Hole 10 at Pasatiempo Golf Club
- Par
- 4
- Yardage
- 441 yds
- Stroke index
- 5
- Hazards
- 8 bunkers
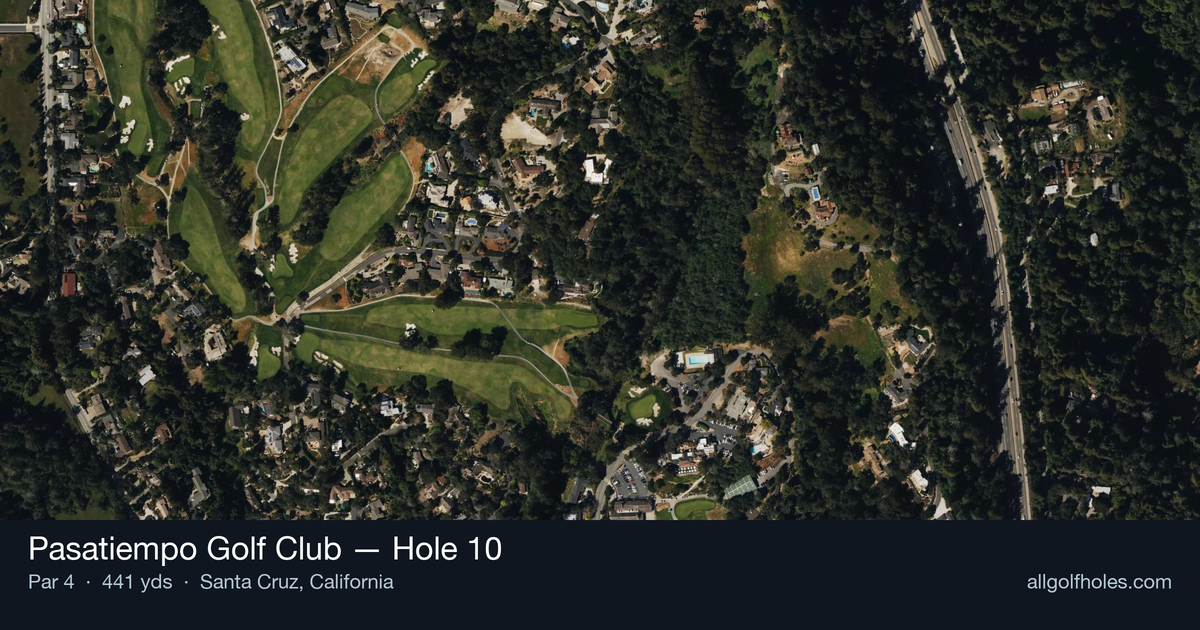
Aerial source not provided
Green size: 26 yds deep × 35 yds wide
Scorecard yardage is for Championship tees. The aerial shows its labeled reference position; distance rings measure to the green.
Championship tees · Par 4 · 441 yards
The plan for No. 10
The 10th hole at Pasatiempo Golf Club exemplifies Dr. Alister MacKenzie's masterful design philosophy, presenting a deceptively challenging 441-yard par 4 that opens the back nine with authority. This straight-away hole plays downhill from an elevated tee, offering breathtaking views of the Santa Cruz mountains while demanding precision over power. The generous fairway invites an aggressive tee shot, but the small, subtly contoured green requires a perfectly struck approach shot to hold the putting surface. MacKenzie's strategic bunkering and natural terrain create multiple options for golfers of every skill level, rewarding thoughtful course management over brute force. The hole's serene beauty masks its true challenge—finding the right combination of distance control and accuracy to conquer one of Pasatiempo's most memorable par 4s.
Off the tee
The elevated tee provides a commanding view and significant distance advantage, making club selection crucial for proper positioning. Most players will benefit from driver to maximize the downhill advantage, though stronger players may consider 3-wood for enhanced accuracy. The target line should favor the center-right portion of the fairway, setting up the best angle for the approach shot. The key risk to avoid is overcooking the tee shot - the downhill slope can add 20-30 yards to your normal carry distance. Focus on a smooth, controlled swing rather than trying to overpower the shot. The straight layout is forgiving for direction, but distance control becomes paramount for optimal approach positioning.
Approach & recovery
With the downhill tee shot potentially leaving a mid-iron to short-iron approach, precision becomes the priority over power. The small green size demands accurate club selection and committed execution. Favor the center of the green regardless of pin position - the compact target leaves little room for error. Pay special attention to wind conditions, as the elevated approach can be significantly affected by coastal breezes common to the Santa Cruz area. Take one extra club if there's any doubt, as being short of this small green often leads to difficult up-and-down situations. The approach shot is where this hole's scoring potential is truly determined.
On the green
The small green at Pasatiempo's 10th rewards aggressive putting while punishing poor lag putting. With limited surface area, most putts will be relatively straight, but speed control becomes critical. MacKenzie's subtle contouring means seemingly flat putts can have surprising breaks. Focus on getting your first putt to the hole - the compact green means you're unlikely to face extremely long comeback putts. When the pin is tucked, aim for the center of the green and let the natural slopes feed the ball toward the hole. Three-putts here are particularly costly given the hole's birdie potential. ## RISK VS REWARD This hole presents a classic risk/reward scenario disguised as a straightforward par 4. The reward comes from the downhill advantage and relatively hazard-free layout, offering legitimate birdie opportunities for well-executed shots. The risk lies in the small green target and the temptation to be overly aggressive. The smart play is controlled aggression - take advantage of the downhill tee shot for positioning, then play conservatively to the center of the green. Players who try to attack tight pin positions often find themselves scrambling for par instead of capitalizing on the scoring opportunity. ## DIFFERENT SKILL LEVELS **High-Handicap Players:** Focus on fairway accuracy over distance off the tee. Consider 3-wood or hybrid if driver accuracy is inconsistent. On the approach, always aim for the center of the green and take an extra club to ensure you reach the putting surface. This hole's birdie potential makes par a very good score. **Low-Handicap Players:** Use the downhill advantage to position your drive in the optimal yardage range for your favorite approach club. Be more aggressive with pin-seeking approaches, but respect the small green size. This is a hole where good players should expect to make birdie regularly, making par feel like a missed opportunity. The 10th at Pasatiempo embodies the strategic brilliance that made MacKenzie famous - apparent simplicity masking nuanced challenges that reward thoughtful golf strategy and precise execution.
Hole 10 Green Complex
Mapped green boundary
Green size: 5,045 sq ft
How did Hole 10 play?
How did this hole play today?
Frequently asked questions
Yardage reference: Championship tees · 441 yards.
What's the best strategy off the tee?
↓
For this 441-yard par 4, most players will hit driver to set up a comfortable approach.
How difficult is hole 10?
↓
This hole is a moderate challenge for most golfers. Key challenges include: heavily bunkered.
What hazards should I watch out for on hole 10?
↓
Key hazards include: 8 greenside bunkers. Plan your shots to avoid these trouble spots.
How big is the green on hole 10?
↓
The green is medium-sized with moderate targets. Pay attention to pin placement when selecting your approach club.
What's a good score on hole 10?
↓
This hole is a demanding hole where bogey is not unusual. This longer par 4 will test most golfers. Focus on position over distance.