Hole 7 at Pasatiempo Golf Club
- Par
- 4
- Yardage
- 348 yds
- Stroke index
- 10
- Hazards
- 4 bunkers
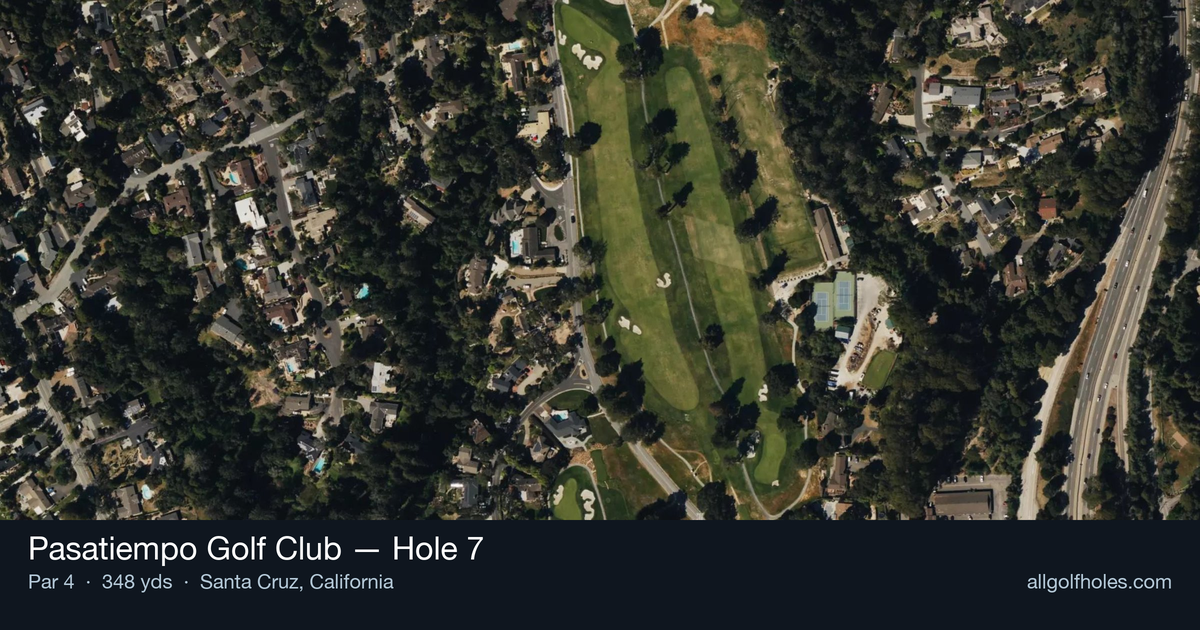
Aerial source not provided
Green size: 37 yds deep × 28 yds wide
Scorecard yardage is for Championship tees. The aerial shows its labeled reference position; distance rings measure to the green.
Championship tees · Par 4 · 348 yards
The plan for No. 7
The seventh hole at Pasatiempo Golf Club exemplifies Dr. Alister MacKenzie's strategic brilliance in a deceptively simple package. This straight par 4 stretches 348 yards through MacKenzie's masterfully restored design, offering golfers a seemingly straightforward test that reveals its complexities upon closer inspection. The hole's clean lines and uncluttered appearance belie the precision required for optimal positioning, as the small green demands an accurate approach shot from the ideal angle. Without significant hazards to distract, players must focus on course management and shot execution, making club selection crucial off the tee. The compact green complex rewards those who resist the temptation to overpower this shorter par 4, instead favoring strategic thinking over brute force—a hallmark of MacKenzie's enduring architectural philosophy at this historic Santa Cruz gem.
Off the tee
The downhill nature of this hole means your tee shot will carry further than the yardage suggests. Driver isn't always the optimal choice here - a well-struck 3-wood or hybrid can provide ideal positioning while maintaining control. Focus your target line down the center of the fairway, as the straight layout rewards accuracy over distance. The key is leaving yourself a comfortable approach distance rather than getting too close to the green, which could result in an awkward short iron or wedge shot into the small target.
Approach & recovery
The small green size makes this approach shot all about precision rather than power. Depending on your tee shot placement, you'll likely face a short to mid-iron approach. Study the pin position carefully - with limited green real estate, being on the correct tier or section is crucial. Favor the center of the green when in doubt, as short-siding yourself on either side can lead to difficult recovery shots. The green's compact nature means even a well-struck shot that's slightly off-line can find trouble.
On the green
MacKenzie's greens are renowned for their subtle breaks and strategic contours. Despite its small size, expect the 7th green to feature nuanced slopes that can catch the unwary. Take extra time reading putts, as the compact surface means every foot matters. Lag putting becomes especially important here - with less margin for error, getting your first putt close is preferable to being aggressive and potentially three-putting. ## RISK VS REWARD The primary risk/reward decision comes with tee shot club selection. The aggressive play is driver, potentially leaving a wedge or short iron, but risking running through the fairway or creating an awkward distance. The conservative approach uses a fairway wood or long iron, accepting a longer approach shot in exchange for better positioning and distance control. Given the small green, the conservative strategy often proves more effective for consistent scoring. ## DIFFERENT SKILL LEVELS **High-Handicap Players:** Focus on finding the fairway with a comfortable club - likely a 3-wood or hybrid. Accept a longer approach shot and aim for the center of the green regardless of pin position. Two-putt par should be the goal, with any birdie opportunities being a bonus. **Low-Handicap Players:** Can be more aggressive with driver if conditions favor it, but should still prioritize position over distance. These players can attack specific pin positions and use the green's contours to their advantage. The key is avoiding the temptation to be overly aggressive on what appears to be a "scoring hole." The 7th at Pasatiempo perfectly exemplifies how MacKenzie could create strategic interest even on shorter holes. Success here comes from respecting the design's subtleties rather than simply trying to overpower the yardage.
Hole 7 Green Complex
Mapped green boundary
Green size: 3,915 sq ft
How did Hole 7 play?
How did this hole play today?
Frequently asked questions
Yardage reference: Championship tees · 348 yards.
What's the best strategy off the tee?
↓
For this 348-yard par 4, most players will hit 3-wood or driver to set up a comfortable approach.
How difficult is hole 7?
↓
This hole is a moderate challenge for most golfers. Key challenges include: heavily bunkered, small green.
How big is the green on hole 7?
↓
The green is small and requires precision. The green is deeper than wide, so club selection is crucial. Expect challenging pin positions with limited room for error.
What's a good score on hole 7?
↓
This hole is a birdie opportunity if you find the fairway. This shorter par 4 rewards accuracy off the tee with a short iron approach.