Hole 18 at Pasatiempo Golf Club
- Par
- 3
- Yardage
- 169 yds
- Stroke index
- 11
- Hazards
- 4 bunkers
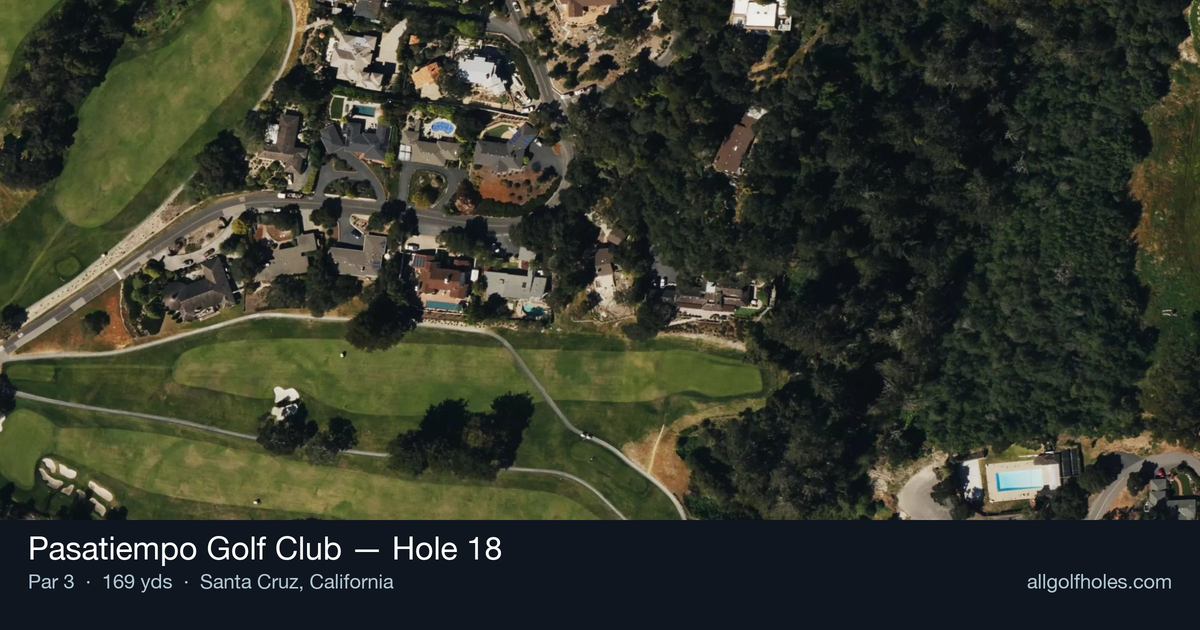
Aerial source not provided
Green size: 24 yds deep × 35 yds wide
Scorecard yardage is for Championship tees. The aerial shows its labeled reference position; distance rings measure to the green.
Championship tees · Par 3 · 169 yards
The plan for No. 18
Alister MacKenzie's masterpiece at Pasatiempo Golf Club concludes with one of golf's most dramatic finishing holes. This signature par 3 stretches 169 yards over a yawning barranca that fronts the green, creating the course's most intimidating tee shot. Recently restored by Tom Doak's Renaissance team, the hole showcases MacKenzie's genius with expansive bunkers spilling into the forested ravine below. The elevated tee provides a commanding view of the target, but the carry over the natural chasm demands precision and nerve. Few courses finish with a one-shotter, but Pasatiempo Golf Club hole 18 proves MacKenzie's brilliance in saving the best for last, delivering a memorable conclusion that tests both skill and courage.
Off the tee
Club selection is paramount on this hole, typically requiring a mid-iron to long-iron depending on pin position and wind conditions. The target line should favor the center-back portion of the green, as the barranca fronting the putting surface punishes any shot that comes up short. Take one extra club and focus on a smooth, controlled swing rather than forcing a shot. The elevated tee provides excellent visibility of the hazards, so use this vantage point to carefully assess wind direction and pin placement before committing to your club choice.
Approach & recovery
Since this is a par 3, your tee shot IS your approach shot, making precision absolutely critical. The key is carrying the ball safely over the barranca while avoiding the collection of bunkers that Tom Doak's restoration team has strategically positioned around the green. Aim for the fat part of the green rather than attacking tight pin positions, especially when the flag is tucked near the bunkers. A shot to the center of the green will always leave you with a reasonable putt for birdie.
On the green
The small green at the 18th demands respect, with subtle breaks that can catch players off guard. Given MacKenzie's design philosophy, expect the putting surface to have strategic undulations that reward proper approach angles. Focus on lag putting to ensure you don't leave yourself with a challenging comeback putt. Pin positions near the edges of this compact green create particularly treacherous putting scenarios, so conservative play often yields better results. ## RISK VS REWARD The risk/reward calculation here is stark: attack the pin and risk finding the barranca or bunkers, or play safely to the center and accept a longer putt. Given that this is the finishing hole, your strategy should align with your overall round situation. If you need birdie to achieve your target score, the reward may justify the aggressive play. However, the severe penalty for missing the green makes conservative course management the percentage play for most golfers. ## DIFFERENT SKILL LEVELS **High-handicap players** should focus entirely on finding the green, taking an extra club and aiming for the largest portion of the putting surface. Avoid the temptation to attack pins, as the penalty for missing this green is severe. A bogey here is infinitely better than the big number that awaits in the barranca. **Low-handicap players** can be more aggressive with pin positions, but should still respect the hole's defenses. Consider the wind conditions carefully and don't be afraid to take the safe line when the pin is in a dangerous position. Even scratch players should prioritize finding the green over attacking every pin on this unforgiving finishing hole. This signature hole exemplifies why Pasatiempo is considered one of MacKenzie's finest works, demanding both strategic thinking and precise execution to close out your round successfully.
Hole 18 Green Complex
Mapped green boundary
Green size: 4,296 sq ft
How did Hole 18 play?
How did this hole play today?
Frequently asked questions
Yardage reference: Championship tees · 169 yards.
What club should I use on this par 3?
↓
At 169 yards, most golfers will need a mid-iron (7-iron to 8-iron) to reach this green. Adjust for elevation, wind, and pin position.
How difficult is hole 18?
↓
This hole is a moderate challenge for most golfers. Key challenges include: heavily bunkered, small green.
What hazards should I watch out for on hole 18?
↓
Key hazards include: 4 greenside bunkers. Plan your shots to avoid these trouble spots.
How big is the green on hole 18?
↓
The green is small and requires precision. Expect challenging pin positions with limited room for error.
What's a good score on hole 18?
↓
This hole is a solid par with birdie chances for precise approach shots. Making par is a good result here. Focus on hitting the green and avoiding three-putts.