Hole 9 at Pasatiempo Golf Club
- Par
- 5
- Yardage
- 500 yds
- Stroke index
- 18
- Hazards
- 6 bunkers
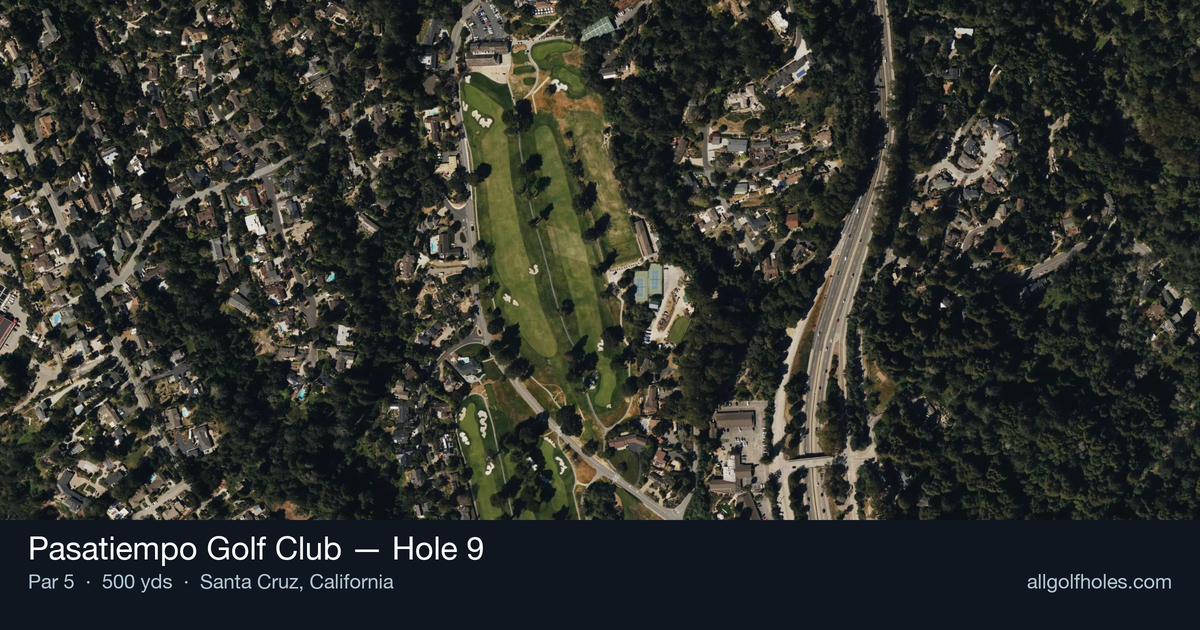
Aerial source not provided
Green size: 41 yds deep × 26 yds wide
Scorecard yardage is for Championship tees. The aerial shows its labeled reference position; distance rings measure to the green.
Championship tees · Par 5 · 500 yards
The plan for No. 9
The ninth hole at Pasatiempo Golf Club serves as a deceptively challenging finale to Dr. Alister MacKenzie's front nine masterpiece. This 500-yard par 5 appears straightforward from the elevated tee, offering golfers a seemingly generous downhill opportunity to attack the pin. However, the hole's true character emerges through its subtle strategic demands and the architect's brilliant use of terrain. The straight layout allows aggressive players to consider going for the green in two, but the small target requires precise distance control on the approach shot. Tree-lined fairways frame the hole beautifully while demanding accuracy throughout. As the easiest handicap hole, it provides a birdie opportunity for those who execute properly, yet punishes wayward shots with its unforgiving borders. This elegant design perfectly captures MacKenzie's philosophy of rewarding bold, well-executed golf while maintaining the scenic beauty that defines Pasatiempo's front nine experience.
Off the tee
Your tee shot strategy should focus on finding the optimal position for your second shot rather than maximum distance. Driver or 3-wood both work well here, depending on your comfort level and the day's conditions. The straight fairway allows you to aim down the center, but consider the wind direction and pin position when selecting your target line. Since this is a reachable par 5 for longer hitters, positioning becomes crucial - you want to avoid awkward yardages that leave you between clubs for your approach.
Approach & recovery
The small green is the defining feature of your approach strategy. Whether you're going for the green in two or laying up for a wedge, precision trumps distance. For those attempting to reach in two, favor the center of the green regardless of pin position - the compact target leaves little margin for error. If laying up, position your second shot to leave a comfortable wedge distance, ideally avoiding those tricky 60-80 yard shots that can be difficult to control. The lack of hazards means you can be aggressive with your target line, but respect that small green.
On the green
With a small putting surface, every approach shot that finds the green should be considered a success. Focus on lag putting to avoid three-putts, as the compact nature means you're likely to have reasonable birdie opportunities from most positions. Pay attention to the grain and any subtle breaks - MacKenzie's greens are known for their subtlety. Pin positions on small greens can create significant differences in difficulty, so adjust your approach strategy accordingly. ## RISK VS REWARD This hole offers a classic risk/reward scenario for players capable of reaching in two. The upside is a potential eagle or easy birdie, while the downside is minimal given the lack of major hazards. However, the small green means that aggressive approaches require exceptional accuracy. The conservative play - driver, layup, wedge - often produces the same scoring result with less risk. ## DIFFERENT SKILL LEVELS **Higher Handicap Players**: Treat this as a three-shot hole and focus on finding the fairway with your tee shot. Your second shot should position you for a comfortable third shot distance - don't try to get too close if it means risking an awkward yardage. The small green rewards accuracy over distance, so take one more club on your approach and swing smoothly. **Lower Handicap Players**: This hole rewards aggressive course management. If conditions favor going for the green in two, commit fully to the shot - the small target demands confidence. If laying up, be precise with your positioning to create the ideal wedge distance. Consider pin position heavily in your decision-making, as the compact green makes certain flag locations much more accessible than others. The 9th at Pasatiempo exemplifies Dr. MacKenzie's philosophy that strategic options create the most interesting golf. While the hole appears straightforward, the small green ensures that only well-executed shots are rewarded with scoring opportunities.
Hole 9 Green Complex
Mapped green boundary
Green size: 4,690 sq ft
How did Hole 9 play?
How did this hole play today?
Frequently asked questions
Yardage reference: Championship tees · 500 yards.
Can this par 5 be reached in two?
↓
At 500 yards, Reachable in two for longer hitters. Consider laying up short of hazards if going for it is risky.
How difficult is hole 9?
↓
This hole is a good scoring opportunity for most golfers. Key challenges include: heavily bunkered.
How big is the green on hole 9?
↓
The green is medium-sized with moderate targets. Pay attention to pin placement when selecting your approach club.
What's a good score on hole 9?
↓
This hole is a solid birdie opportunity with smart layup strategy. Most golfers can reach in three. Position your layup to leave a comfortable wedge.