Hole 8 at Pasatiempo Golf Club
- Par
- 3
- Yardage
- 176 yds
- Stroke index
- 12
- Hazards
- 4 bunkers
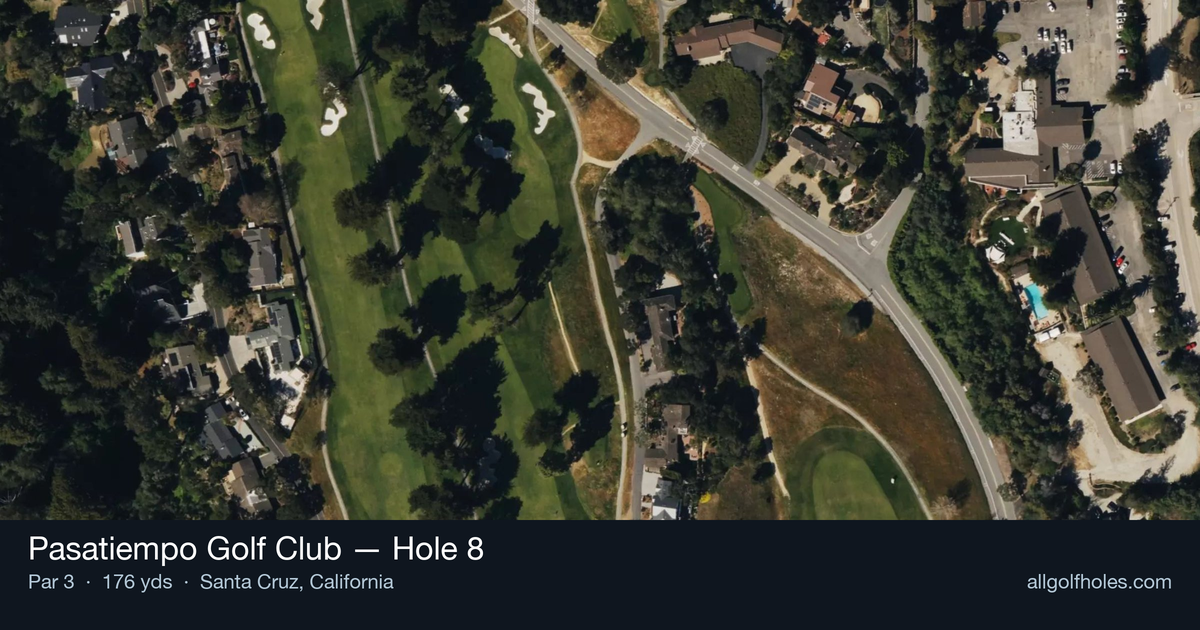
Aerial source not provided
Green size: 45 yds deep × 23 yds wide
Scorecard yardage is for Championship tees. The aerial shows its labeled reference position; distance rings measure to the green.
Championship tees · Par 3 · 176 yards
The plan for No. 8
The eighth hole at Pasatiempo Golf Club showcases Dr. Alister MacKenzie's architectural brilliance in a deceptively challenging par 3 that plays 176 yards to a small, elevated green. This straight shot demands precision over power, as the compact target leaves little margin for error despite the absence of traditional hazards. The hole's beauty lies in its simplicity – a pure test of iron play that requires golfers to commit fully to their club selection and swing. Out of bounds lurks beyond the green complex, adding psychological pressure to what appears straightforward from the tee. MacKenzie's restored design creates a memorable moment where course management and mental fortitude prove as important as technical execution, embodying the strategic principles that make Pasatiempo legendary.
Off the tee
Club selection is paramount on this mid-length par 3. Most players will be looking at anything from a 7-iron to a 4-iron depending on conditions, pin position, and personal carry distances. The key is committing fully to your club choice and swinging with confidence. Aim for the center of the green unless you're certain of the pin position and have the precision to attack it directly. With a small green as your target, there's little margin for error, so favor the fat part of the putting surface over risky pin hunting.
Approach & recovery
Since this is a par 3, your tee shot IS your approach shot. The small green demands that you land the ball softly and with proper trajectory. Take one extra club if you're between selections - it's better to have a controlled, smooth swing that finds the green than to force a shot and miss the target entirely. Pay attention to wind conditions, as they can significantly affect club selection on this length of shot.
On the green
MacKenzie's greens are renowned for their subtle undulations and strategic pin positions. Even though specific green contours aren't detailed, expect typical MacKenzie characteristics: gentle slopes that can create tricky putts if you're on the wrong tier. Focus on getting your approach shot below the hole when possible, as uphill putts are generally easier to control. The small green size means most putts will be relatively short, so concentrate on pace control and reading the grain. ## RISK VS REWARD The risk/reward calculation here is primarily about pin position. When the flag is tucked in a corner or near an edge, the conservative play to the center of the green becomes even more important. The reward for aggressive pin-seeking is a potential birdie, but the risk of missing the small target entirely could lead to difficult recovery shots and bogey or worse. ## DIFFERENT SKILL LEVELS **High-handicap players** should focus entirely on finding the green. Club up if in doubt, aim for the center regardless of pin position, and make a smooth, confident swing. A two-putt par is an excellent result on any MacKenzie par 3. **Low-handicap players** can be more aggressive with pin position, especially when the flag is in the center or front of the green. These players should also factor in spin rates and trajectory to optimize their approach, potentially taking advantage of firm conditions to bounce the ball to back pins or using higher trajectory shots to attack front flags. The beauty of this hole lies in its honest challenge - there are no tricks or hidden dangers, just the fundamental test of hitting your target under pressure. Success comes from proper preparation, smart club selection, and confident execution.
Hole 8 Green Complex
Mapped green boundary
Green size: 5,337 sq ft
How did Hole 8 play?
How did this hole play today?
Frequently asked questions
Yardage reference: Championship tees · 176 yards.
What club should I use on this par 3?
↓
At 176 yards, most golfers will need a mid-iron (7-iron to 8-iron) to reach this green. Adjust for elevation, wind, and pin position.
How difficult is hole 8?
↓
This hole is a moderate challenge for most golfers. Key challenges include: heavily bunkered.
What hazards should I watch out for on hole 8?
↓
Key hazards include: 4 greenside bunkers. Plan your shots to avoid these trouble spots.
How big is the green on hole 8?
↓
The green is medium-sized with moderate targets. The green is deeper than wide, so club selection is crucial. Pay attention to pin placement when selecting your approach club.
What's a good score on hole 8?
↓
This hole is a solid par with birdie chances for precise approach shots. Making par is a good result here. Focus on hitting the green and avoiding three-putts.