Hole 1 at Pasatiempo Golf Club
- Par
- 4
- Yardage
- 457 yds
- Stroke index
- 4
- Hazards
- 4 bunkers
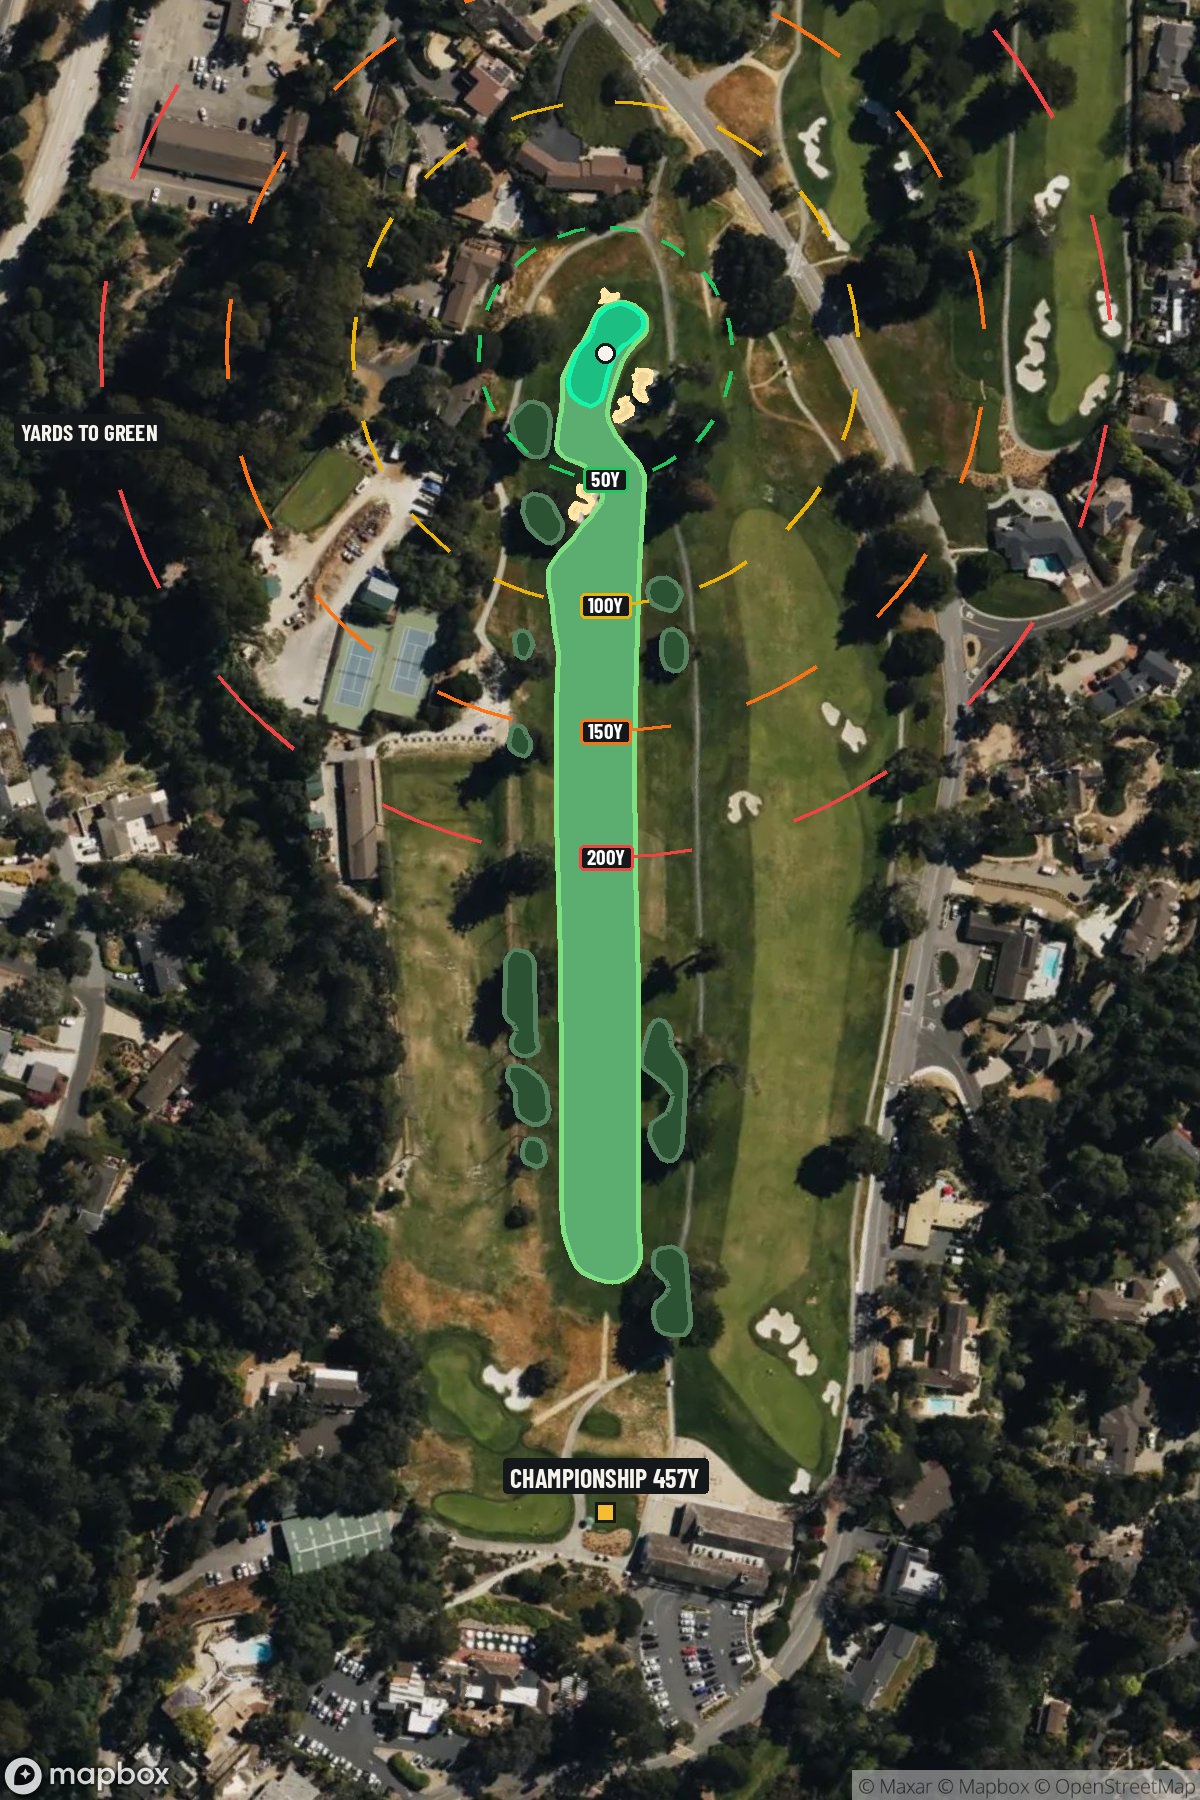 Hole 1 map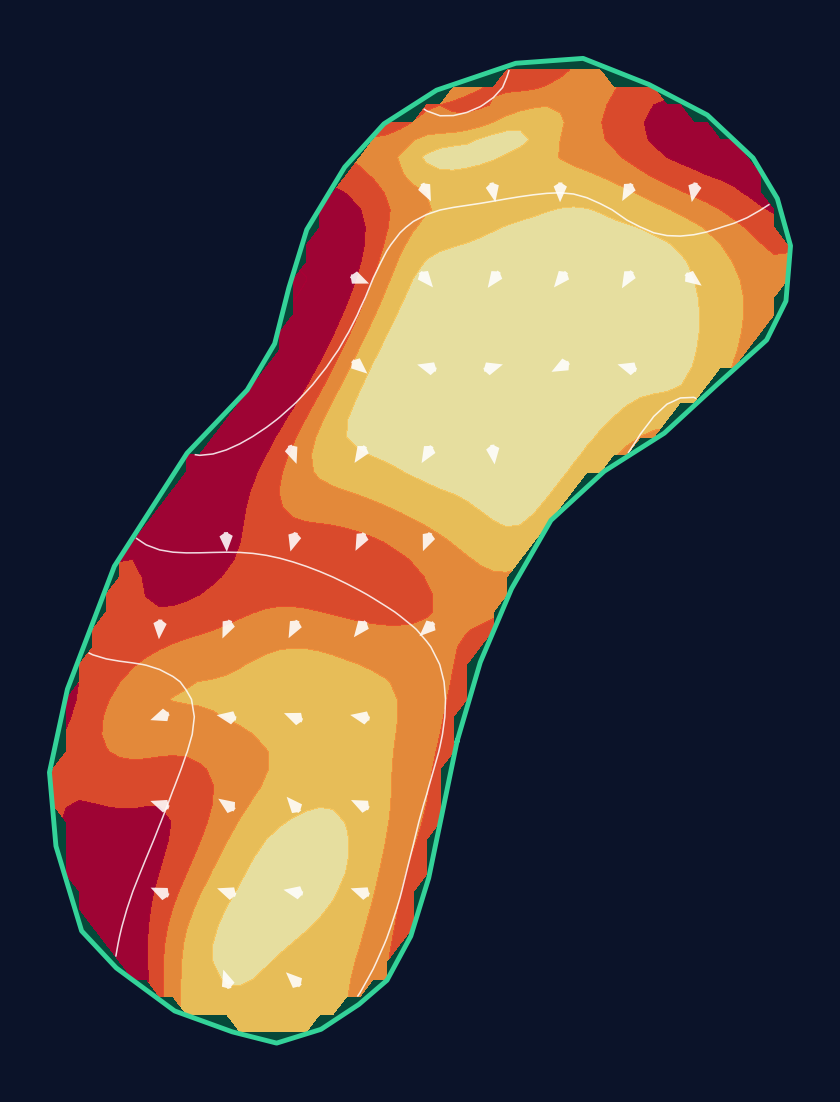
32 yd wide × 42 yd deep · 3.9 ft total elevation range
Light = gentler slope · Red = steeper slope
White lines: 1 foot of elevation. Arrows: downhill. General terrain, not a pin read.
Approach from bottom
Contour source
USGS 1 Meter 10 x58y410 CA_AZ_FEMA_R9_Lidar_2017_D18 · collection 2018–2019
Map source & reference
Mapbox Satellite composite · capture date not provided. Green at the top; the labeled map reference is below.
Scorecard yardage is for Championship tees. The aerial shows its labeled reference position; distance rings measure to the green.
Championship tees · Par 4 · 457 yards
The plan for No. 1
Pasatiempo Golf Club's opening hole immediately announces Alister MacKenzie's architectural genius with a deceptively challenging par 4 that sets the tone for one of California's most revered layouts. This 457-yard opener appears straightforward from the tee, but the downhill approach shot reveals the hole's true character. Towering trees guard the right side, forcing players to navigate carefully toward a small green perched above a dramatic canyon. The elevated green complex, requiring a long iron approach of over 180 yards, punishes short shots that spin back toward the abyss. Wind conditions, often undetectable at ground level, add another layer of complexity to this memorable opening statement at MacKenzie's masterpiece.
Off the tee
The tee shot requires careful attention to wind conditions and club selection. Watch the tree tops for wind direction guidance, as headlong breezes at elevation may not be detectable from the tee box. The downhill nature of the hole can add significant distance, so consider taking one extra club length depending on conditions. Your target line should favor the left side of the fairway, as towering trees on the right side will negate any shots that drift in that direction. The key is positioning yourself for the optimal approach angle while avoiding the trouble that MacKenzie strategically placed to challenge overly aggressive drives.
Approach & recovery
The approach shot is where this hole reveals its true difficulty. Expect a mid-iron to long-iron shot of approximately 185+ yards to reach the small, elevated green. This is a demanding iron shot to start your round, requiring both distance control and accuracy. The green is protected by a deep canyon on the left side, creating a severe penalty for shots that come up short or left of the target. Balls that land short of the hole tend to spin back toward this canyon hazard, making distance control crucial. Favor the right side of the green on your approach, as this provides the safest angle and best chance for recovery if you miss the target.
On the green
The small green size demands precision on your approach shot, as there's little room for error once you're putting. The green's elevated position and surrounding slopes create subtle breaks that can be difficult to read. Pay attention to the overall slope of the terrain, as putts will generally break away from the canyon side. Focus on lag putting to the correct level of the green, as the combination of elevation changes and small target area makes three-putting a real possibility if you're overly aggressive with your first putt. ## RISK VS REWARD This hole offers limited risk/reward opportunities, instead demanding solid course management and execution. The primary risk comes from being overly aggressive with either the drive (challenging the trees on the right) or the approach (attacking pins near the canyon). The reward for conservative, well-executed shots is a realistic birdie opportunity and confidence-building start to your round. The biggest risk/reward decision comes on the approach shot: attacking a pin position near the canyon edge versus playing to the safe side of the green. Given the severe penalty for missing left or short, the smart play is typically to aim for the center-right portion of the green. ## DIFFERENT SKILL LEVELS **High Handicappers:** Focus on finding the fairway with your tee shot, favoring the left side to avoid the trees. On the approach, aim for the center-right of the green regardless of pin position. Accept bogey as a reasonable score if you struggle with the long iron approach, and avoid the temptation to be overly aggressive. **Low Handicappers:** Use the downhill slope and wind conditions to your advantage off the tee, but maintain discipline in club selection. The approach shot is your scoring opportunity - commit to your yardage and trust your iron play. Consider pin position carefully, but remember that the penalty for missing left or short is severe enough to warrant conservative target selection even for skilled players. The opening hole at Pasatiempo serves as an excellent introduction to MacKenzie's strategic design philosophy, where natural features create both beauty and challenge in equal measure.
Hole 1 Green Complex & Slope
USGS 3DEP terrain analysis
Green size: 5,286 sq ft
How did Hole 1 play?
How did this hole play today?
Frequently asked questions
Yardage reference: Championship tees · 457 yards.
What's the best strategy off the tee?
↓
For this 457-yard par 4, most players will hit driver to set up a comfortable approach.
How difficult is hole 1?
↓
This hole is a moderate challenge for most golfers. Key challenges include: long par 4, heavily bunkered.
How big is the green on hole 1?
↓
The green is medium-sized with moderate targets. The green is deeper than wide, so club selection is crucial. Pay attention to pin placement when selecting your approach club.
What's a good score on hole 1?
↓
This hole is one of the tougher holes where par feels like birdie. A challenging par 4. Accept that bogey happens and avoid big numbers.