Hole 15 at Pasatiempo Golf Club
- Par
- 3
- Yardage
- 141 yds
- Hazards
- 5 bunkers
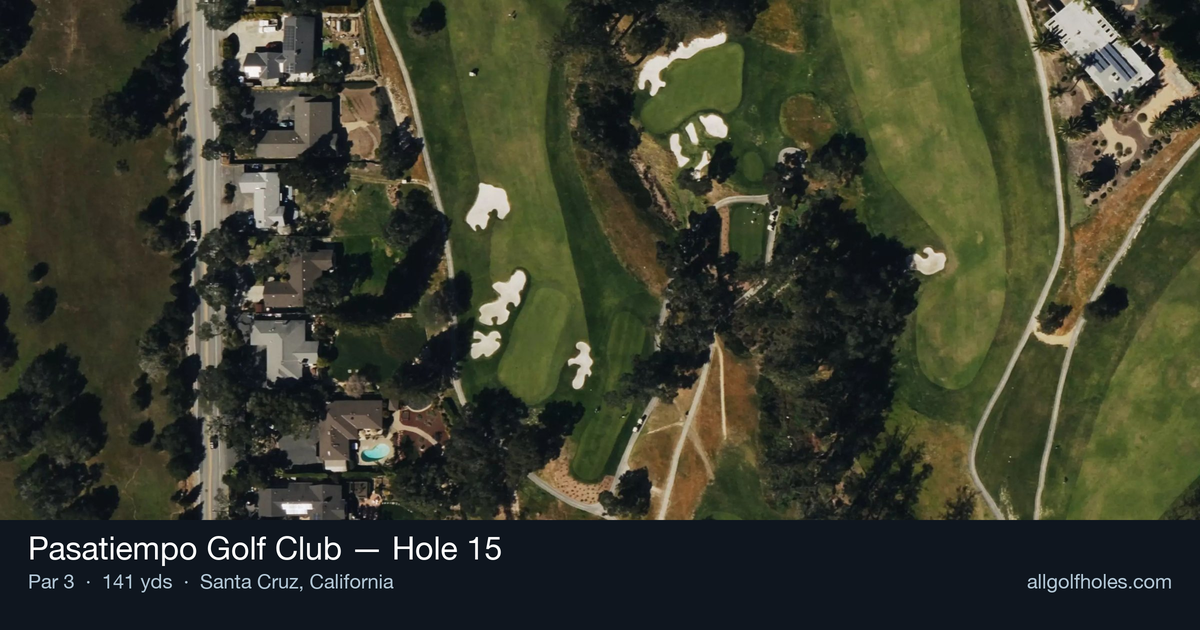
Aerial source not provided
Green size: 39 yds deep × 34 yds wide
Scorecard yardage is for Championship tees. The aerial shows its labeled reference position; distance rings measure to the green.
Championship tees · Par 3 · 141 yards
The plan for No. 15
The 15th hole at Pasatiempo Golf Club showcases Dr. Alister MacKenzie's genius for deceptively challenging par 3 design. At 141 yards, this seemingly straightforward tee shot demands precision over a compact green complex that punishes wayward approaches. MacKenzie's restored original design creates subtle undulations and slopes that make distance control critical, while the small green offers little margin for error. The hole's strategic brilliance lies in its simplicity - no bunkers or water hazards distract from the pure test of accurate iron play. What appears routine from the tee becomes a demanding examination of short-game skills, embodying the understated elegance that defines this historic Santa Cruz masterpiece.
Off the tee
Club selection is absolutely critical on this short iron. Most players will be choosing between an 8-iron and pitching wedge, but the key is accounting for Pasatiempo's significant elevation changes and coastal wind conditions. Take extra club if there's any doubt - short-siding yourself on a small green is far more costly than being pin-high or slightly long. Focus on smooth tempo and solid contact rather than trying to attack every pin position. The target line should generally favor the center of the green, allowing the natural contours to feed the ball toward most pin positions. Avoid the temptation to get too aggressive with difficult pin placements.
Approach & recovery
Since this is a one-shot hole, your tee shot IS your approach. The small green demands precision, so commit fully to your club selection and swing with confidence. MacKenzie's greens are known for their subtle slopes and strategic bunkering, so study the pin position carefully during your pre-shot routine. Pay attention to the grain of the coastal Bermuda or bentgrass, as this can significantly affect how your ball reacts upon landing. A controlled, descending blow will give you the best chance of holding this small target, especially when the pin is tucked in challenging positions.
On the green
MacKenzie's greens are renowned for their subtle breaks and false fronts. Even on this small putting surface, expect nuanced undulations that can fool the eye. Most putts will have some element of coastal influence, so read carefully from multiple angles before committing to your line. The key to putting success here is speed control - with a small green, distance control becomes even more critical as you have less margin for error. Focus on getting your first putt close rather than being overly aggressive, as three-putts can quickly turn a birdie opportunity into bogey. ## RISK VS REWARD The primary risk/reward decision involves pin hunting versus playing to the center of the green. When the pin is tucked behind trouble or on a severe slope, the smart play is targeting the fat part of the green and taking your two-putt par. However, with such a short iron in hand, aggressive players may choose to attack certain pin positions for birdie opportunities. The reward for precise execution is significant - this represents one of the best birdie chances on the course. The risk of missing this small target, however, can lead to difficult up-and-downs and potential bogeys. ## DIFFERENT SKILL LEVELS **High Handicappers:** Focus entirely on finding the green rather than attacking pins. Take one extra club to ensure you clear any front trouble, and aim for the center of the green regardless of pin position. A stress-free par here is an excellent score and keeps momentum positive. **Low Handicappers:** This hole demands birdie consideration given the short yardage. Study pin positions carefully and be prepared to attack when the risk/reward ratio favors aggression. However, respect MacKenzie's design - even skilled players should avoid the most challenging pin positions unless absolutely necessary for competitive reasons. **Course Management Tip:** Use this hole as a confidence builder early in your round or as a crucial scoring opportunity late. The straightforward nature of the shot allows you to focus on fundamentals and build rhythm for the challenging holes that follow in MacKenzie's masterful routing.
Hole 15 Green Complex
Mapped green boundary
Green size: 5,423 sq ft
How did Hole 15 play?
How did this hole play today?
Frequently asked questions
Yardage reference: Championship tees · 141 yards.
What club should I use on this par 3?
↓
At 141 yards, most golfers will need a short iron (9-iron to PW) to reach this green. Adjust for elevation, wind, and pin position.
How difficult is hole 15?
↓
This hole is a good scoring opportunity for most golfers. Key challenges include: heavily bunkered.
What hazards should I watch out for on hole 15?
↓
Key hazards include: 5 greenside bunkers. Plan your shots to avoid these trouble spots.
How big is the green on hole 15?
↓
The green is medium-sized with moderate targets. Pay attention to pin placement when selecting your approach club.
What's a good score on hole 15?
↓
This hole is a legitimate birdie opportunity for accurate iron players. Most golfers should target par, with birdie chances if you hit the green in regulation.