Hole 12 at Pasatiempo Golf Club
- Par
- 4
- Yardage
- 373 yds
- Stroke index
- 13
- Hazards
- 3 bunkers
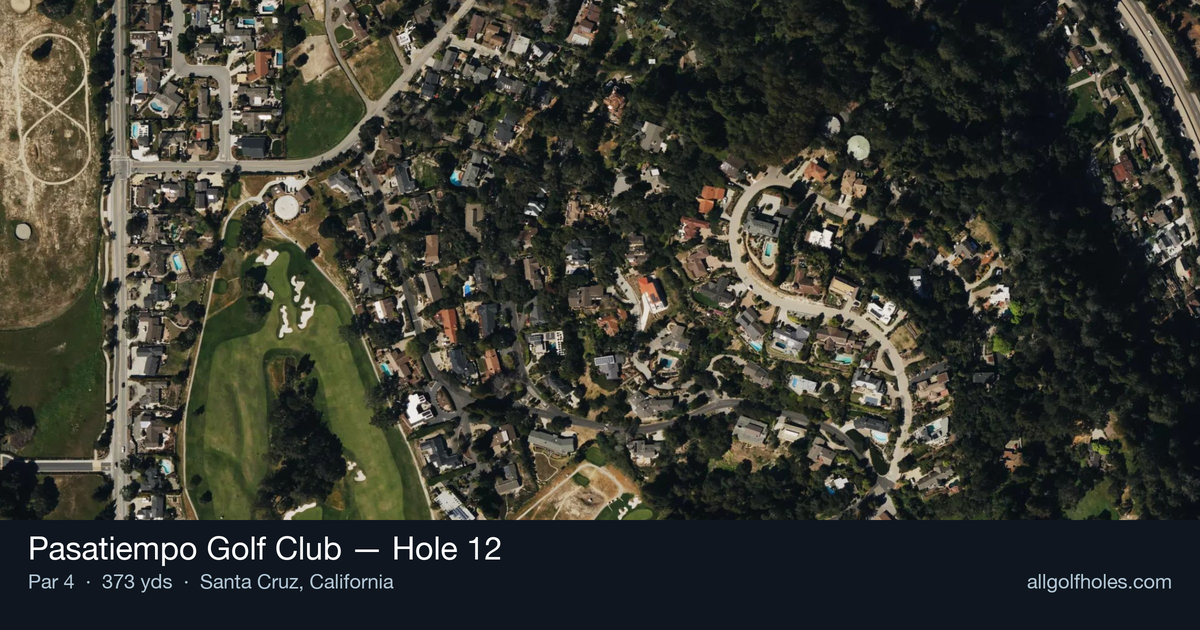
Aerial source not provided
Green size: 33 yds deep × 32 yds wide
Scorecard yardage is for Championship tees. The aerial shows its labeled reference position; distance rings measure to the green.
Championship tees · Par 4 · 373 yards
The plan for No. 12
Pasatiempo Golf Club hole 12 exemplifies Dr. Alister MacKenzie's strategic brilliance in a deceptively straightforward par 4. This 373-yard hole demands precision over power, as the tee shot placement dictates everything that follows. The key lies in finding the right center of the fairway, which establishes the crucial angle needed to attack the small, well-protected green complex. What appears as a manageable approach shot quickly reveals its teeth when golfers drift left off the tee, leaving an awkward angle into the putting surface. The hole's understated elegance masks its strategic complexity, where course management trumps distance. MacKenzie's genius shines through this seemingly simple design that rewards thoughtful play while punishing the overly aggressive, making it a perfect example of championship golf architecture at its finest.
Off the tee
The tee shot strategy is absolutely crucial and well-documented by those who've mastered this hole: **aim for the right center of the fairway**. This target line is not negotiable if you want to score well. From this position, you'll have the optimal angle into the small green complex. Club selection should prioritize accuracy over distance. Many players will benefit from a 3-wood or hybrid off the tee, especially if driver accuracy is inconsistent. The landing zone in the right center provides the best approach angle, while shots that drift left of center create increasingly difficult angles into the green. Avoid the temptation to aim left, as this severely compromises your approach shot options.
Approach & recovery
With the proper tee shot placement in the right center, your approach becomes much more manageable to the small green. From this angle, you'll typically be hitting a short to mid-iron into the green, depending on your tee shot distance and pin position. The small green size demands precision, so club selection should err on the side of taking enough club to reach the back edge. Missing short on a small green often leaves the most difficult recovery shots. Pay attention to pin position - front pins may allow for more aggressive play, while back pins require careful distance control to avoid going long into trouble.
On the green
The small green at Pasatiempo's 12th requires committed putting strokes. With limited surface area, most putts will have manageable distance, but the slopes and breaks typical of MacKenzie designs demand careful reading. Focus on speed control, as short putts can easily run well past the hole on a small surface. Pin positions dramatically affect putting strategy. When the pin is tucked in corners or on slopes, lag putting becomes essential to avoid three-putts that can quickly derail a good round. ## RISK VS REWARD The primary risk/reward decision comes with tee shot positioning. Aggressive drivers who can consistently find the right center of the fairway will have shorter approach shots and better scoring opportunities. However, the penalty for missing the optimal position is severe enough that conservative players should strongly consider hitting less than driver. There's also a subtle risk/reward element in approach shot aggression. With a small target, going directly at pins can lead to excellent birdie chances, but also increases the risk of missing the green entirely. ## DIFFERENT SKILL LEVELS **Higher Handicap Players:** Focus entirely on finding the right center of the fairway with your most reliable club - often a 3-wood or hybrid. Accept longer approach shots in exchange for the proper angle. Aim for the center of the small green regardless of pin position, and prioritize two-putting for par. **Lower Handicap Players:** Can be more aggressive with driver if accuracy permits, but must still respect the critical importance of right-center positioning. These players can attack pins more aggressively and should use their short iron accuracy to create birdie opportunities from the optimal approach angle. **Course Management Tip:** This hole perfectly exemplifies MacKenzie's philosophy that strategic positioning trumps raw distance. Players of all levels who commit to the right-center tee shot target will consistently outperform longer hitters who ignore this fundamental strategic requirement. The 13th handicap ranking might suggest this is an easier hole, but don't be fooled - respect the strategic demands, execute the proper tee shot, and you'll find scoring opportunities. Ignore the angle requirements, and even short approaches become surprisingly difficult on this expertly designed MacKenzie gem.
Hole 12 Green Complex
Mapped green boundary
Green size: 4,535 sq ft
How did Hole 12 play?
How did this hole play today?
Frequently asked questions
Yardage reference: Championship tees · 373 yards.
What's the best strategy off the tee?
↓
For this 373-yard par 4, most players will hit 3-wood or driver to set up a comfortable approach.
How difficult is hole 12?
↓
This hole is a good scoring opportunity for most golfers.
What hazards should I watch out for on hole 12?
↓
Key hazards include: 3 greenside bunkers. Plan your shots to avoid these trouble spots.
How big is the green on hole 12?
↓
The green is medium-sized with moderate targets. Pay attention to pin placement when selecting your approach club.
What's a good score on hole 12?
↓
This hole is a medium-length test where par is a solid result. A straightforward par 4 where course management pays off.