Hole 4 at Pasatiempo Golf Club
- Par
- 4
- Yardage
- 378 yds
- Stroke index
- 14
- Hazards
- 8 bunkers
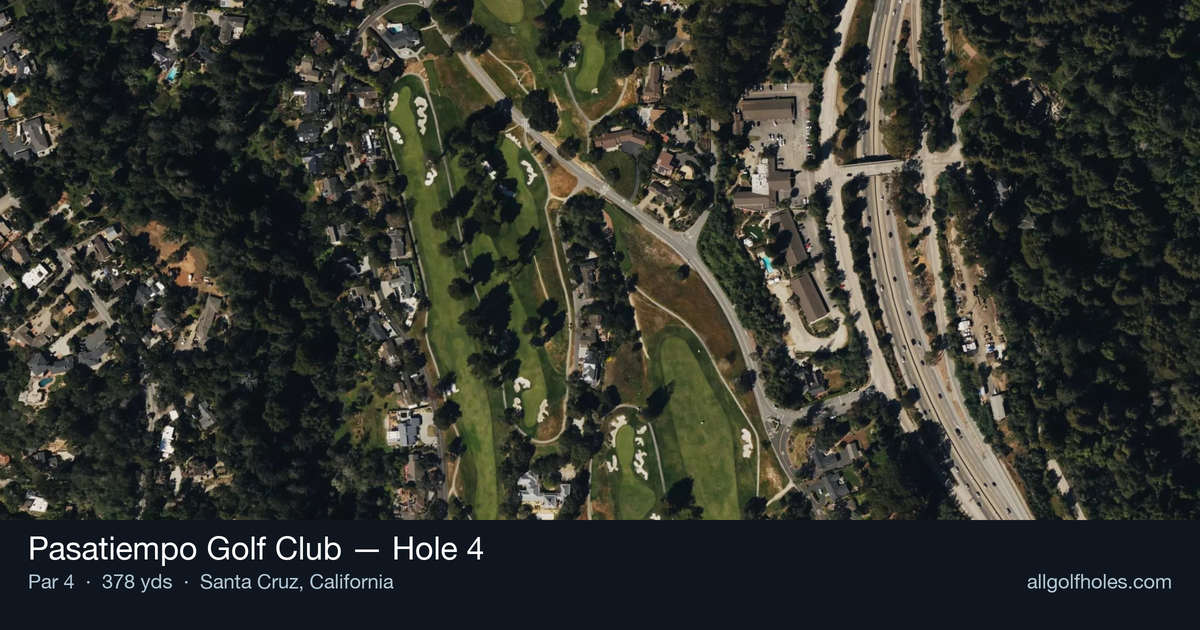
Aerial source not provided
Green size: 46 yds deep × 21 yds wide
Scorecard yardage is for Championship tees. The aerial shows its labeled reference position; distance rings measure to the green.
Championship tees · Par 4 · 378 yards
The plan for No. 4
Pasatiempo Golf Club hole 4 exemplifies Alister MacKenzie's chess-like par 4 philosophy, presenting a deceptively strategic 378-yard challenge that demands precision over power. This straight par 4 features a generous fairway that welcomes an accurate tee shot, but the real test lies in the approach to the small, elevated green complex. MacKenzie's signature design principles shine through as golfers must carefully judge distance and trajectory to a putting surface that punishes overly aggressive play. The green's subtle contours and lightning-fast speeds require thoughtful club selection and precise execution. While appearing straightforward from the tee, this hole rewards tactical thinking and punishes careless approach shots, embodying the strategic brilliance that MacKenzie later refined at Augusta National.
Off the tee
The tee shot strategy revolves around finding the ideal position for your approach rather than maximizing distance. With a straight layout, your target line should favor the center-left portion of the fairway, giving you the best angle into the small green. Club selection becomes crucial - many players benefit from taking a fairway wood or long iron off the tee to ensure accuracy over raw distance. The key is finding that perfect balance between advancing the ball far enough to leave a comfortable approach while maintaining control and avoiding any trouble areas that could complicate your second shot.
Approach & recovery
The approach shot to this small green demands precision and careful club selection. The compact target requires you to commit fully to your yardage and account for any elevation changes or wind conditions. Focus on the center of the green rather than attacking pins, as the small surface leaves little margin for error. A mid-iron to long-iron approach, depending on your tee shot position and conditions, should be played with confidence. The key is ensuring you're hitting the green in regulation, as short-game recoveries around this small target can be particularly challenging.
On the green
MacKenzie's greens at Pasatiempo are renowned for their lightning-fast pace and subtle undulations. This small green amplifies every break and slope, making green reading absolutely critical. Take extra time to study the putt from multiple angles, as the compact surface can create deceptive breaks. Lag putting becomes essential - focus on getting your first putt close rather than being aggressive with longer attempts. The small target means that three-putts can quickly derail your score, so conservative putting strategy often pays dividends. ## RISK VS REWARD While this hole doesn't feature dramatic risk/reward elements like some of MacKenzie's heroic par 5s, the strategic decisions are more subtle but equally important. The primary risk/reward calculation comes in tee shot club selection - taking driver for a shorter approach versus choosing accuracy with a fairway wood. The small green amplifies any approach shot mistakes, making the reward for a well-positioned tee shot significant. Conservative play that prioritizes hitting the green in regulation typically outscores aggressive approaches that miss the small target. ## DIFFERENT SKILL LEVELS **High-Handicap Players:** Focus entirely on accuracy over distance. Consider hitting fairway wood or hybrid off the tee to ensure you find the fairway. For the approach, aim for the center of the green regardless of pin position, and take one extra club to ensure you clear any front trouble. On the green, prioritize lag putting and accept that two-putting is a victory. **Low-Handicap Players:** You can be more aggressive with driver if your accuracy permits, but respect MacKenzie's design philosophy that rewards precision. Study pin positions carefully and consider working the ball slightly to optimize your approach angle. Use your superior green reading skills to attack makeable birdie putts while still respecting the challenging surface. The 4th hole at Pasatiempo perfectly embodies MacKenzie's design principles - it rewards strategic thinking, precise execution, and respect for the subtleties that make great golf architecture timeless.
Hole 4 Green Complex
Mapped green boundary
Green size: 4,838 sq ft
How did Hole 4 play?
How did this hole play today?
Frequently asked questions
Yardage reference: Championship tees · 378 yards.
What's the best strategy off the tee?
↓
For this 378-yard par 4, most players will hit 3-wood or driver to set up a comfortable approach.
How difficult is hole 4?
↓
This hole is a good scoring opportunity for most golfers. Key challenges include: heavily bunkered.
How big is the green on hole 4?
↓
The green is medium-sized with moderate targets. The green is deeper than wide, so club selection is crucial. Pay attention to pin placement when selecting your approach club.
What's a good score on hole 4?
↓
This hole is a medium-length test where par is a solid result. A straightforward par 4 where course management pays off.