Hole 10 at Grayhawk Golf Club (Raptor course)
- Par
- 4
- Yardage
- 390 yds
- Stroke index
- 11
- Hazards
- 2 bunkers · Water
Aerial source not provided
Green size: 32 yds deep × 26 yds wide
Scorecard yardage is for Championship tees. The aerial shows its labeled reference position; distance rings measure to the green.
Championship tees · Par 4 · 390 yards
The plan for No. 10
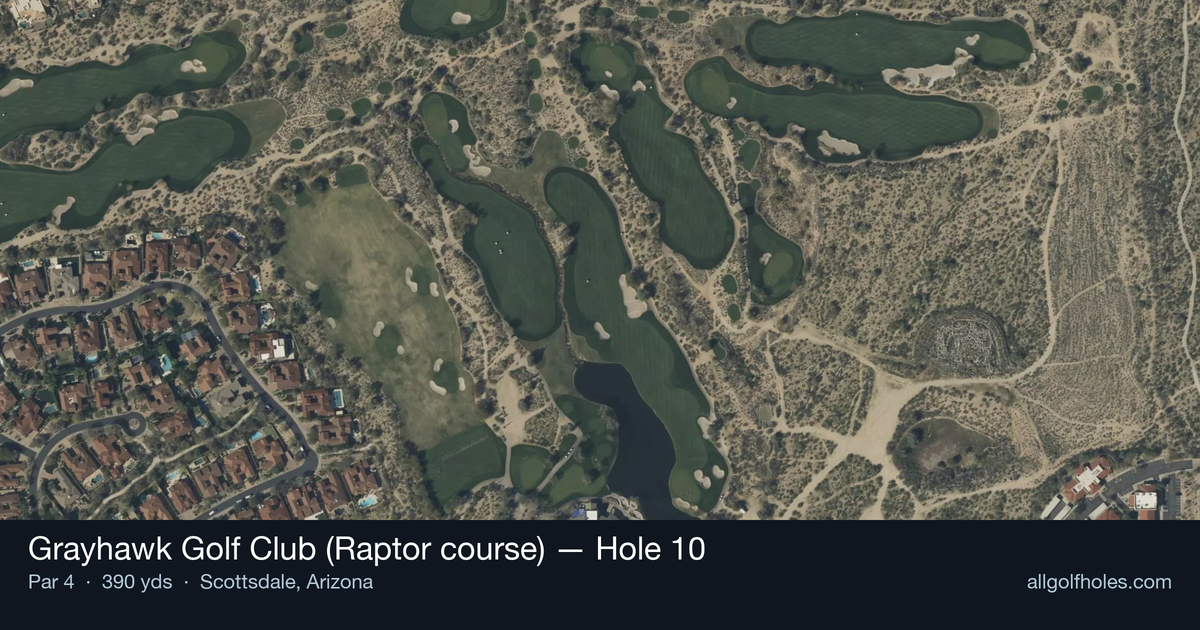
The tenth hole at Grayhawk Golf Club's Raptor course epitomizes Tom Fazio's masterful risk-reward philosophy in a deceptively challenging par 4. At 390 yards, this straight hole demands precision over power, with a gaping fairway bunker lurking to the right that has claimed countless tee shots from aggressive players. The conservative play calls for a long iron or fairway wood positioned just short of the right-side hazard, setting up an ideal approach angle. The elevated green presents its own test, sloping dramatically from back to front with a tricky lower tier on the left protected by a deep bunker. Pin placement becomes crucial on this small green complex, where approach shot strategy can make or break your score on this mid-handicap hole.
Off the tee
The tee shot strategy centers on avoiding the gaping fairway bunker positioned to the right side of the landing zone. Course management is crucial here - the conservative play calls for a long iron or fairway wood that finds the center-left portion of the fairway, staying well clear of the right-side trouble. This positioning not only eliminates the bunker from play but also provides the best angle into the green complex. Driver can be used by longer hitters, but the risk-reward calculation favors accuracy over distance on this hole.
Approach & recovery
The approach shot presents the hole's primary challenge with an elevated green that slopes dramatically from back to front. The green features a lower tier to the left that's protected by a deep bunker, making pin position critical to club selection and target line. When the pin is on the lower left tier, approach shots must carry the bunker while avoiding the back portion of the green, where balls will feed down toward the hole. For pins on the main level, focus on hitting to the correct tier and letting the slope work in your favor. A mid-iron to long-iron approach, depending on conditions and tee shot position, gives you the best control for this precision shot.
On the green
The green's front-to-back slope dominates putting strategy, with most putts breaking toward the front edge. Above-the-hole putts require extreme caution due to the steep gradient, while lag putting from below the pin offers more aggressive options. The tiered structure means reading the green correctly is essential - putts crossing from one level to another will break more severely at the transition points. Focus on speed control, as the slope can quickly turn a makeable birdie putt into a challenging two-putt. ## RISK VS REWARD The primary risk-reward decision comes with tee shot club selection. While driver might leave a shorter approach, the penalty for finding the right fairway bunker significantly outweighs the benefit of a wedge versus short iron into the green. The elevated green actually plays longer than the yardage suggests, making the difference between a 9-iron and 7-iron less critical than ensuring you're putting from the correct tier. ## DIFFERENT SKILL LEVELS **High-handicap players** should embrace the conservative strategy completely: fairway wood or long iron off the tee, aiming for the center-left of the fairway, followed by a controlled approach to the middle of the green regardless of pin position. The slope will help funnel balls toward most pin locations. **Low-handicap players** can be more aggressive with driver if they're confident in their accuracy, but should still favor the left side of the fairway. These players can attack specific tiers based on pin position, using the green's slope as an ally rather than fighting it. The key is committing to the chosen target line and trusting the precision that got them to single digits. This hole rewards patience and precision - qualities that define successful play on Tom Fazio's demanding Raptor course. Smart course management here often leads to scoring opportunities while aggressive play can quickly lead to bogey or worse.
Watch for
- Course conditioning and mapped hazards may affect line selection; confirm from the aerial.
Hole 10 Green Complex
Mapped green boundary
Green size: 4,339 sq ft
How did Hole 10 play?
How did this hole play today?
Frequently asked questions
Yardage reference: Championship tees · 390 yards.
What's the best strategy off the tee?
↓
For this 390-yard par 4, most players will hit driver to set up a comfortable approach.
How difficult is hole 10?
↓
This hole is a moderate challenge for most golfers. Key challenges include: water in play, small green.
How big is the green on hole 10?
↓
The green is small and requires precision. The green is deeper than wide, so club selection is crucial. Expect challenging pin positions with limited room for error.
What's a good score on hole 10?
↓
This hole is a medium-length test where par is a solid result. A straightforward par 4 where course management pays off.