Hole 12 at Grayhawk Golf Club (Raptor course)
- Par
- 4
- Yardage
- 468 yds
- Stroke index
- 5
- Hazards
- 4 bunkers
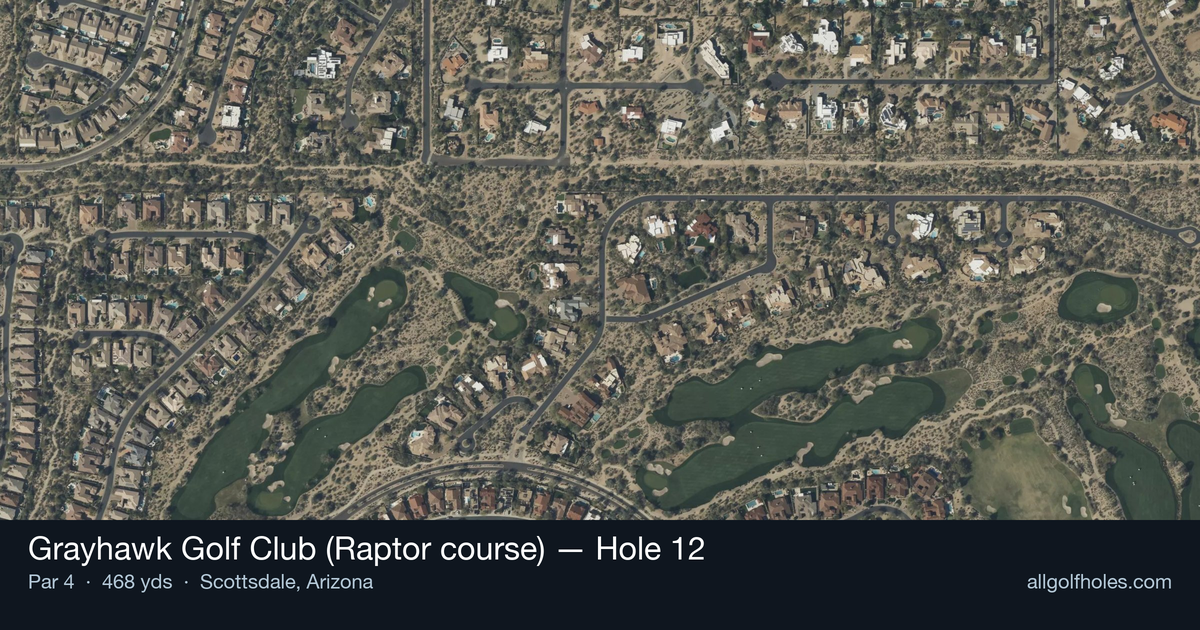
Aerial source not provided
Green size: 31 yds deep × 34 yds wide
Scorecard yardage is for Championship tees. The aerial shows its labeled reference position; distance rings measure to the green.
Championship tees · Par 4 · 468 yards
The plan for No. 12
The 12th hole at Grayhawk Golf Club's Raptor course exemplifies Tom Fazio's masterful risk-reward design philosophy on this 468-yard par 4. From the tee, players face an immediate strategic decision as a gaping fairway bunker lurks menacingly on the right side, demanding precise placement off the tee. The conservative approach calls for a long iron or fairway wood positioned safely short of the right-side hazard, setting up a longer but safer approach shot. The elevated green complex presents its own challenges, sloping dramatically from back to front with a distinctive lower tier on the left protected by a deep bunker. This demanding approach shot requires careful club selection and precise distance control to navigate the green's multiple levels and avoid the punishing greenside sand, making it a true test of strategy and execution in the Arizona desert.
Off the tee
The conservative approach is the smart play here—use a long iron or fairway wood to position your ball just short of the right-side fairway bunker. This strategy keeps you in the optimal scoring position while avoiding the gaping bunker that can derail your hole. Target the left-center portion of the fairway to give yourself the best angle into the green. Driver is tempting given the 468-yard length, but the risk of finding that right bunker far outweighs any distance advantage. Focus on accuracy over power, as a well-positioned tee shot from the fairway trumps a longer shot from trouble.
Approach & recovery
With the green elevated and sloped significantly from back to front, your approach shot demands precision in both distance control and trajectory. The green features a lower tier on the left that's protected by a deep bunker, creating a challenging target for pins in that area. Aim for the center of the green when possible, as the back-to-front slope will help feed balls toward front pin positions. Take one extra club to ensure you reach the putting surface, as coming up short into the greenside bunkers makes par extremely difficult. The elevated nature of the green means shots will play longer than the yardage suggests.
On the green
The pronounced back-to-front slope dominates putting strategy on this small green. Approach putts from below the hole with caution, as the slope can easily turn makeable putts into three-putts. When putting from above the hole, focus on speed control rather than line—gravity will do most of the work. The lower left tier creates additional complexity, so read putts carefully when the pin is positioned there. Given the green's small size, getting close to any pin position requires precise distance control on your approach shot. ## RISK VS REWARD The primary risk/reward decision comes off the tee. While driver might leave you closer to the green, the penalty for finding the right fairway bunker is severe, often leading to bogey or worse. The reward for the conservative play—long iron or fairway wood—is a manageable approach shot from the ideal angle. On the approach, aggressive pins (especially left-side locations) tempt players to challenge the deep bunker, but the smart play is targeting the center of the green and relying on putting to get close. ## DIFFERENT SKILL LEVELS **High-Handicap Players:** Embrace the conservative strategy completely. Use a long iron or hybrid off the tee, aiming for the left side of the fairway. On your approach, target the center of the green regardless of pin position—the slope will help feed balls toward most pins. Focus on avoiding the bunkers at all costs, as recovering from Fazio's deep sand traps requires advanced technique. **Low-Handicap Players:** You have more options but should still respect the hole's demands. Consider driver only in ideal conditions with confidence in your accuracy. You can be more aggressive with approach shots to accessible pins, but always have a bailout plan. Your short game skills allow you to challenge some pins that others should avoid, but remember that even scratch players struggle with the deep greenside bunkers. The 12th hole rewards patience and precision over aggression, making it a true test of golf strategy and course management skills.
Watch for
- Course conditioning and mapped hazards may affect line selection; confirm from the aerial.
Hole 12 Green Complex
Mapped green boundary
Green size: 5,672 sq ft
How did Hole 12 play?
How did this hole play today?
Frequently asked questions
Yardage reference: Championship tees · 468 yards.
What's the best strategy off the tee?
↓
For this 468-yard par 4, most players will hit driver to set up a comfortable approach.
How difficult is hole 12?
↓
This hole is a moderate challenge for most golfers. Key challenges include: long par 4, heavily bunkered.
How big is the green on hole 12?
↓
The green is medium-sized with moderate targets. Pay attention to pin placement when selecting your approach club.
What's a good score on hole 12?
↓
This hole is one of the tougher holes where par feels like birdie. A challenging par 4. Accept that bogey happens and avoid big numbers.