Hole 7 at Grayhawk Golf Club (Raptor course)
- Par
- 5
- Yardage
- 502 yds
- Stroke index
- 8
- Hazards
- 4 bunkers
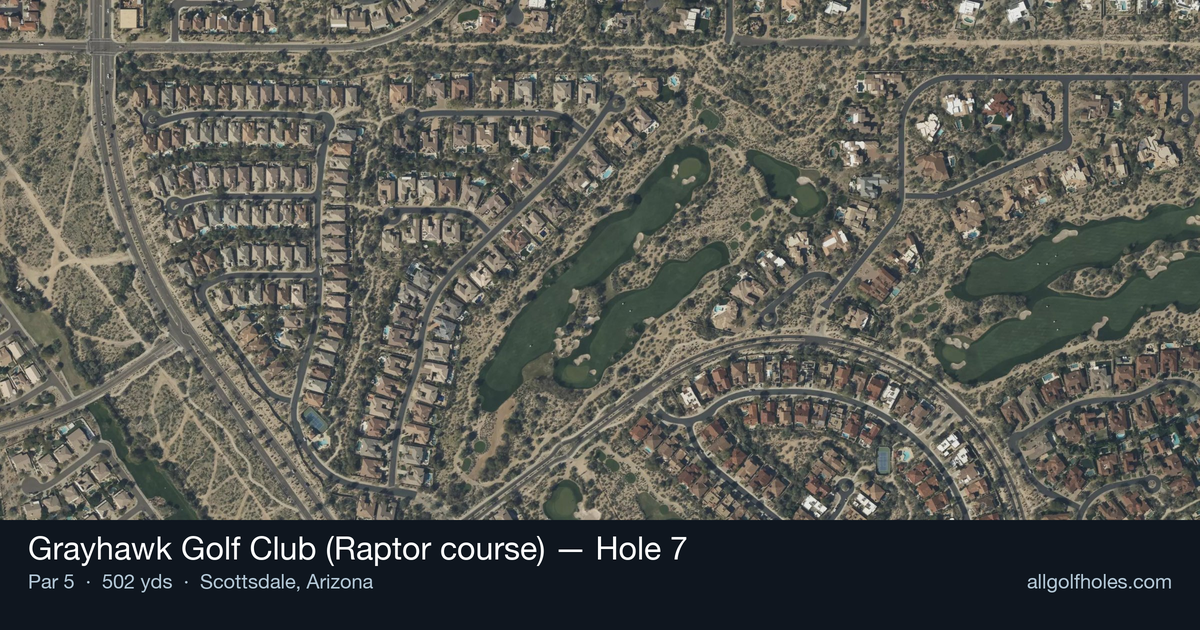
Aerial source not provided
Green size: 29 yds deep × 30 yds wide
Scorecard yardage is for Championship tees. The aerial shows its labeled reference position; distance rings measure to the green.
Championship tees · Par 5 · 502 yards
The plan for No. 7
The seventh hole at Grayhawk Golf Club's Raptor course epitomizes Tom Fazio's strategic design philosophy, presenting golfers with a classic risk-reward par 5 that demands both power and precision. At 502 yards, this straight-away hole appears deceptively straightforward from the tee, but a menacing fairway bunker lurking on the right side immediately commands respect. The conservative tee shot calls for a long iron or fairway wood positioned safely left of the hazard, while aggressive players can challenge the bunker for a shorter approach. The elevated green complex features dramatic front-to-back slopes with a lower left tier protected by a deep greenside bunker, making pin position crucial for approach shot strategy and creating multiple scoring opportunities for those who navigate the challenges successfully.
Off the tee
The tee shot strategy revolves entirely around the prominent right-side fairway bunker. **The conservative play is with a long iron or fairway wood aimed just short of the right bunker**, which keeps you safely in play while leaving a manageable approach. This strategy particularly makes sense when the pin is tucked on the challenging lower left tier of the green. For longer hitters seeking to maximize scoring opportunity, driver can be used if you're confident about carrying the bunker or finding the left side of the fairway. However, the risk/reward calculation here favors the conservative approach - the penalty for finding that right bunker is severe, often leading to bogey or worse. Your target line should favor the left-center of the fairway, giving yourself maximum margin for error away from the troublesome right-side hazard.
Approach & recovery
The approach shot presents its own set of challenges due to the elevated green and complex putting surface. The green slopes from back to front, creating different playing zones that dramatically affect your strategy. When the pin is positioned on the lower left tier, you must be particularly careful to avoid the deep bunker that guards this section. Club selection should account for the elevated nature of the green - expect to take one extra club compared to the yardage. The back-to-front slope means shots landing beyond the pin will have a tendency to roll away, making distance control crucial. For your second shot positioning, favor approaches from the right side of the fairway when possible, as this provides the best angle to most pin positions and avoids the severe greenside bunkers on the left.
On the green
The putting strategy centers around understanding the green's two-tier nature and dominant back-to-front slope. Putts from above the hole require extreme caution, as the slope can quickly turn a birdie attempt into a challenging two-putt scenario. When the pin is on the lower left tier, approach putts from the upper level demand a delicate touch. Conversely, uphill putts to back pin positions can be struck more aggressively, using the slope to help control speed. The small green size means precision is paramount - leaving yourself in the wrong section relative to the pin position can create unnecessarily difficult putting scenarios. ## RISK VS REWARD This hole epitomizes Tom Fazio's design philosophy of presenting clear risk/reward decisions. The primary choice comes off the tee: play conservatively short of the right bunker for a guaranteed good lie and manageable approach, or challenge the bunker with driver for a shorter second shot. The reward for the aggressive play is a potential eagle opportunity or easy birdie, but the penalty for failure is significant. Most players will find better long-term scoring by playing the percentages and accepting the slightly longer approach shot. ## DIFFERENT SKILL LEVELS **High-handicap players** should embrace the conservative strategy without hesitation. Use a long iron or fairway wood off the tee, aim for the left-center of the fairway, and focus on finding the green in regulation. The elevated green and slopes make up-and-down challenging, so prioritize hitting the putting surface over attacking pins. **Low-handicap players** can consider the more aggressive driver line when conditions favor it, but should still respect the consequences of the right-side bunker. These players can also be more aggressive with pin-seeking approach shots, particularly when the pin is in favorable positions on the upper tier. **Mid-handicap players** should generally lean toward the conservative approach while occasionally taking calculated risks based on their current round momentum and comfort level with their driver accuracy. The beauty of this hole lies in its strategic clarity - the challenges are presented honestly, and success comes from making smart decisions rather than executing heroic shots. Focus on solid course management, and this par 5 can become a consistent scoring opportunity in your round at Grayhawk's acclaimed Raptor course.
Watch for
- Course conditioning and mapped hazards may affect line selection; confirm from the aerial.
Hole 7 Green Complex
Mapped green boundary
Green size: 4,375 sq ft
How did Hole 7 play?
How did this hole play today?
Frequently asked questions
Yardage reference: Championship tees · 502 yards.
Can this par 5 be reached in two?
↓
At 502 yards, Reachable in two for longer hitters. Consider laying up short of hazards if going for it is risky.
How difficult is hole 7?
↓
This hole is a moderate challenge for most golfers. Key challenges include: heavily bunkered, small green.
How big is the green on hole 7?
↓
The green is small and requires precision. The green is wider than it is deep, rewarding shots that find the correct tier. Expect challenging pin positions with limited room for error.
What's a good score on hole 7?
↓
This hole is a solid birdie opportunity with smart layup strategy. Most golfers can reach in three. Position your layup to leave a comfortable wedge.