Hole 9 at Grayhawk Golf Club (Raptor course)
- Par
- 4
- Yardage
- 464 yds
- Stroke index
- 6
- Hazards
- 2 bunkers
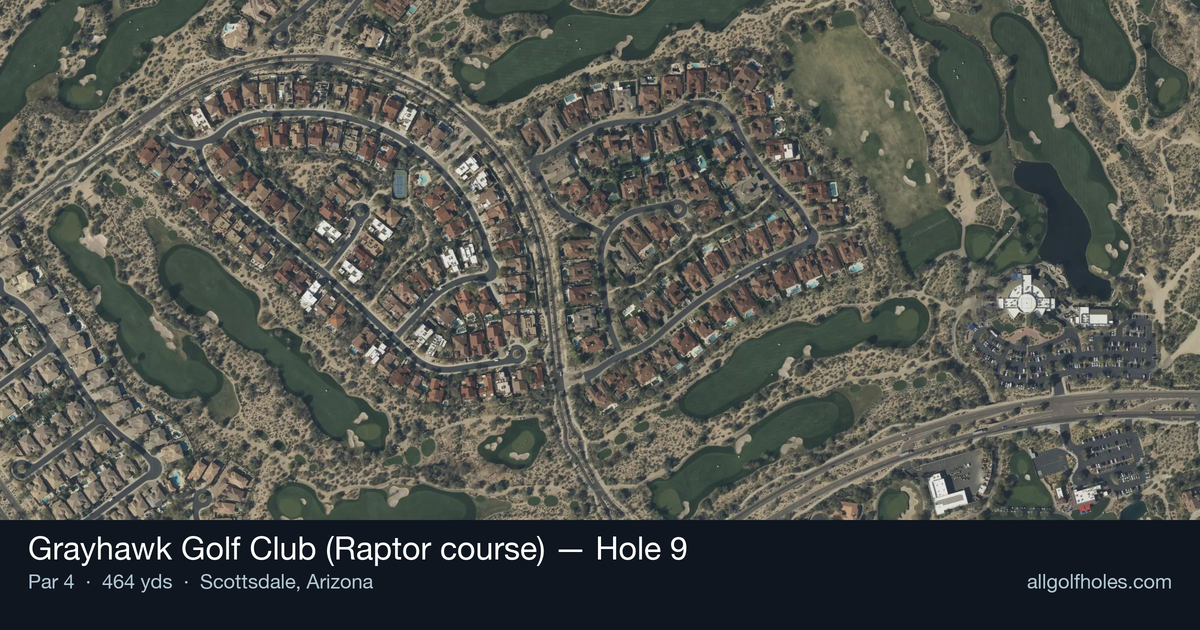
Aerial source not provided
Green size: 32 yds deep × 26 yds wide
Scorecard yardage is for Championship tees. The aerial shows its labeled reference position; distance rings measure to the green.
Championship tees · Par 4 · 464 yards
The plan for No. 9
The ninth hole at Grayhawk Golf Club's Raptor course exemplifies Tom Fazio's masterful risk-reward design philosophy on this 464-yard par 4. From the tee, players face an immediate strategic decision as a gaping fairway bunker lurks on the right side, demanding precise placement off the tee. The conservative play calls for a long iron or fairway wood positioned just short of the right-side hazard, setting up a manageable approach shot. The elevated green complex presents the hole's true test, featuring dramatic back-to-front slopes and a treacherous lower left tier guarded by a deep bunker. This demanding approach shot requires careful club selection and precise distance control to find the correct level of this small, crowned green that epitomizes the Raptor course's traditional yet challenging character.
Off the tee
The tee shot strategy revolves around the gaping fairway bunker positioned on the right side of the landing zone. **The conservative play is with a long iron or fairway wood just short of the right bunker**, which keeps you safely in the fairway but leaves a longer approach. More aggressive players can challenge the bunker with driver, aiming down the left side of the fairway to shorten the hole significantly. Your target line should favor the left-center of the fairway, giving you maximum room to avoid the right-side trouble. Wind conditions in the Arizona desert can affect club selection, so factor in any crosswinds when choosing between the safe layup or the aggressive line.
Approach & recovery
The approach shot requires careful attention to the green's architecture and pin position. The green is elevated and slopes dramatically from back to front, with a distinct lower tier on the left side that's guarded by a deep bunker. This creates multiple target zones depending on where the flag is positioned. When the pin is on the upper tier, aim for the center-right portion of the green to avoid the left-side bunker and use the back-to-front slope to feed the ball toward the hole. For lower-tier pin positions, you'll need to be more precise with your distance control, as shots that come up short face the deep greenside bunker. Club selection typically ranges from mid-iron to long-iron depending on your tee shot position and conditions. The elevated nature of the green means you'll need one extra club to account for the uphill shot.
On the green
The green's back-to-front slope is the dominant feature affecting your putting strategy. Putts from above the hole require extreme caution, as the slope can quickly turn a makeable birdie putt into a challenging par save. When putting from the lower tier to an upper pin position, be aggressive enough to get the ball up the slope while maintaining control. The small green size means precision is rewarded, but it also means that approach shots slightly off-target can leave difficult recovery shots from the surrounding bunkers. ## RISK VS REWARD This hole offers a clear risk-reward scenario off the tee. Taking on the right fairway bunker with driver can leave you with a short iron into the green, creating genuine birdie opportunities. However, finding the bunker typically results in bogey or worse, especially with the challenging approach to the elevated green. The safer play with a fairway wood or long iron ensures you're playing your approach from the fairway, but the longer distance makes it harder to attack pins and increases the likelihood of finding the greenside bunkers. ## DIFFERENT SKILL LEVELS **High-handicap players** should embrace the conservative strategy, using a club that comfortably keeps them short of the fairway bunker. Focus on hitting the center of the green regardless of pin position, as the slopes and bunkers severely punish missed approach shots. **Low-handicap players** can be more aggressive, especially when conditions favor a longer tee shot. These players have the precision to challenge the fairway bunker and the short game skills to recover if they miss the green. However, even skilled players should respect the green's slopes and plan their approach shots accordingly. The 9th hole at Grayhawk's Raptor course rewards thoughtful course management while punishing overly aggressive play. Success here comes from choosing the right balance of risk and reward based on your skill level and the day's conditions.
Watch for
- Course conditioning and mapped hazards may affect line selection; confirm from the aerial.
Hole 9 Green Complex
Mapped green boundary
Green size: 4,542 sq ft
How did Hole 9 play?
How did this hole play today?
Frequently asked questions
Yardage reference: Championship tees · 464 yards.
What's the best strategy off the tee?
↓
For this 464-yard par 4, most players will hit driver to set up a comfortable approach.
How difficult is hole 9?
↓
This hole is a moderate challenge for most golfers. Key challenges include: long par 4.
How big is the green on hole 9?
↓
The green is medium-sized with moderate targets. Pay attention to pin placement when selecting your approach club.
What's a good score on hole 9?
↓
This hole is one of the tougher holes where par feels like birdie. A challenging par 4. Accept that bogey happens and avoid big numbers.