Hole 16 at Grayhawk Golf Club (Raptor course)
- Par
- 3
- Yardage
- 211 yds
- Stroke index
- 9
- Hazards
- 1 bunker · Water
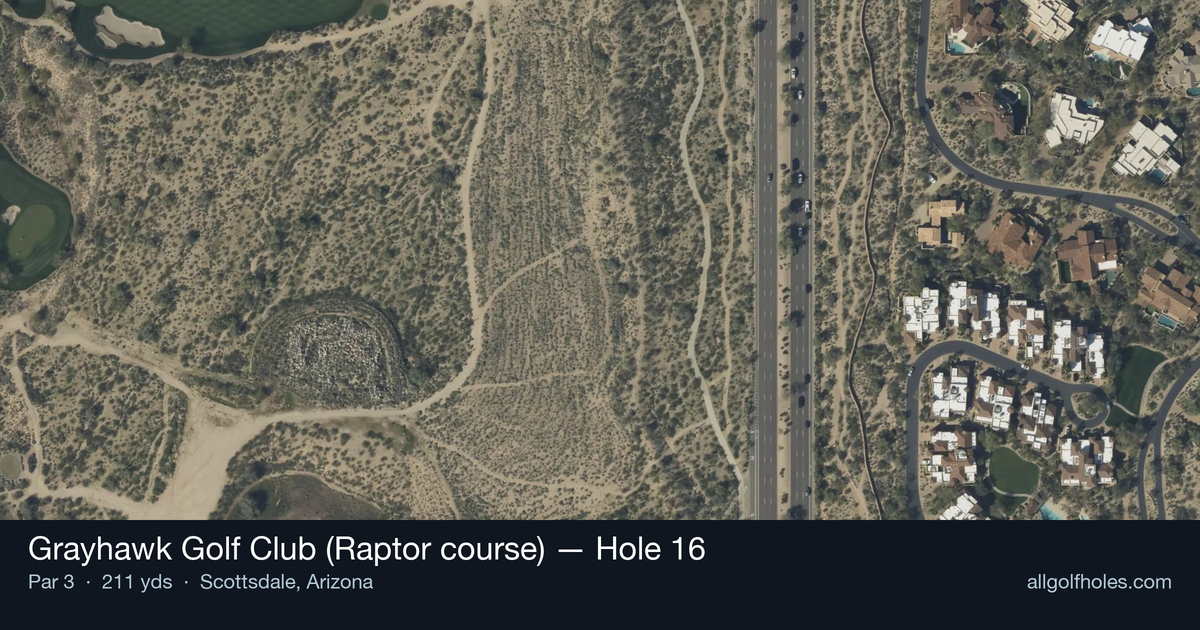
Aerial source not provided
Green size: 37 yds deep × 25 yds wide
Scorecard yardage is for Championship tees. The aerial shows its labeled reference position; distance rings measure to the green.
Championship tees · Par 3 · 211 yards
The plan for No. 16
The 16th hole at Grayhawk Golf Club's Raptor course presents a deceptively challenging par 3 that embodies Tom Fazio's masterful design philosophy. At 211 yards, this tee shot demands precision to a small, well-protected green nestled within the Sonoran Desert landscape. The hole's strategic complexity lies in its risk-reward proposition, where aggressive players can attack the pin while conservative approaches favor the safer areas of the putting surface. Desert vegetation and natural arroyos frame this picturesque hole, creating both visual intimidation and genuine hazards for wayward shots. Club selection becomes critical in Arizona's desert conditions, where distance control separates confident putts from challenging recoveries. This memorable par 3 exemplifies the Raptor course's reputation for demanding respect while rewarding thoughtful course management.
Off the tee
Your tee shot strategy centers on precise club selection and unwavering commitment to your target line. From 211 yards, most players will need anything from a 5-iron to a hybrid depending on conditions and elevation changes. The key is selecting enough club to comfortably reach the green without overpowering it. Aim for the center of the green regardless of pin position - the small target demands conservative targeting. Take one extra club if there's any doubt, as coming up short in the desert is far more penal than being long.
Approach & recovery
Since this is a par 3, your tee shot is your approach. Focus on smooth tempo and solid contact rather than trying to force distance. The straight layout means you can commit fully to your line without worrying about doglegs or hidden trouble. Pay attention to wind conditions, which can be significant in the Arizona desert, and adjust your club selection accordingly. A controlled, committed swing to the center of the green gives you the best chance for success.
On the green
The small green size means putting strategy becomes crucial for scoring. With limited real estate, lag putting takes precedence over aggressive birdie attempts unless you have a short putt. Read the subtle breaks carefully, as Tom Fazio greens often have more movement than they appear. Focus on getting your first putt close to the hole rather than trying to make everything. Two-putting from anywhere on this green should be considered a victory. ## RISK VS REWARD The primary risk-reward decision involves club selection and target choice. The reward for aggressive pin-seeking is a potential birdie, but the risk of missing the small green entirely makes center-green targeting the smart play. There's minimal reward for taking on additional risk here - par is an excellent score that keeps momentum building toward the closing holes. ## DIFFERENT SKILL LEVELS **High Handicappers:** Focus entirely on finding the green with your most reliable mid-to-long iron. Ignore pin positions and aim for the center of the green every time. Take one extra club to ensure you reach the putting surface, and be content with bogey if you miss - don't compound mistakes with risky recovery shots. **Low Handicappers:** While you can be more aggressive with pin positions, still respect the small target. Consider pin position only if it's in the center third of the green. Your superior distance control allows for more precise club selection, but don't let overconfidence lead to poor decisions. This hole rewards patience and precision over aggression. The 16th hole at Grayhawk's Raptor course demands respect through intelligent course management and committed execution. Success comes from playing within your abilities while maintaining the precision this Tom Fazio design requires.
Watch for
- Course conditioning and mapped hazards may affect line selection; confirm from the aerial.
Hole 16 Green Complex
Mapped green boundary
Green size: 4,387 sq ft
How did Hole 16 play?
How did this hole play today?
Frequently asked questions
Yardage reference: Championship tees · 211 yards.
What club should I use on this par 3?
↓
At 211 yards, most golfers will need a fairway wood or hybrid to reach this green. Adjust for elevation, wind, and pin position.
How difficult is hole 16?
↓
This hole is one of the tougher holes on the course for most golfers. Key challenges include: long par 3, water in play, small green.
What hazards should I watch out for on hole 16?
↓
Key hazards include: 1 greenside bunker; water at 194.1 yards. Plan your shots to avoid these trouble spots.
How big is the green on hole 16?
↓
The green is small and requires precision. Expect challenging pin positions with limited room for error.
What's a good score on hole 16?
↓
This hole is a challenging par where bogey is acceptable. This longer par 3 will test your long iron or hybrid game. Par is a good score.