Hole 6 at Grayhawk Golf Club (Raptor course)
- Par
- 4
- Yardage
- 345 yds
- Stroke index
- 12
- Hazards
- 3 bunkers
Aerial source not provided
Green size: 30 yds deep × 27 yds wide
Scorecard yardage is for Championship tees. The aerial shows its labeled reference position; distance rings measure to the green.
Championship tees · Par 4 · 345 yards
The plan for No. 6
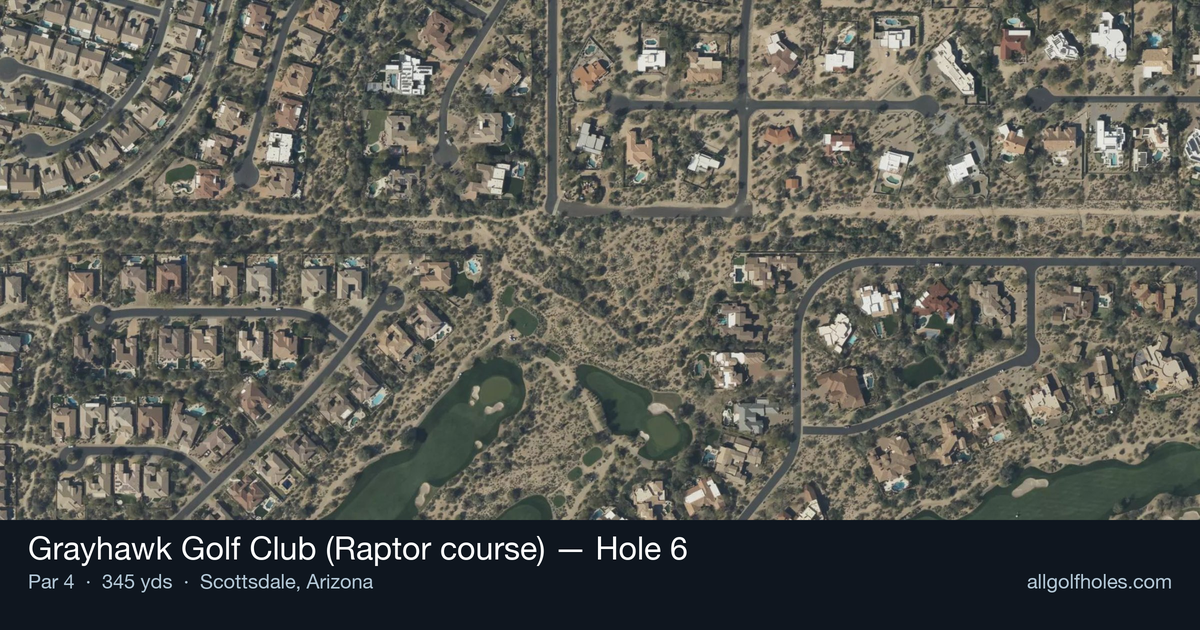
Hole 6 at Grayhawk Golf Club's Raptor course epitomizes Tom Fazio's risk-reward philosophy in a deceptively strategic par 4. At 345 yards, this straight hole presents golfers with a classic decision: unleash the driver for a sand wedge approach or play conservatively with a fairway wood leaving a comfortable nine iron. The defining feature is a massive, deep bunker guarding the right-front of the green complex, creating a visual intimidation factor that influences every tee shot. The small green demands precision on the approach shot, rewarding aggressive play while severely punishing wayward shots. This hole perfectly captures the Raptor course's "come-and-get-it" mentality, where bold golfers can score but cautious strategy often proves wiser.
Off the tee
The tee shot presents two distinct strategies. Aggressive players can take driver and attempt to get as close as possible to the green, leaving just a sand wedge for the approach. This high-reward option requires precise execution and confidence in your distance control. The conservative approach involves hitting a long iron or fairway wood, positioning yourself in the optimal landing zone while accepting a nine iron approach shot. The target line should favor the left side of the fairway, giving you the best angle to approach the green while staying away from trouble. Wind conditions and pin position should factor heavily into your club selection decision.
Approach & recovery
The approach shot is where this hole's true challenge reveals itself. The small green is guarded by a gigantic, deep bunker on the right-front that must be avoided at all costs. This hazard is so prominent that it influences every aspect of your approach strategy. When the pin is positioned on the right side of the green, resist the temptation to attack it directly. Instead, aim for the center or left portion of the green and rely on your putting to get close. The crowned nature of the green, typical of Fazio designs, means shots that miss the putting surface will likely roll away from the hole. Club selection becomes critical here - it's better to be slightly long than to come up short and find that deep bunker. Take one extra club if you're between selections, as the consequences of being short are severe.
On the green
The small, crowned green requires precise distance control on your approach. Putts will generally break away from the center of the green due to its elevated design. Pay attention to the subtle slopes during your pre-round preparation, as these can be deceiving from ground level. When putting, focus on getting your first putt close rather than being overly aggressive. The green's size means three-putts are easily avoided with smart lag putting, while aggressive putts that miss can leave challenging comeback attempts on the sloped surface. ## RISK VS REWARD This hole perfectly embodies the risk/reward philosophy that defines the Raptor course. The aggressive driver play offers the reward of a short iron approach but increases the pressure on execution. The conservative tee shot provides a more comfortable approach distance but requires precise iron play into a small target. The massive right-front bunker creates the ultimate risk/reward scenario on the approach. Players who successfully navigate this hazard while attacking pins will be rewarded with birdie opportunities, while those who get too aggressive may find themselves in deep trouble. ## DIFFERENT SKILL LEVELS **High-handicap players** should strongly consider the conservative approach: hit a club you're confident with off the tee, even if it means a longer approach shot. The priority is avoiding the greenside bunker and finding the putting surface. Aim for the center of the green regardless of pin position and focus on making par. **Low-handicap players** can be more aggressive with both tee shot and approach. If you're confident with your driver, the sand wedge approach provides excellent scoring opportunities. However, even skilled players should respect the right-front bunker and consider pin position carefully when selecting target lines. **Mid-handicap players** should assess their current form and confidence level. If you're striking the ball well, the aggressive approach can pay dividends. If you're struggling with consistency, adopt the conservative strategy and focus on solid course management to avoid big numbers. The beauty of this hole lies in its strategic options - there's no single "correct" way to play it, making it a true test of golf strategy and execution.
Watch for
- Course conditioning and mapped hazards may affect line selection; confirm from the aerial.
Hole 6 Green Complex
Mapped green boundary
Green size: 3,774 sq ft
How did Hole 6 play?
How did this hole play today?
Frequently asked questions
Yardage reference: Championship tees · 345 yards.
What's the best strategy off the tee?
↓
For this 345-yard par 4, most players will hit 3-wood or driver to set up a comfortable approach.
How difficult is hole 6?
↓
This hole is a good scoring opportunity for most golfers. Key challenges include: small green.
How big is the green on hole 6?
↓
The green is small and requires precision. The green is wider than it is deep, rewarding shots that find the correct tier. Expect challenging pin positions with limited room for error.
What's a good score on hole 6?
↓
This hole is a birdie opportunity if you find the fairway. This shorter par 4 rewards accuracy off the tee with a short iron approach.