Hole 9 at Blackwolf Run Golf Course
- Par
- 4
- Yardage
- 485 yds
- Stroke index
- 3
- Hazards
- 5 bunkers · Water
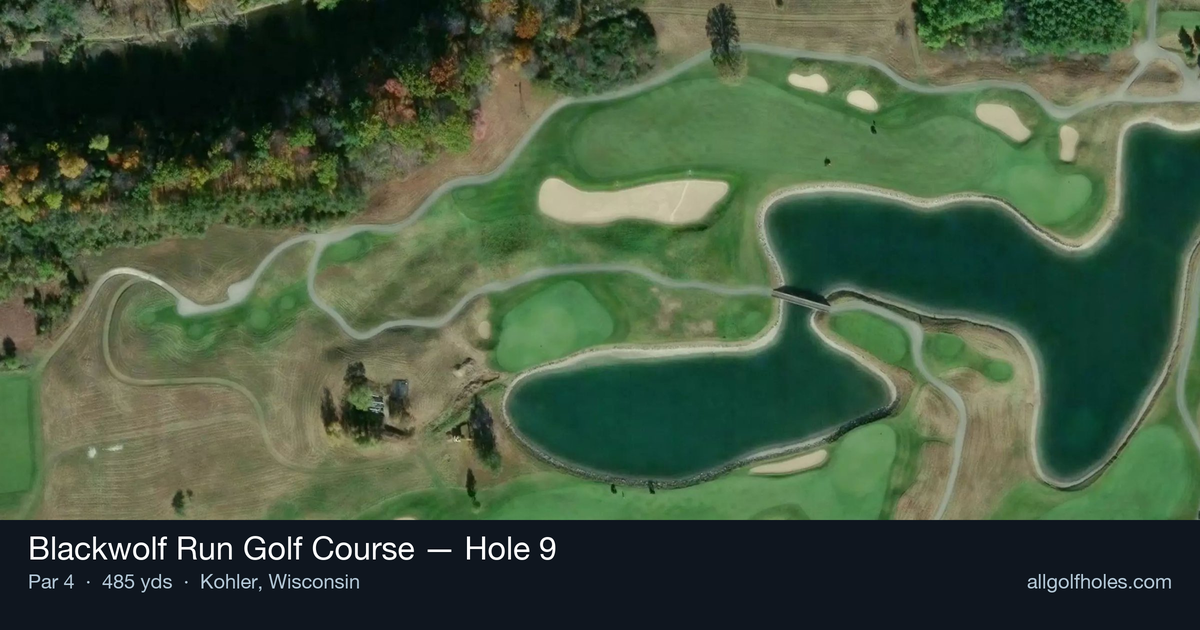
Aerial source not provided
Green size: 42 yds deep × 32 yds wide
Scorecard yardage is for Championship tees. The aerial shows its labeled reference position; distance rings measure to the green.
Championship tees · Par 4 · 485 yards
The plan for No. 9
The ninth hole at Blackwolf Run Golf Course exemplifies Pete Dye's masterful design philosophy, presenting a deceptively challenging 485-yard par 4 that demands both power and precision. This straight-away hole carves through the Wisconsin landscape with characteristic Dye subtlety, where the absence of obvious hazards creates its own psychological challenge. The generous fairway invites an aggressive tee shot, but the small green complex requires surgical accuracy on the approach shot. Set against the backdrop of rolling prairies and oak savannahs that define this championship venue, the hole's true test lies in its demand for sustained excellence over two quality shots. Without bunkers or water to guide strategy, golfers must rely purely on course management and execution, making this a thinking player's hole that rewards conservative aggression and punishes overconfidence.
Off the tee
Your tee shot strategy should prioritize finding the fairway while maximizing distance to set up a manageable approach. With 485 yards to cover, most golfers will need their driver to have any realistic chance of reaching the green in two. Focus on a smooth, controlled swing rather than trying to overpower the shot - accuracy is crucial given the narrow margin for error on the approach. Target the center of the fairway, as Pete Dye designs typically reward precision over raw distance. The straight layout allows you to commit fully to your target line without worrying about doglegs or hidden hazards. Consider the wind conditions carefully, as this exposed hole can play significantly longer or shorter depending on the prevailing Wisconsin weather.
Approach & recovery
The approach shot to this small green represents the hole's primary challenge. From the fairway, you'll likely face a mid to long iron depending on your tee shot distance and the day's conditions. The compact green size demands precision - there's little room for error with your club selection and execution. Study the pin position carefully before selecting your club. With a small target, being slightly short is often preferable to flying the green, as recovery shots from beyond the putting surface can be particularly challenging. Focus on hitting the center of the green and let your putting take care of the rest, rather than being overly aggressive with pin-hunting.
On the green
The small green places a premium on accurate approach shots and solid putting fundamentals. Without specific knowledge of the green's contours, focus on reading the overall slope and grain direction. Pete Dye greens are known for their subtle undulations that can significantly affect ball roll. Pay special attention to your first putt, as three-putting on a small green can be particularly frustrating after executing two good shots to reach it in regulation. Conservative lag putting to ensure you're within comfortable two-putt range is often the wisest strategy, especially if you're playing for a solid front nine finish. ## RISK VS REWARD This hole presents a classic risk/reward scenario in club selection and aggression level. The primary decision point comes with the approach shot - do you take enough club to ensure you reach the green, risking flying it if you catch it perfectly, or do you play more conservatively and accept the possibility of being short? Given the small green size, the reward for aggressive play is limited, while the penalty for missing can be severe. The smart play is typically to take one more club than you think you need and make a smooth, controlled swing rather than trying to muscle a shorter iron. ## DIFFERENT SKILL LEVELS **High Handicappers:** Focus on two solid, straight shots rather than trying to be overly precise. Use your driver off the tee if you can keep it in play, then select a club for your approach that you're confident you can hit solidly. Don't be afraid to aim for the center of the green regardless of pin position - making bogey here isn't a disaster given the hole's difficulty. **Low Handicappers:** This hole rewards tactical thinking and precise execution. Consider course conditions, pin position, and your confidence level with longer irons when developing your strategy. You have the skills to be more aggressive, but Pete Dye designs often punish overconfidence. Play within yourself and trust your swing - par here is always a good score. The 9th hole at Blackwolf Run serves as an excellent test of your complete game, requiring distance, accuracy, and smart decision-making to navigate successfully. Embrace the challenge while respecting the hole's difficulty, and you'll find yourself well-positioned for a strong back nine.
Watch for
- Course conditioning and mapped hazards may affect line selection; confirm from the aerial.
Hole 9 Green Complex
Mapped green boundary
Green size: 6,771 sq ft
How did Hole 9 play?
How did this hole play today?
Frequently asked questions
Yardage reference: Championship tees · 485 yards.
What's the best strategy off the tee?
↓
For this 485-yard par 4, most players will hit driver to set up a comfortable approach.
How difficult is hole 9?
↓
This hole is one of the tougher holes on the course for most golfers. Key challenges include: long par 4, water in play, heavily bunkered.
How big is the green on hole 9?
↓
The green is fairly large with multiple pin positions. The green is wider than it is deep, rewarding shots that find the correct tier. Lag putting becomes important on longer putts.
What's a good score on hole 9?
↓
This hole is one of the tougher holes where par feels like birdie. A challenging par 4. Accept that bogey happens and avoid big numbers.