Hole 16 at Blackwolf Run Golf Course
- Par
- 5
- Yardage
- 590 yds
- Stroke index
- 12
- Hazards
- 4 bunkers
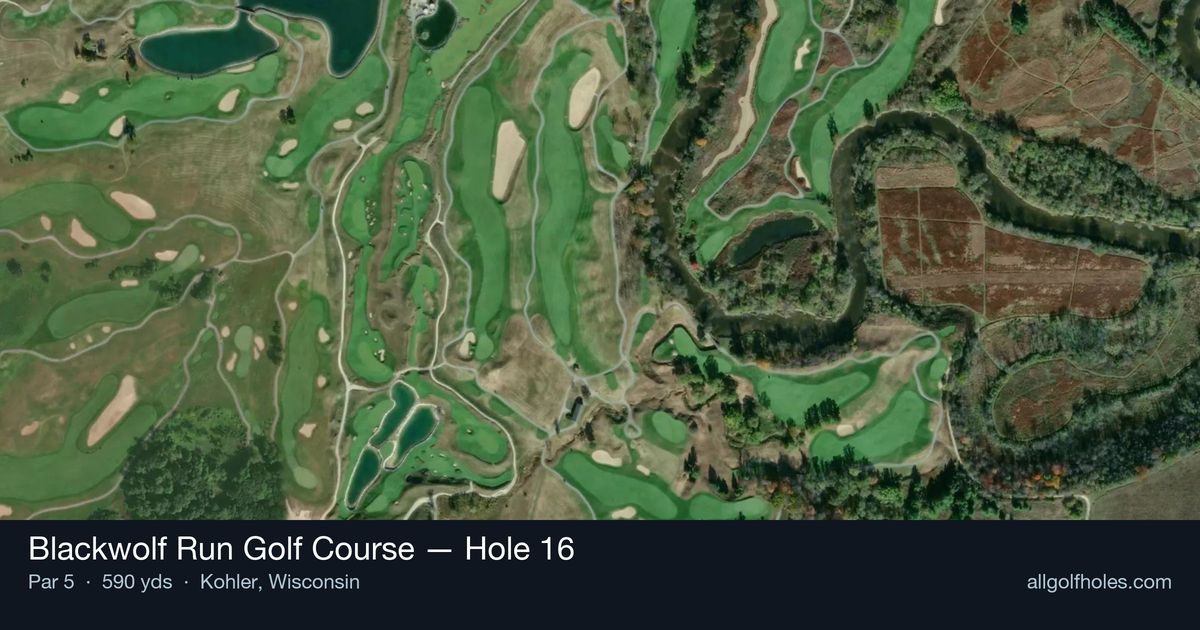
Aerial source not provided
Green size: 34 yds deep × 35 yds wide
Scorecard yardage is for Championship tees. The aerial shows its labeled reference position; distance rings measure to the green.
Championship tees · Par 5 · 590 yards
The plan for No. 16
The 16th hole at Blackwolf Run Golf Course presents a tantalizing scoring opportunity within Pete Dye's masterfully crafted closing stretch. This straight par 5 stretches 590 yards through the rolling Wisconsin prairie, offering golfers a genuine birdie chance before tackling the demanding final two holes. The generous fairway welcomes aggressive tee shots, while the approach requires precision to a compact green complex that embodies Dye's subtle yet devilish design philosophy. Carved from the glacial landscape that defines this championship venue, the hole rewards strategic thinking and solid execution. As part of holes 14-18 - considered one of golf's strongest finishing stretches - this par 5 provides the perfect setup for a memorable conclusion to your round at this acclaimed Kohler destination.
Off the tee
The tee shot strategy centers on finding the optimal position for your second shot while maximizing distance. With no significant hazards to avoid, longer hitters can unleash the driver with confidence, aiming down the center of the fairway. The key consideration is wind direction and course conditions, as the glacially-carved terrain can create unpredictable bounces. Mid-handicap players should focus on finding the fairway first, as the length of the hole demands every yard possible. Consider the pin position when selecting your target line – a back pin might favor a slightly right approach angle, while front pins reward a more centered approach.
Approach & recovery
Your approach strategy depends entirely on your tee shot success and personal distance capabilities. Stronger players reaching the landing zone around 280-300 yards face a critical decision: attempt to reach the small green in two or lay up to ideal wedge distance. The small green size makes going for it in two a high-risk proposition, especially with longer irons or fairway woods. When laying up, target the 100-120 yard range to leave a comfortable wedge shot. Pay attention to the green's surroundings – Pete Dye designs typically feature subtle collection areas and slopes that can help or hurt depending on your approach angle.
On the green
The small green demands precise distance control on your approach, whether it's your second or third shot. Expect typical Pete Dye green complexes with subtle breaks and potentially challenging pin positions. The putting surfaces at Blackwolf Run are known for their speed and trueness, so trust your read and commit to your line. Focus on getting your approach shot below the hole when possible, as uphill putts are generally more manageable on faster greens. The compact size means most putts will be relatively short, making this a hole where you can be aggressive with your putting. ## RISK VS REWARD This hole presents a clear risk/reward scenario that varies by skill level. The reward is substantial – a legitimate birdie opportunity in a challenging stretch of holes. The risk lies primarily in the small green target and the potential for a difficult up-and-down if you miss. Going for the green in two offers the highest reward but carries the risk of a challenging recovery shot. The conservative play of laying up virtually guarantees a good look at birdie with a short iron approach, making it the percentage play for most golfers. ## DIFFERENT SKILL LEVELS **Low Handicappers**: Consider going for the green in two if you can reach it with a mid-iron or better. The small target demands precision, but the scoring opportunity is worth the risk early in your round. Late in competitive rounds, the conservative layup might be the smarter play. **Mid Handicappers**: Focus on two solid shots to reach comfortable wedge distance. This hole rewards patience and course management. A well-executed three-shot strategy should yield birdie opportunities regularly. **High Handicappers**: Treat this as a three-shot hole from the start. Focus on advancing the ball with each shot while staying in play. The absence of major hazards makes this hole more forgiving than many Pete Dye designs, so play within your abilities and take advantage of the scoring opportunity. The 16th hole at Blackwolf Run exemplifies strategic golf design – offering genuine birdie chances while punishing poor decisions. Smart course management and precise execution on the approach shot are the keys to capitalizing on this scoring opportunity before tackling the challenging final two holes.
Watch for
- Course conditioning and mapped hazards may affect line selection; confirm from the aerial.
Hole 16 Green Complex
Mapped green boundary
Green size: 5,809 sq ft
How did Hole 16 play?
How did this hole play today?
Frequently asked questions
Yardage reference: Championship tees · 590 yards.
Can this par 5 be reached in two?
↓
At 590 yards, A true three-shot hole for most players. Position your layup to leave a comfortable wedge distance.
How difficult is hole 16?
↓
This hole is a moderate challenge for most golfers. Key challenges include: long par 5, heavily bunkered.
How big is the green on hole 16?
↓
The green is medium-sized with moderate targets. Pay attention to pin placement when selecting your approach club.
Which side of the fairway is safer on hole 16?
↓
Aim for the right side of the fairway when possible. Missing left brings more trouble into play.
What's a good score on hole 16?
↓
This hole is a true three-shot hole where birdie requires execution. This longer par 5 demands patience. Two good shots set up the scoring opportunity.