Hole 13 at Blackwolf Run Golf Course
- Par
- 4
- Yardage
- 341 yds
- Stroke index
- 8
- Hazards
- 4 bunkers · Water
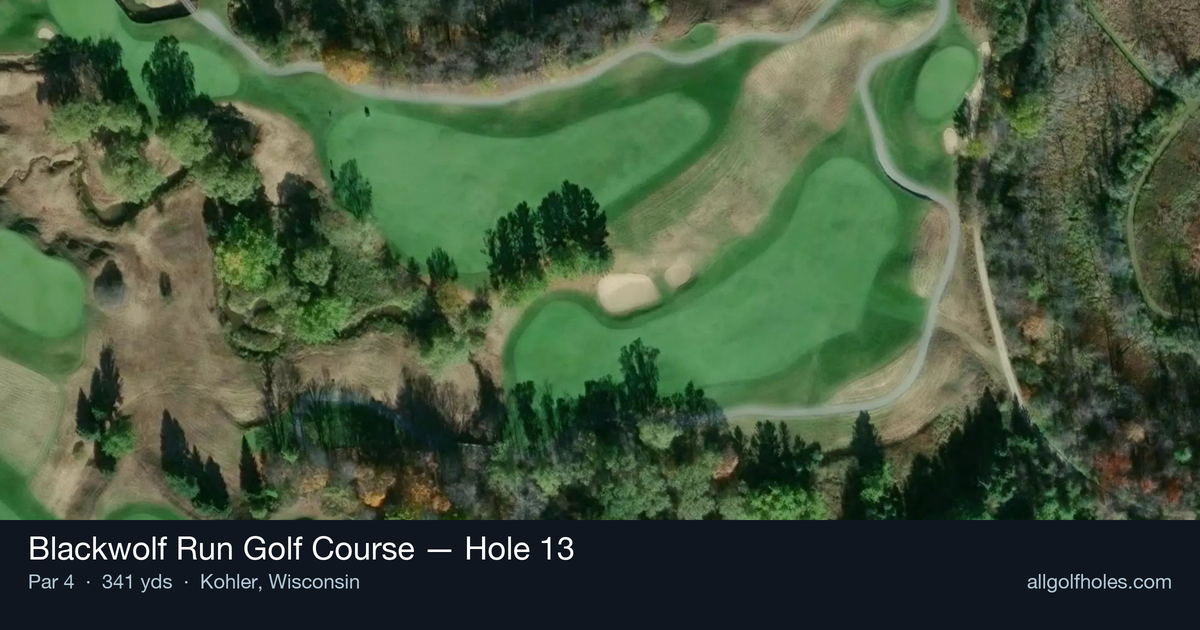
Aerial source not provided
Green size: 32 yds deep × 26 yds wide
Scorecard yardage is for Championship tees. The aerial shows its labeled reference position; distance rings measure to the green.
Championship tees · Par 4 · 341 yards
The plan for No. 13
The 13th hole at Blackwolf Run Golf Course presents a deceptively strategic par 4 that epitomizes Pete Dye's masterful design philosophy. At 341 yards, this straight hole appears straightforward from the tee, but the river running along the right side creates an immediate visual and psychological challenge. The tee shot demands precision over distance, as the generous fairway narrows considerably as it approaches the small green complex. What makes this hole particularly memorable is the approach shot to a green surrounded by Dye's signature railroad ties, creating an intimidating target that sits slightly right and downhill from the fairway. The combination of river proximity and the compact green requires golfers to commit fully to their club selection and execution, making this mid-length par 4 one of Blackwolf Run's most engaging strategic tests.
Off the tee
Target the left-center of the fairway to provide the safest line away from the river hazard on the right. A controlled drive with a fairway wood or long iron may be the smart play here, as finding the fairway is more important than maximizing distance on this shorter hole. The key is leaving yourself in the optimal position for your approach shot rather than getting too aggressive and potentially finding trouble. Pay attention to wind conditions, as they can push shots toward the river hazard.
Approach & recovery
With the green sitting slightly right and downhill, your approach angle becomes critical. From the left side of the fairway, you'll have a better angle to attack most pin positions while avoiding the railway ties that frame Pete Dye's signature green complex. Club selection should favor accuracy over aggression - a smooth swing with a mid-iron will serve you better than forcing a shorter club. The small green size means precision is paramount, so focus on the center of the green unless the pin position clearly favors a more aggressive line.
On the green
Pete Dye's railway tie framing around this green creates both visual intimidation and practical challenges for recovery shots. The downhill slope to the green means approach shots can release more than expected, so factor this into your club selection. Putting on this small green requires careful attention to subtle breaks, particularly those influenced by the surrounding terrain and the river's proximity. ## RISK VS REWARD The primary risk/reward decision comes with tee shot strategy - aggressive drivers may reach optimal approach distances but risk finding the river or rough. Conservative players who lay back with position-focused tee shots set up more manageable approach shots to the small target. The reward for precise execution is a genuine birdie opportunity, while poor execution can quickly lead to big numbers. ## DIFFERENT SKILL LEVELS **High-handicap players** should prioritize keeping the ball in play off the tee, even if it means using a hybrid or long iron. Focus on finding the fairway and giving yourself the best chance for a clean approach to the center of the green. Avoid the temptation to get aggressive with the driver on this shorter hole. **Low-handicap players** can be more aggressive with driver placement, using the extra distance to set up shorter approach shots. However, course management remains key - the small green and surrounding hazards punish even slightly off-target shots. Consider pin position when determining your optimal tee shot target line and approach strategy. This hole exemplifies Pete Dye's design philosophy where strategic thinking and precise execution matter more than raw power, making it a true test of golf strategy and course management skills.
Watch for
- Course conditioning and mapped hazards may affect line selection; confirm from the aerial.
Hole 13 Green Complex
Mapped green boundary
Green size: 4,594 sq ft
How did Hole 13 play?
How did this hole play today?
Frequently asked questions
Yardage reference: Championship tees · 341 yards.
What's the best strategy off the tee?
↓
For this 341-yard par 4, most players will hit 3-wood or driver to set up a comfortable approach.
How difficult is hole 13?
↓
This hole is a moderate challenge for most golfers. Key challenges include: water in play, heavily bunkered.
How big is the green on hole 13?
↓
The green is medium-sized with moderate targets. Pay attention to pin placement when selecting your approach club.
What's a good score on hole 13?
↓
This hole is a birdie opportunity if you find the fairway. This shorter par 4 rewards accuracy off the tee with a short iron approach.