Hole 10 at Blackwolf Run Golf Course
- Par
- 4
- Yardage
- 382 yds
- Stroke index
- 10
- Hazards
- 4 bunkers
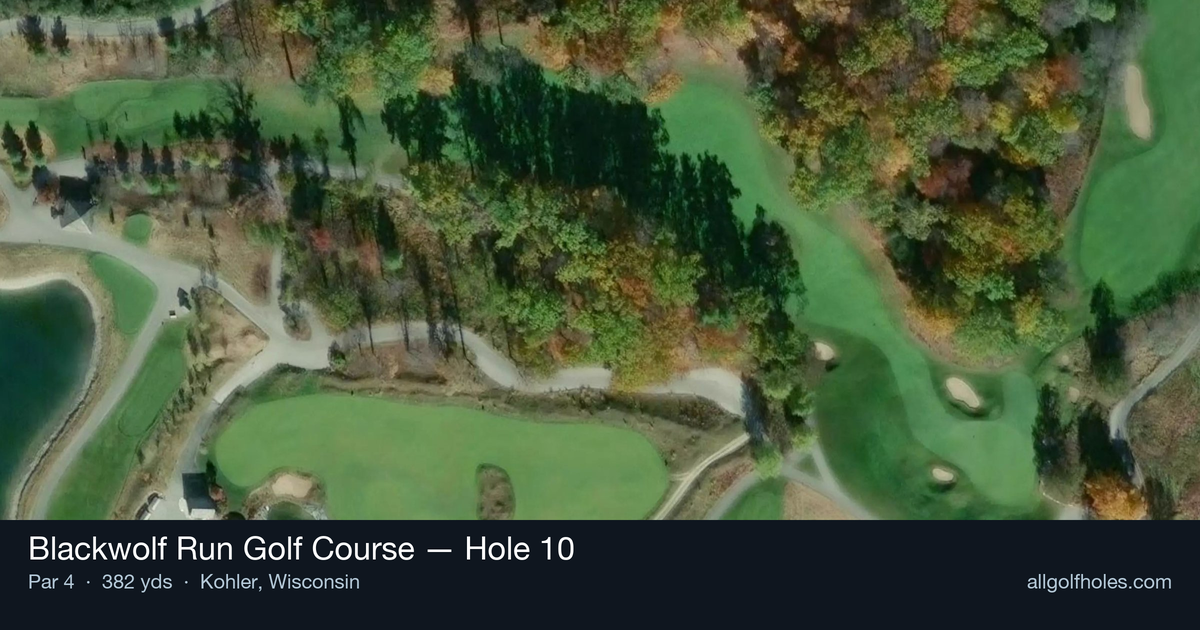
Aerial source not provided
Green size: 30 yds deep × 25 yds wide
Scorecard yardage is for Championship tees. The aerial shows its labeled reference position; distance rings measure to the green.
Championship tees · Par 4 · 382 yards
The plan for No. 10
Following the legendary "Cathedral Spires" 9th hole, Blackwolf Run Golf Course hole 10 begins the back nine with Pete Dye's signature subtlety on full display. This 382-yard par 4 presents a deceptively straightforward challenge through the glacially-carved Wisconsin landscape. The generous fairway invites an aggressive tee shot, but Dye's strategic bunkering and undulating terrain demand precision over power. Rolling prairies and oak savannahs frame the hole, creating a natural amphitheater that showcases the course's championship pedigree. The approach shot plays to a compact green complex that rewards accurate iron play while punishing wayward attempts. As part of the "finest three holes around the turn," this opening back-nine hole seamlessly transitions golfers from Blackwolf Run's front nine drama into the equally compelling homeward stretch.
Off the tee
Your tee shot strategy should focus on finding the ideal position for your approach rather than maximum distance. The fairway offers multiple landing zones, but positioning is crucial for attacking the small green effectively. A well-struck driver or 3-wood should target the center-left portion of the fairway, providing the best angle for your approach shot. Avoid the temptation to aim too far right, as this can create difficult angles to certain pin positions. The key is maintaining good tempo and finding the fairway - Pete Dye courses reward accuracy over raw power, and this hole exemplifies that principle perfectly.
Approach & recovery
The approach shot to this small green demands precision club selection and committed execution. With the green's compact size, your margin for error is limited, making distance control paramount. Depending on your tee shot position, you'll likely face a mid-iron to short-iron approach. Focus on the center of the green rather than attacking pins, especially when they're tucked near edges. The small target requires a confident, committed swing - tentative approaches often find trouble around Pete Dye greens. Pay attention to wind conditions, as they can significantly affect club selection on this exposed hole.
On the green
The small green creates interesting putting challenges despite its size. Subtle slopes and contours typical of Dye designs can create deceptive breaks, so take time to read your putts carefully. Speed control becomes critical on the smaller surface - aggressive putts can easily run off the green. When facing longer putts, focus on lag putting to ensure your next putt is makeable. The compact green means even modest misreads can leave you with challenging comeback putts. ## RISK VS REWARD This hole offers a more conservative risk/reward profile compared to some of Dye's more dramatic designs. The primary reward comes from precise execution rather than aggressive lines. Players who consistently find the fairway and attack the center of the green will score well over time. The main risk lies in trying to be too precise with approach shots to difficult pin positions. Smart course management suggests playing to the fat part of the green and relying on your putting to create scoring opportunities. ## DIFFERENT SKILL LEVELS **High-Handicap Players:** Focus on keeping the ball in play off the tee, even if it means using a hybrid or long iron for accuracy. Aim for the center of the green on your approach, regardless of pin position. Two-putting from anywhere on this small green represents solid execution. **Low-Handicap Players:** Use your distance control skills to attack specific sections of the green based on pin position. Consider how your tee shot position affects approach angles, and don't hesitate to work the ball when conditions favor it. Your short game skills become crucial around this small target. **Mid-Handicap Players:** Strike a balance between aggression and conservation. Find the fairway with your most reliable tee shot, then commit fully to your approach club selection. This hole rewards confident, committed swings over tentative attempts. The 10th hole at Blackwolf Run exemplifies why this course has earned its reputation among America's finest. Success here comes from embracing Pete Dye's strategic philosophy: precision over power, patience over aggression, and smart course management over heroic shots.
Watch for
- Course conditioning and mapped hazards may affect line selection; confirm from the aerial.
Hole 10 Green Complex
Mapped green boundary
Green size: 4,287 sq ft
How did Hole 10 play?
How did this hole play today?
Frequently asked questions
Yardage reference: Championship tees · 382 yards.
What's the best strategy off the tee?
↓
For this 382-yard par 4, most players will hit driver to set up a comfortable approach.
How difficult is hole 10?
↓
This hole is a moderate challenge for most golfers. Key challenges include: heavily bunkered, small green.
How big is the green on hole 10?
↓
The green is small and requires precision. Expect challenging pin positions with limited room for error.
What's a good score on hole 10?
↓
This hole is a medium-length test where par is a solid result. A straightforward par 4 where course management pays off.