Hole 14 at Blackwolf Run Golf Course
- Par
- 4
- Yardage
- 423 yds
- Stroke index
- 6
- Hazards
- 2 bunkers · Water
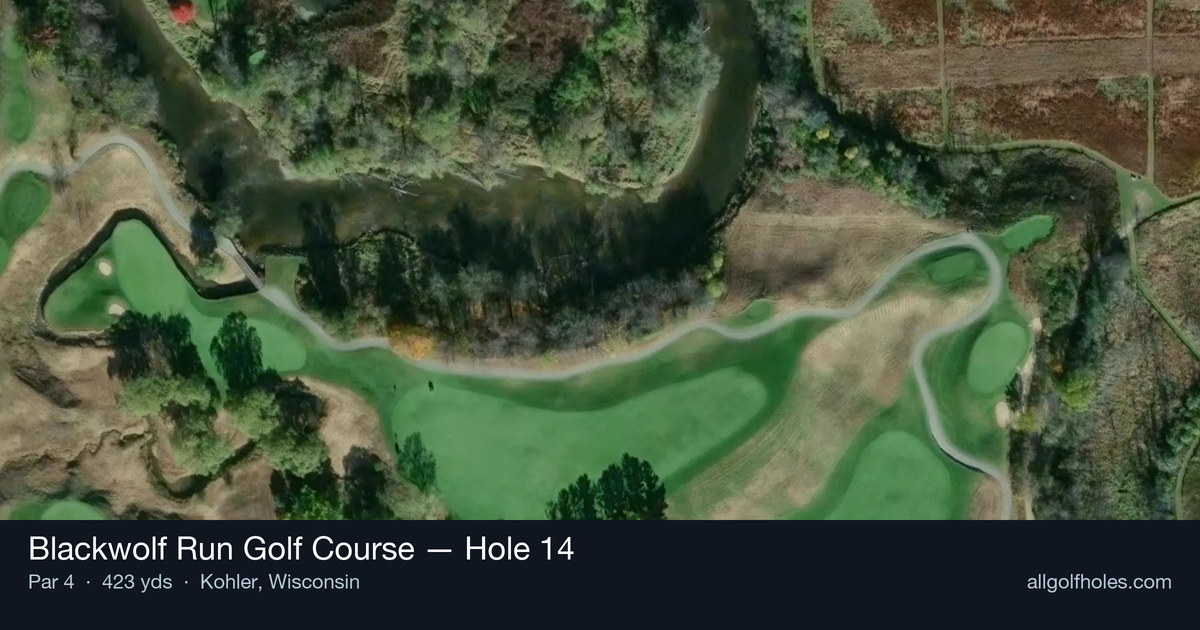
Aerial source not provided
Green size: 30 yds deep × 41 yds wide
Scorecard yardage is for Championship tees. The aerial shows its labeled reference position; distance rings measure to the green.
Championship tees · Par 4 · 423 yards
The plan for No. 14
The 14th hole at Blackwolf Run Golf Course epitomizes Pete Dye's masterful design philosophy, presenting a deceptively challenging par 4 that demands both power and precision. This 423-yard test features a straightforward tee shot to a generous fairway, but the real drama unfolds on the approach. The second shot requires a precise carry over a dramatic deep ravine to reach a small green perched dramatically on an elevated plateau. Steep slopes and strategically placed bunkers guard the putting surface, creating a high-risk, high-reward scenario that punishes anything less than perfect execution. This signature hole showcases Dye's genius for creating strategic dilemmas where accuracy trumps distance, making it one of Blackwolf Run's most memorable and photographed challenges.
Off the tee
Your tee shot strategy should focus on finding the optimal position for your approach rather than maximizing distance. A well-struck drive of about 250-270 yards will leave you in prime position for the approach. The key is staying in the center of the fairway to give yourself the best angle and lie for the challenging second shot. Avoid the temptation to bomb driver if it compromises accuracy - a smooth 3-wood or hybrid might be the smarter play depending on conditions and your confidence level.
Approach & recovery
This is where the hole's true character emerges. The approach shot requires a precise carry over the deep ravine to reach the green perched on its plateau. Club selection is critical - take enough club to clear the hazard comfortably, typically a mid-iron to long-iron depending on your position and pin location. Aim for the center of the green rather than attacking pins, as the small target and surrounding bunkers punish aggressive plays. The elevated nature of the green means shots will play shorter than the yardage suggests, so factor this into your club selection.
On the green
The small, elevated green demands respect with your putting approach. Expect subtle breaks that can be difficult to read from the fairway below. Lag putting is essential here - focus on getting your first putt close rather than being aggressive with longer attempts. The plateau setting means putts can gain speed quickly, especially if you're putting downhill. Take time to read the green carefully, as three-putts can quickly turn a good approach shot into a disappointing score. ## RISK VS REWARD The primary risk/reward decision comes on the approach shot. The conservative play is aiming for the center of the green with a club that ensures you clear the ravine comfortably. The reward for precision is a legitimate birdie opportunity on this challenging hole. However, the penalty for coming up short or missing the small target is severe - you'll likely face a difficult recovery shot from the ravine or surrounding bunkers. ## DIFFERENT SKILL LEVELS **Higher Handicap Players:** Focus on course management over heroics. Use a conservative tee shot that keeps you in play, then take plenty of club on the approach to ensure you clear the ravine. Aim for the center of the green and be satisfied with par - it's a good score here. **Lower Handicap Players:** You can be more aggressive with your positioning off the tee to set up optimal approach angles. Still respect the ravine carry, but you can attack pins more confidently with precise iron play. This hole rewards the player who can execute under pressure with proper club selection and commitment to the shot. The 14th hole at Blackwolf Run is a masterclass in strategic golf design that demands both mental fortitude and precise execution - embrace the challenge and trust your swing over the intimidating carry.
Watch for
- Course conditioning and mapped hazards may affect line selection; confirm from the aerial.
Hole 14 Green Complex
Mapped green boundary
Green size: 7,032 sq ft
How did Hole 14 play?
How did this hole play today?
Frequently asked questions
Yardage reference: Championship tees · 423 yards.
What's the best strategy off the tee?
↓
For this 423-yard par 4, most players will hit driver to set up a comfortable approach.
How difficult is hole 14?
↓
This hole is a moderate challenge for most golfers. Key challenges include: water in play, large green requiring good lag putting.
What hazards should I watch out for on hole 14?
↓
Key hazards include: 2 greenside bunkers; water at 400.2 yards. Plan your shots to avoid these trouble spots.
How big is the green on hole 14?
↓
The green is fairly large with multiple pin positions. Lag putting becomes important on longer putts.