Hole 12 at Blackwolf Run Golf Course
- Par
- 4
- Yardage
- 461 yds
- Stroke index
- 2
- Hazards
- 3 bunkers
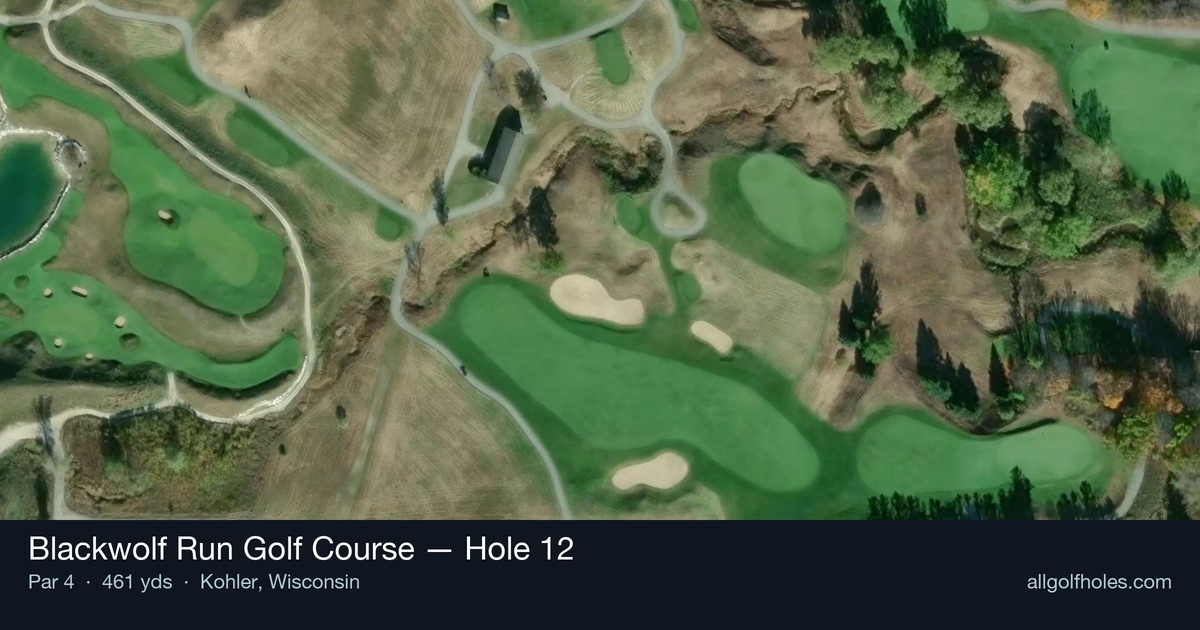
Aerial source not provided
Green size: 40 yds deep × 32 yds wide
Scorecard yardage is for Championship tees. The aerial shows its labeled reference position; distance rings measure to the green.
Championship tees · Par 4 · 461 yards
The plan for No. 12
The second-hardest hole at Blackwolf Run Golf Course, this demanding 461-yard par 4 embodies Pete Dye's "subtly devilish" design philosophy. Known as "Long Lagoon," this straight but unforgiving test requires both power and precision from the championship tees. The tee shot must navigate Pete Dye's signature strategic elements carved into the glacial landscape, demanding accurate placement to set up the crucial approach shot. The small green complex showcases classic Dye bunker work, with well-guarded sand traps that punish wayward approaches. Playing particularly challenging when facing Wisconsin's prevailing winds, this hole separates skilled players from pretenders. The combination of length, precise green complex, and strategic bunkering creates a memorable test that reflects Blackwolf Run's reputation as a major championship venue where every shot demands respect and execution.
Off the tee
The tee shot strategy centers on finding the optimal position for your approach rather than maximum distance. Target the center-right portion of the fairway to set up the best angle to the green. Most players will need driver or strong 3-wood to leave a manageable approach distance, but accuracy takes precedence over extra yards. The straight layout allows for an aggressive line, but maintain discipline with your target line to avoid rough that could complicate club selection on the approach.
Approach & recovery
The approach shot represents the hole's primary scoring challenge. With the green well-guarded by bunkers and compact in size, precision becomes paramount. Favor the center of the green regardless of pin position, as the small target leaves little margin for error. Club selection should account for the bunkers - it's better to be slightly long than short and caught in sand. Mid-iron to long-iron will typically be required depending on conditions and tee shot distance, making this a true test of iron play accuracy.
On the green
The small green demands respect with your putting approach. Focus on lag putting to the correct level, as three-putts can quickly turn a good hole into a disappointing score. Without specific break information, read the green carefully and prioritize getting your first putt close rather than being overly aggressive. The compact surface means most putts will be relatively straight, but speed control becomes critical on this smaller target. ## RISK VS REWARD This hole offers limited risk/reward opportunities, instead presenting a straightforward challenge of execution. The main decision point comes with approach club selection - taking enough club to clear the bunkers while still holding the small green. Conservative play targeting the center of the green typically yields the best results, as the bunkers make recovery shots difficult and the small green punishes misses. ## DIFFERENT SKILL LEVELS **High-Handicap Players:** Focus on course management over heroics. Consider laying up to a comfortable wedge distance if your typical approach iron lacks the precision needed for this small target. Two solid shots followed by a wedge often produces better scores than attempting a demanding long-iron approach. **Low-Handicap Players:** This hole rewards your best iron play. Be aggressive with your target line off the tee to optimize approach angle, then commit fully to your approach club selection. The small green demands Tour-level precision, making this an excellent opportunity to separate yourself from the field with quality ball-striking. The combination of length, a small green, and strategic bunkering makes this par 4 a quintessential Pete Dye challenge where patience and precision triumph over power and aggression.
Watch for
- Course conditioning and mapped hazards may affect line selection; confirm from the aerial.
Hole 12 Green Complex
Mapped green boundary
Green size: 7,257 sq ft
How did Hole 12 play?
How did this hole play today?
Frequently asked questions
Yardage reference: Championship tees · 461 yards.
What's the best strategy off the tee?
↓
For this 461-yard par 4, most players will hit driver to set up a comfortable approach.
How difficult is hole 12?
↓
This hole is a moderate challenge for most golfers. Key challenges include: long par 4, large green requiring good lag putting.
How big is the green on hole 12?
↓
The green is fairly large with multiple pin positions. The green is wider than it is deep, rewarding shots that find the correct tier. Lag putting becomes important on longer putts.
What's a good score on hole 12?
↓
This hole is one of the tougher holes where par feels like birdie. A challenging par 4. Accept that bogey happens and avoid big numbers.