Hole 2 at Blackwolf Run Golf Course
- Par
- 4
- Yardage
- 402 yds
- Stroke index
- 5
- Hazards
- 5 bunkers
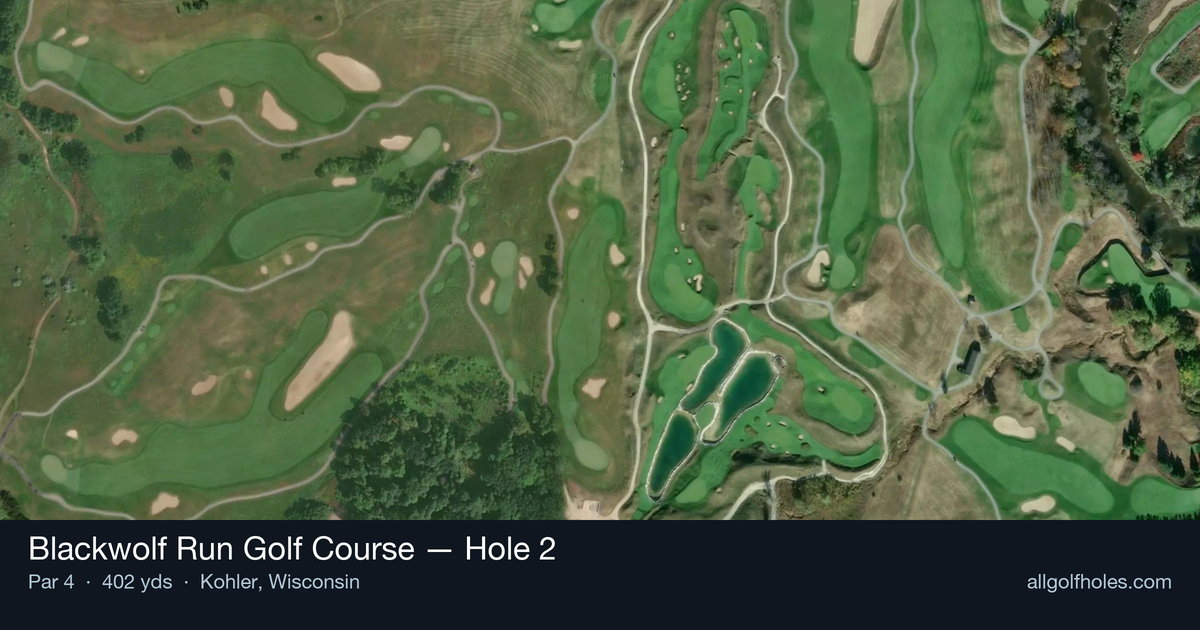
Aerial source not provided
Green size: 28 yds deep × 32 yds wide
Scorecard yardage is for Championship tees. The aerial shows its labeled reference position; distance rings measure to the green.
Championship tees · Par 4 · 402 yards
The plan for No. 2
The second hole at Blackwolf Run Golf Course presents a deceptively challenging 402-yard par 4 that embodies Pete Dye's subtle yet diabolical design philosophy. This straight-away layout demands precision from tee to green, with the small target green serving as the hole's primary defense. The tee shot plays across rolling Wisconsin terrain, offering golfers a generous fairway to work with, but the approach shot reveals the hole's true character. The compact green complex requires pinpoint accuracy with mid-to-short irons, leaving little margin for error on approach shots. Without the distraction of major hazards, golfers must focus entirely on execution and club selection. This early test at the historic venue, where Se Ri Pak made major championship history, sets the tone for the strategic challenges that define Blackwolf Run's championship pedigree.
Off the tee
The tee shot strategy centers on finding the optimal position in the fairway rather than maximum distance. Most golfers should focus on a controlled driver or 3-wood aimed at the center of the landing zone, leaving an approach shot of 120-150 yards depending on your driving distance. The straight layout allows for an aggressive target line down the middle, but course management suggests favoring the side that provides the best angle to the day's pin position. Given the hole's 402-yard length, even shorter hitters can reach this green in regulation with solid contact off the tee.
Approach & recovery
The approach shot represents the scoring opportunity on this hole, but the small green demands precision. A mid-iron to short-iron will typically be required, making club selection critical based on pin position and wind conditions. Without significant hazards protecting the green, the primary concern is distance control and avoiding short-sided positions. The small target means there's little margin for error, so err on the side of the center of the green rather than attacking difficult pin positions. Take one extra club if in doubt, as being long is often preferable to coming up short on a small green.
On the green
The small green size makes putting strategy relatively straightforward - focus on lag putting to avoid three-putts rather than aggressive birdie attempts from long range. The compact putting surface means most putts will have manageable break, but the reduced target area from your approach shot makes getting close to the pin more challenging. Pay attention to the green's subtle slopes and grain direction, as even small variations can significantly affect ball roll on a tight surface. ## RISK VS REWARD This hole offers a clear risk/reward scenario: the absence of major hazards allows for aggressive play, but the small green punishes wayward approach shots. The reward for precise play is a legitimate birdie opportunity, while the risk lies in missing the small target and facing difficult up-and-down situations. Smart golfers will play conservatively to the center of the green unless they have a short iron in hand and perfect conditions. ## DIFFERENT SKILL LEVELS **High-Handicap Players:** Focus on hitting the fairway with whatever club gives you confidence, even if it's a hybrid or long iron. Aim for the center of the green with your approach, taking an extra club to ensure you reach the putting surface. Don't be tempted to attack pins - par is an excellent score here. **Low-Handicap Players:** Use this hole as a scoring opportunity by finding the optimal side of the fairway for your approach angle. With a short iron in hand, you can be more aggressive with pin hunting, but still respect the small green size. Consider the pin position when selecting your tee shot target line to set up the best possible approach angle. The key to success on Blackwolf Run's second hole lies in recognizing that sometimes the most challenging holes are those without obvious trouble - the small green and moderate length create their own demands for precision and smart course management.
Watch for
- Course conditioning and mapped hazards may affect line selection; confirm from the aerial.
Hole 2 Green Complex
Mapped green boundary
Green size: 5,064 sq ft
How did Hole 2 play?
How did this hole play today?
Frequently asked questions
Yardage reference: Championship tees · 402 yards.
What's the best strategy off the tee?
↓
For this 402-yard par 4, most players will hit driver to set up a comfortable approach.
How difficult is hole 2?
↓
This hole is a moderate challenge for most golfers. Key challenges include: heavily bunkered.
How big is the green on hole 2?
↓
The green is medium-sized with moderate targets. Pay attention to pin placement when selecting your approach club.
Which side of the fairway is safer on hole 2?
↓
Aim for the left side of the fairway when possible. Missing right brings more trouble into play.