Hole 3 at Blackwolf Run Golf Course
- Par
- 3
- Yardage
- 182 yds
- Stroke index
- 15
- Hazards
- 4 bunkers
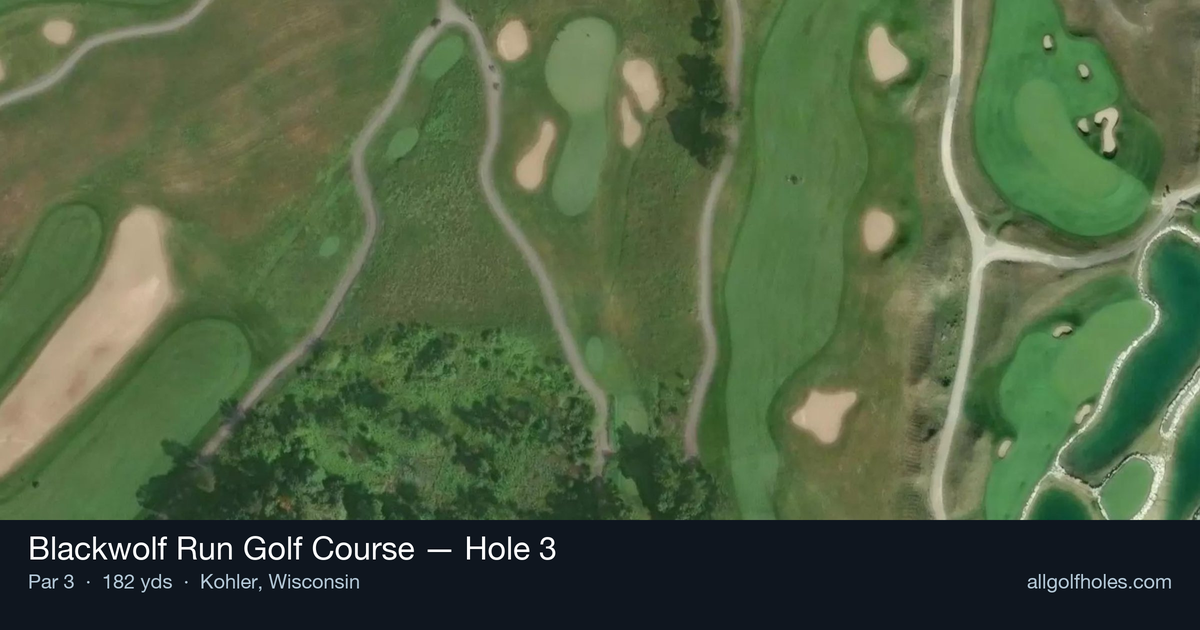
Aerial source not provided
Green size: 32 yds deep × 27 yds wide
Scorecard yardage is for Championship tees. The aerial shows its labeled reference position; distance rings measure to the green.
Championship tees · Par 3 · 182 yards
The plan for No. 3
The third hole at Blackwolf Run Golf Course presents a deceptively straightforward par 3 that embodies Pete Dye's philosophy of subtle challenge within natural beauty. At 182 yards, this tee shot demands precision over the glacially-carved terrain that defines this championship venue in Kohler, Wisconsin. The small green complex sits nestled within the rolling prairie landscape, where oak savannahs and native grasses frame your target. Without major hazards to intimidate, the hole's challenge lies in club selection and wind management across the open Wisconsin countryside. Pete Dye's architectural restraint shines here, allowing the natural topography to dictate strategy while rewarding accurate iron play. This early test sets the tone for the subtly devilish design that has made Blackwolf Run a major championship host, where precision trumps power in the quest for par.
Off the tee
Club selection is critical on this straight par 3, typically requiring a mid-iron to long-iron depending on wind conditions and pin position. Aim for the center of the small green rather than attacking pins, as the limited green surface makes precision more important than aggression. Take one extra club if you're between selections - being long is often better than coming up short on Pete Dye designs. Pay close attention to wind direction, as the exposed nature of many Blackwolf Run holes can significantly affect ball flight.
Approach & recovery
Since this is a par 3, your tee shot IS your approach shot. Focus on a smooth, controlled swing rather than trying to overpower the distance. The small green demands a high, soft-landing shot that will hold the putting surface. Consider the pin position when selecting your target line - with limited green space, you may need to aim away from tucked pins to ensure you find the putting surface. Trust your yardage and commit fully to your club selection.
On the green
The small green at the 3rd hole requires careful attention to speed control and break reading. With limited surface area, even minor misreads can result in putts rolling off the green or leaving difficult second putts. Focus on lag putting to the center of the green when facing longer putts, as getting close is more important than being aggressive. Pete Dye greens often feature subtle undulations that can be deceiving, so take time to read the slope from multiple angles. ## RISK VS REWARD This hole offers limited risk/reward opportunities, which is actually the strategic challenge. The temptation might be to attack pins, but the small green punishes aggressive play. The reward comes from playing conservatively to the center of the green and taking your par. Trying to get too cute with pin-seeking shots often results in missed greens and difficult up-and-downs, turning a scoring opportunity into a bogey. ## DIFFERENT SKILL LEVELS **High Handicappers:** Focus entirely on finding the green with a conservative club selection. Aim for the center of the green regardless of pin position, and take one extra club to ensure you carry any front trouble. A bogey from the middle of the green is better than a double from short of the target. **Low Handicappers:** While you can be more aggressive with pin positions, respect the small green size. Consider wind conditions and green firmness when selecting clubs, and don't be afraid to take the safe play to the fat part of the green. Your short game skills should allow you to get up and down from around the green if you do miss, but keeping the ball on the putting surface is still the priority. The 3rd hole at Blackwolf Run exemplifies Pete Dye's design philosophy - rewarding thoughtful, strategic play while punishing overly aggressive shots. Success here comes from disciplined club selection and committed execution rather than heroic shot-making.
Watch for
- Course conditioning and mapped hazards may affect line selection; confirm from the aerial.
Hole 3 Green Complex
Mapped green boundary
Green size: 5,149 sq ft
How did Hole 3 play?
How did this hole play today?
Frequently asked questions
Yardage reference: Championship tees · 182 yards.
What club should I use on this par 3?
↓
At 182 yards, most golfers will need a long iron or hybrid (5-iron to 6-iron) to reach this green. Adjust for elevation, wind, and pin position.
How difficult is hole 3?
↓
This hole is a moderate challenge for most golfers. Key challenges include: heavily bunkered.
What hazards should I watch out for on hole 3?
↓
Key hazards include: 4 greenside bunkers. Plan your shots to avoid these trouble spots.
How big is the green on hole 3?
↓
The green is medium-sized with moderate targets. Pay attention to pin placement when selecting your approach club.