Hole 15 at Blackwolf Run Golf Course
- Par
- 3
- Yardage
- 227 yds
- Stroke index
- 16
- Hazards
- Water
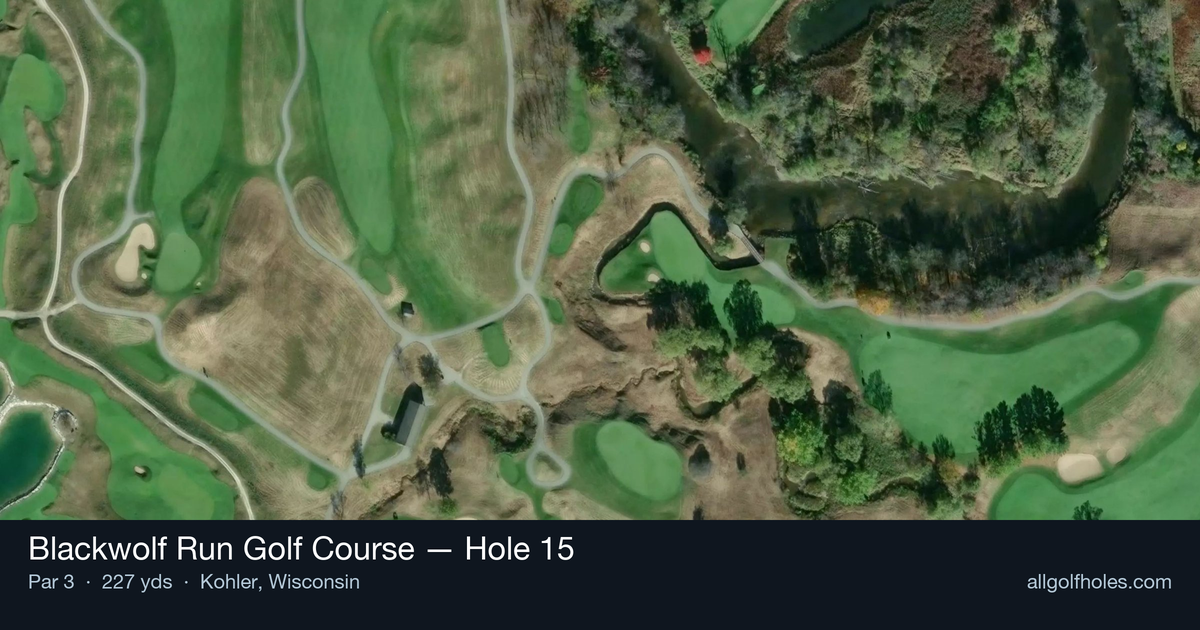
Aerial source not provided
Green size: 49 yds deep × 45 yds wide
Scorecard yardage is for Championship tees. The aerial shows its labeled reference position; distance rings measure to the green.
Championship tees · Par 3 · 227 yards
The plan for No. 15
The 15th hole at Blackwolf Run Golf Course epitomizes Pete Dye's devilish design philosophy, presenting a dramatic par 3 that plays 227 yards across a menacing ravine to a wild, undulating green. This signature hole showcases the glacier-forged terrain that defines the back nine, demanding both courage and precision from the elevated tee. The small green complex sits precariously beyond the chasm, offering little margin for error on what appears deceptively straightforward. Club selection becomes critical as players must account for the carry over the ravine while navigating swirling winds common to the exposed Wisconsin landscape. Miss short, and the ball disappears into the abyss; miss long or wide, and recovery becomes nearly impossible. This hole perfectly captures Meadow Valleys' reputation as both subtle and strategic, rewarding only the most committed swings.
Off the tee
Your tee shot strategy centers entirely on committing to the right club and trusting your swing. The 227-yard distance typically calls for a long iron or hybrid, but wind conditions and pin position significantly influence club selection. Aim for the center of the green regardless of pin position - the small target and severe consequences of missing make aggressive pin-hunting inadvisable for most players. Take one extra club if there's any doubt, as coming up short in the ravine leads to penalty strokes and big numbers. Focus on a smooth, controlled swing rather than trying to muscle the shot.
Approach & recovery
Since this is a par-3, your tee shot is your approach. The key is reading the wind correctly and accounting for the elevation change across the ravine. The "wild green" mentioned by course reviewers suggests significant undulation and challenging pin positions. When the pin is tucked near edges, still play to the fat part of the green - the small green size means even center-green putts will be makeable. In crosswinds, aim into the wind and let it bring the ball back to target.
On the green
Expect a challenging putting surface with multiple tiers and subtle breaks that can fool even experienced players. Pete Dye greens are notorious for their complexity, and this small target amplifies every imperfection in your approach. Study the green carefully during your pre-shot routine from the tee, as you'll get the best read of the overall slope and grain. Lag putting becomes crucial here - getting your first putt close is more important than being aggressive with birdie attempts. The undulating surface means speed control is as important as line. ## RISK VS REWARD This hole offers little in terms of risk/reward options - it's purely about execution and course management. The only "reward" is making par on a difficult hole, while the risks are substantial. Missing short means penalty strokes from the ravine, while missing long or wide often leaves challenging recovery shots. The smart play is always center green with the right club, accepting that par is an excellent score and bogey isn't disastrous given the 16 handicap rating. ## DIFFERENT SKILL LEVELS **High Handicappers:** Take an extra club and aim for the largest part of the green. Don't let the intimidating carry affect your swing - commit fully to your club selection and make a confident pass at the ball. If you're genuinely uncomfortable with the carry, consider playing a provisional ball to speed up play. **Low Handicappers:** You can be slightly more aggressive with pin position, but respect the small green size. Focus on distance control and trajectory - a higher shot will land softer on the firm surface. This is a hole where course management trumps heroics, even for skilled players. **Mid Handicappers:** Play conservatively but confidently. Choose your club based on your most reliable distance, not your maximum. The hole's difficulty means a well-struck shot to the center of the green often results in a better score than trying to get cute with pin position. This hole exemplifies Pete Dye's philosophy of rewarding precision over power, making it a true test of both skill and mental fortitude in the dramatic Wisconsin landscape.
Watch for
- Course conditioning and mapped hazards may affect line selection; confirm from the aerial.
Hole 15 Green Complex
Mapped green boundary
Green size: 11,485 sq ft
How did Hole 15 play?
How did this hole play today?
Frequently asked questions
Yardage reference: Championship tees · 227 yards.
What club should I use on this par 3?
↓
At 227 yards, most golfers will need a fairway wood or hybrid to reach this green. Adjust for elevation, wind, and pin position.
How difficult is hole 15?
↓
This hole is one of the tougher holes on the course for most golfers. Key challenges include: long par 3, water in play, large green requiring good lag putting.
What hazards should I watch out for on hole 15?
↓
Key hazards include: water at 113.6 yards. Plan your shots to avoid these trouble spots.
How big is the green on hole 15?
↓
The green is large and can play quite long. Three-putt territory if you don't manage your approach distance well.
What's a good score on hole 15?
↓
This hole is a challenging par where bogey is acceptable. This longer par 3 will test your long iron or hybrid game. Par is a good score.