Hole 11 at Blackwolf Run Golf Course
- Par
- 5
- Yardage
- 522 yds
- Stroke index
- 14
- Hazards
- 4 bunkers
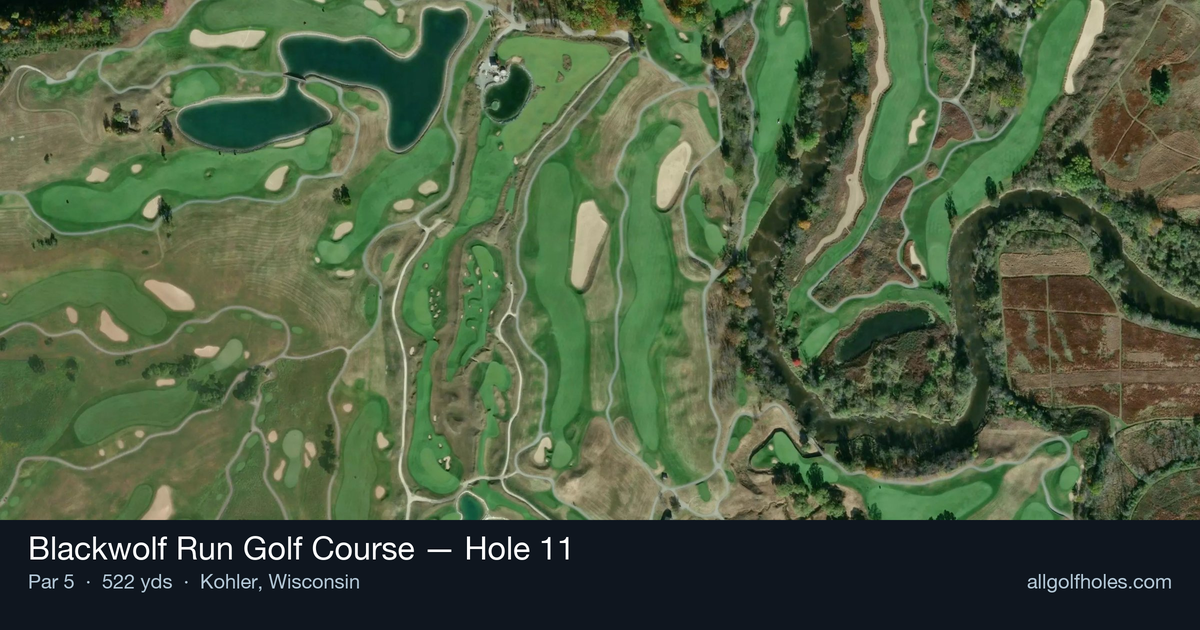
Aerial source not provided
Green size: 32 yds deep × 24 yds wide
Scorecard yardage is for Championship tees. The aerial shows its labeled reference position; distance rings measure to the green.
Championship tees · Par 5 · 522 yards
The plan for No. 11
The 11th hole at Blackwolf Run Golf Course presents a deceptively strategic par 5 that embodies Pete Dye's subtle brilliance across 522 yards of Wisconsin's glacial-carved terrain. This straight-away layout flows through the course's signature rolling prairies and oak savannahs, offering multiple route options that reward both power and precision. The generous fairway invites aggressive tee shots, but the hole's true character emerges in the approach phases, where the small green demands pinpoint accuracy from varying distances. Without traditional hazards to dictate strategy, golfers must rely on course management and green reading skills to navigate this seemingly straightforward test. The compact putting surface transforms what appears to be a birdie opportunity into a nuanced challenge that exemplifies Blackwolf Run's championship pedigree while remaining accessible to golfers of all abilities.
Off the tee
Your tee shot strategy should focus on finding the optimal position for your second shot rather than simply bombing it down the middle. With the fairway relatively open, most golfers can be aggressive with driver, aiming to get as close to the green as possible in two shots. The target line should favor the center of the fairway, giving you the best angle for your approach. Since there are no significant hazards mentioned, you can swing freely, but maintain good tempo and balance - Pete Dye courses often have subtle slopes and undulations that can kick errant shots into less favorable positions.
Approach & recovery
The approach shot is where this hole's true character emerges. With a small green as your target, precision becomes paramount over power. If you're within range to reach in two, carefully assess pin position and wind conditions before committing to an aggressive play. A mid-iron to long-iron layup to about 100-120 yards might be the smarter play, especially if the pin is tucked in a challenging position. This leaves you with a comfortable wedge distance where you can attack the flag with confidence. The small green means there's little margin for error, so prioritize hitting the putting surface over getting close to the pin.
On the green
Pete Dye greens are notorious for their subtle breaks and challenging pin positions, and this small green likely amplifies those characteristics. Take extra time to read the slopes, as what appears straight may have significant break. The compact size means most putts will be relatively short, but don't underestimate the difficulty - small greens often feature more dramatic contours to compensate for their size. Focus on getting your first putt to the hole rather than being overly aggressive, as three-putts on small greens can be particularly frustrating. ## RISK VS REWARD This hole presents a classic risk/reward scenario typical of Pete Dye's design philosophy. The reward is clear - a reachable par 5 with minimal hazards offers excellent birdie and eagle opportunities. The risk lies in the small green that punishes imprecise approach shots. Going for the green in two is most rewarding when you have a mid-iron or shorter in your hands. With longer clubs, the smart play is often laying up to your favorite wedge distance, where you can be more aggressive with pin-seeking shots. ## DIFFERENT SKILL LEVELS **High-handicap players** should view this as a three-shot hole and focus on advancing the ball strategically. Play conservatively off the tee with a club that ensures you stay in the fairway, then hit two solid approach shots to set up a manageable third shot to the small green. The lack of major hazards means double bogeys should be avoidable with smart course management. **Low-handicap players** can be more aggressive, potentially reaching the green in two when conditions are favorable. However, even skilled players should respect the small green - sometimes laying up to a perfect wedge distance is the higher percentage play, especially in tournament situations where par is a good score and birdie is a bonus. The key for all skill levels is recognizing that Pete Dye's "subtle" design elements often reveal themselves through experience, so play within your capabilities while staying alert to the nuances that make this hole both scoreable and potentially treacherous.
Watch for
- Course conditioning and mapped hazards may affect line selection; confirm from the aerial.
Hole 11 Green Complex
Mapped green boundary
Green size: 4,942 sq ft
How did Hole 11 play?
How did this hole play today?
Frequently asked questions
Yardage reference: Championship tees · 522 yards.
Can this par 5 be reached in two?
↓
At 522 yards, A true three-shot hole for most players. Position your layup to leave a comfortable wedge distance.
How difficult is hole 11?
↓
This hole is a good scoring opportunity for most golfers. Key challenges include: heavily bunkered.
How big is the green on hole 11?
↓
The green is medium-sized with moderate targets. Pay attention to pin placement when selecting your approach club.
What's a good score on hole 11?
↓
This hole is a solid birdie opportunity with smart layup strategy. Most golfers can reach in three. Position your layup to leave a comfortable wedge.