Hole 6 at Cog Hill Golf & CC (Dubsdread)
- Par
- 3
- Yardage
- 240 yds
- Stroke index
- 15
- Hazards
- 3 bunkers
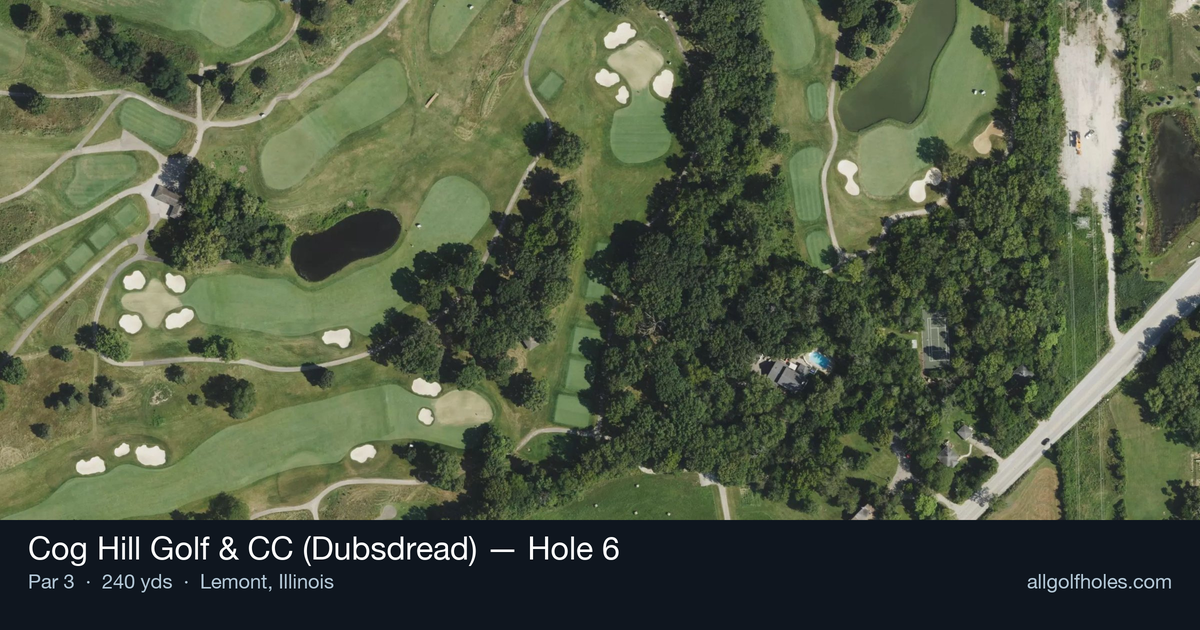
Aerial source not provided
Green size: 31 yds deep × 34 yds wide
Scorecard yardage is for Championship tees. The aerial shows its labeled reference position; distance rings measure to the green.
Championship tees · Par 3 · 240 yards
The plan for No. 6
The sixth hole at Cog Hill Golf & CC (Dubsdread) presents a deceptively challenging par 3 that embodies the course's notorious reputation. At 240 yards, this lengthy one-shotter demands a confident tee shot across natural prairie terrain dotted with wildflowers that create both beauty and intimidation. The small green complex sits like an island target, requiring precise distance control and unwavering accuracy. While the hole lacks water hazards, the premium lies entirely on finding the putting surface with your opening shot. Miss the green, and recovery becomes a delicate proposition around the compact target. This mid-length par 3 exemplifies Dubsdread's philosophy of rewarding precision over power, making it a true test of iron play that separates confident ball-strikers from those who struggle with commitment on longer par 3s.
Off the tee
Your tee shot strategy centers entirely around club selection and commitment to your swing. Most golfers will need anything from a 5-iron to a hybrid or fairway wood depending on conditions and individual distance capabilities. The key is selecting enough club to comfortably reach the green without forcing a swing that compromises accuracy. Take careful note of wind conditions, as they'll significantly impact club selection on this lengthy par 3. A headwind can easily add two clubs to your selection, while a tailwind might allow you to swing more smoothly with less club. Commit fully to your club choice and make a confident, controlled swing rather than trying to muscle a shorter iron.
Approach & recovery
Since this is a par 3, your tee shot IS your approach shot. The small green demands pinpoint accuracy, so aim for the center of the green regardless of pin position. This conservative target line gives you the best chance of finding the putting surface and avoiding the trouble that likely surrounds this green. Focus on a smooth tempo and solid contact rather than trying to attack specific pin positions. The green's small size means even a shot to the center will leave you with a reasonable putt for birdie, while missing the green entirely can lead to bogey or worse.
On the green
With a small green, you'll want to be aggressive with your putting once you've successfully found the surface. The shorter putts typical on a compact green should be attacked, as leaving birdie putts short on a hole this challenging would be a missed opportunity. Pay attention to the overall slope and drainage of the green. Small greens often have subtle but important breaks that can be difficult to read. Take your time with green reading, as two-putting from anywhere on this green should be your minimum expectation after executing a good tee shot. ## RISK VS REWARD The primary risk/reward decision comes in club selection. Playing aggressively with just enough club to reach the green in perfect conditions leaves you vulnerable to coming up short, while taking an extra club ensures you'll reach the green but might leave you with a more challenging distance if you catch it perfectly. The reward for finding this green is significant - a legitimate birdie opportunity on a hole where many players will struggle to make par. The risk of missing the green entirely, however, makes conservative play the smart strategy for most golfers. ## DIFFERENT SKILL LEVELS **High Handicappers:** Focus entirely on making solid contact and reaching the green. Don't worry about pin position - aim for the center of the green and be satisfied with a two-putt par. Consider taking one extra club to ensure you have enough distance, as coming up short is typically more costly than being slightly long. **Low Handicappers:** You can be more aggressive with pin hunting, especially if you're confident in your distance control. Still prioritize the center of the green on difficult pin positions, but don't hesitate to attack accessible pins. Your short game skills should give you confidence to be slightly more aggressive with club selection. **Course Management Tip:** This hole likely comes early in your round, so use it as a barometer for how your ball-striking is feeling. A solid result here can build confidence for the challenges ahead on this demanding course, while a poor result should remind you to play more conservatively until you find your rhythm. The 6th hole at Dubsdread exemplifies the course's reputation for testing every aspect of your game. Respect the distance, commit to your club selection, and focus on solid execution rather than trying to manufacture something special.
Watch for
- 3 mapped bunkers guard landing zones and/or the green.
- Tree-lined areas (4 mapped woodland zones) punish offline tee shots.
Hole 6 Green Complex
Mapped green boundary
Green size: 5,194 sq ft
How did Hole 6 play?
How did this hole play today?
Frequently asked questions
Yardage reference: Championship tees · 240 yards.
What club should I use on this par 3?
↓
At 240 yards, most golfers will need a fairway wood or hybrid to reach this green. Adjust for elevation, wind, and pin position.
How difficult is hole 6?
↓
This hole is a moderate challenge for most golfers. Key challenges include: long par 3.
What hazards should I watch out for on hole 6?
↓
Key hazards include: 3 greenside bunkers. Plan your shots to avoid these trouble spots.
How big is the green on hole 6?
↓
The green is medium-sized with moderate targets. Pay attention to pin placement when selecting your approach club.
What's a good score on hole 6?
↓
This hole is a challenging par where bogey is acceptable. This longer par 3 will test your long iron or hybrid game. Par is a good score.