Hole 12 at Cog Hill Golf & CC (Dubsdread)
- Par
- 3
- Yardage
- 216 yds
- Stroke index
- 18
- Hazards
- 2 bunkers
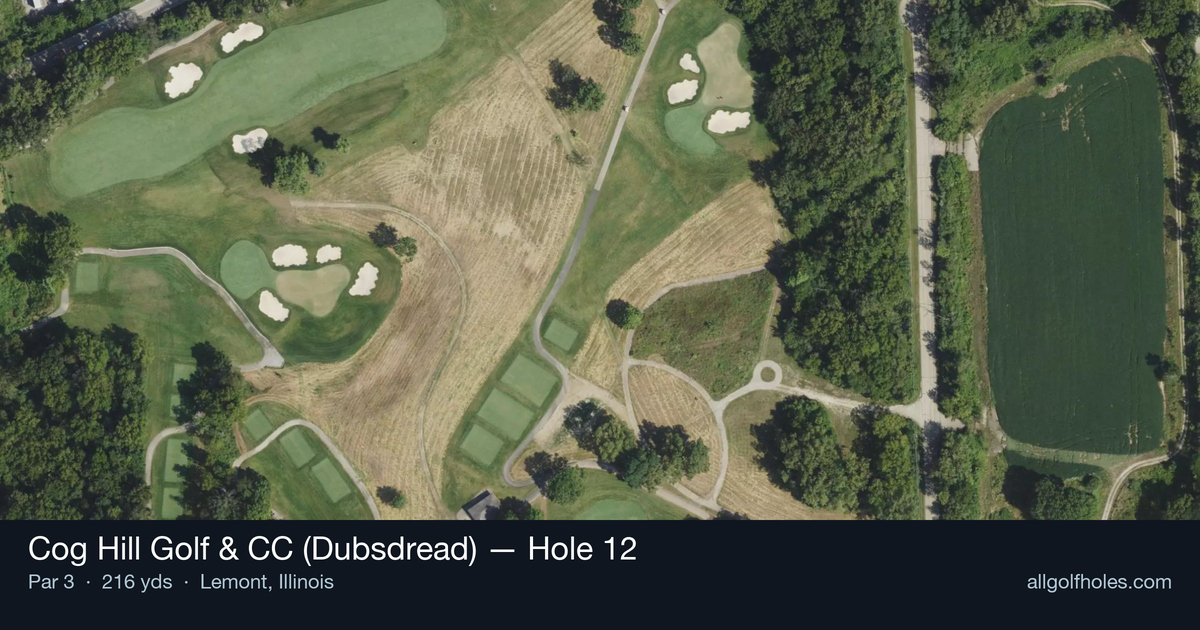
Aerial source not provided
Green size: 41 yds deep × 41 yds wide
Scorecard yardage is for Championship tees. The aerial shows its labeled reference position; distance rings measure to the green.
Championship tees · Par 3 · 216 yards
The plan for No. 12
The 12th hole at Cog Hill Golf & CC (Dubsdread) presents a deceptively challenging par 3 that embodies the course's fearsome reputation. At 216 yards, this straightaway one-shot hole demands precision and club selection confidence from an elevated tee to a compact, well-defended green complex. While lacking the dramatic water hazards found elsewhere on Dubsdread, the hole's difficulty lies in its unforgiving green size and subtle undulations that punish anything but the most accurate tee shots. The relatively benign appearance masks the precision required to find and hold this small target, especially when Chicago's notorious winds factor into play. As the 18th handicap hole, it offers a brief respite in difficulty but still upholds Dubsdread's relentless standard of excellence that has challenged PGA Tour professionals for decades.
Off the tee
Club selection is paramount on this long par 3. Most golfers will need anything from a long iron to a hybrid or fairway wood, depending on conditions and pin position. The key is committing fully to your club choice - indecision leads to poor swings and missed greens. Take one more club than you think you need and make a smooth, controlled swing rather than trying to muscle a shorter iron. Aim for the center of the green regardless of pin position, as the small target leaves little room for error when attacking flags.
Approach & recovery
Since this is a par 3, your tee shot IS your approach shot. Focus on tempo and balance throughout your swing. The straight hole layout means you can be aggressive with your target line, but the small green size demands respect. Consider the wind direction carefully - Chicago's notorious breezes can turn a well-struck shot into trouble quickly. If the pin is tucked in a corner, resist the temptation to get too precise unless you're supremely confident in your ball-striking.
On the green
The small green creates challenging putting scenarios, as most approach shots that find the putting surface may still leave longer putts than expected. Focus on two-putting from anywhere on the green rather than being overly aggressive. Speed control becomes crucial on a compact surface where running putts well past the hole can leave difficult comeback attempts. Study the overall slope and grain of the green during your approach to get an early read on potential break patterns. ## RISK VS REWARD The primary risk/reward decision comes in club selection and target choice. The reward for aggressive play (attacking pins) is minimal compared to the risk of missing the small green entirely. The smart play is always center of the green, taking your par and moving on. This philosophy aligns with Dubsdread's reputation - the course challenges you on every hole, so banking pars where possible is essential for a good round. ## DIFFERENT SKILL LEVELS **High-Handicap Players:** Focus entirely on finding the green with your most reliable long club. Don't worry about pin position - aim dead center and be thrilled with any putt for birdie. Consider playing for the front edge of the green to ensure you don't come up short. A bogey here isn't devastating given the hole's length. **Low-Handicap Players:** You can be slightly more aggressive with pin hunting, but still respect the small target. Use your course management skills to factor in wind, pin position, and your current round momentum. If you're playing well, center of the green keeps momentum going. If you're struggling, this isn't the hole to force a heroic recovery shot. The 12th hole at Dubsdread exemplifies why this course has hosted PGA Tour events - even the "easier" holes demand respect and solid execution. Smart golfers treat this as a scoring opportunity through conservative strategy rather than aggressive shot-making.
Watch for
- 2 mapped bunkers guard landing zones and/or the green.
- Tree-lined areas (5 mapped woodland zones) punish offline tee shots.
Hole 12 Green Complex
Mapped green boundary
Green size: 6,794 sq ft
How did Hole 12 play?
How did this hole play today?
Frequently asked questions
Yardage reference: Championship tees · 216 yards.
What club should I use on this par 3?
↓
At 216 yards, most golfers will need a fairway wood or hybrid to reach this green. Adjust for elevation, wind, and pin position.
How difficult is hole 12?
↓
This hole is a moderate challenge for most golfers. Key challenges include: long par 3.
What hazards should I watch out for on hole 12?
↓
Key hazards include: 2 greenside bunkers. Plan your shots to avoid these trouble spots.
How big is the green on hole 12?
↓
The green is fairly large with multiple pin positions. Lag putting becomes important on longer putts.
What's a good score on hole 12?
↓
This hole is a challenging par where bogey is acceptable. This longer par 3 will test your long iron or hybrid game. Par is a good score.