Hole 11 at Cog Hill Golf & CC (Dubsdread)
- Par
- 5
- Yardage
- 607 yds
- Stroke index
- 2
- Hazards
- 8 bunkers
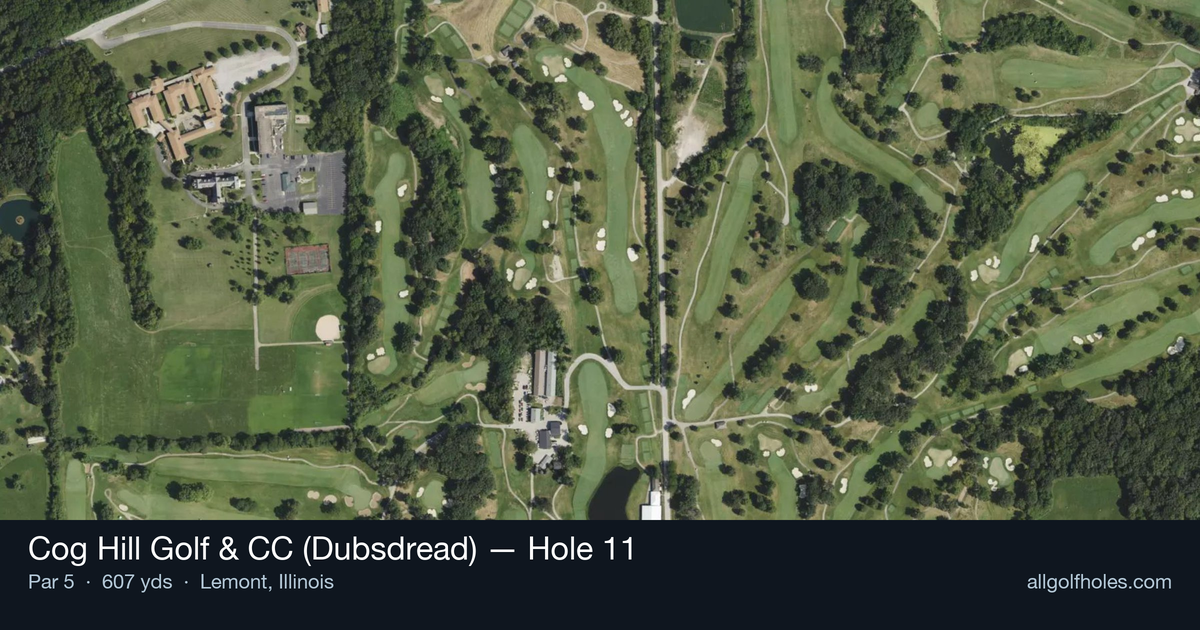
Aerial source not provided
Green size: 31 yds deep × 29 yds wide
Scorecard yardage is for Championship tees. The aerial shows its labeled reference position; distance rings measure to the green.
Championship tees · Par 5 · 607 yards
The plan for No. 11
The 11th hole at Cog Hill Golf & CC (Dubsdread) stands as the course's longest and most demanding par 5, stretching 607 yards through the rolling terrain of Illinois' Des Plaines River Valley. As the second-hardest hole on this legendary layout that has challenged PGA Tour professionals, this straight-away marathon tests both power and precision from tee to green. The generous fairway invites an aggressive tee shot, but the real challenge emerges on the lengthy approach shots that follow. With a small green complex awaiting at the end of this journey, even well-struck shots demand careful club selection and precise execution. This hole epitomizes the "Dubsdread" philosophy—where poor golfers should indeed beware of the challenges ahead.
Off the tee
Your tee shot strategy should prioritize finding the fairway over maximum distance. With no significant hazards mentioned, the primary focus is positioning yourself for the best possible second shot. A well-struck driver down the center line sets up an ideal angle for your layup, while accuracy off the tee becomes even more crucial given the hole's length. Consider the wind conditions and choose a club that ensures you stay in play - even a fairway wood or long iron might be the smart play if driver accuracy is questionable.
Approach & recovery
The approach strategy varies significantly based on your tee shot distance. Most golfers will face a layup decision for their second shot, targeting a comfortable wedge distance to the small green. Position your layup shot to avoid any rough areas and ensure a clean lie for your third shot. The small green demands precision on your final approach, making club selection and distance control paramount. A smooth, controlled swing with a wedge or short iron will serve you better than trying to muscle a longer club.
On the green
The small green size makes every putt crucial and places a premium on approach shot accuracy. Focus on hitting the center of the green rather than attacking pins, as the limited surface area leaves little room for error. Speed control becomes essential on this compact putting surface - lag putting to the fat part of the green often proves more effective than aggressive birdie attempts that could lead to three-putts. ## RISK VS REWARD This hole offers a classic risk/reward scenario typical of championship golf courses. While the length suggests birdie opportunities, the small green punishes overly aggressive play. The reward lies in patient, strategic golf - three solid shots can yield birdie chances, while attempting to reach in two often results in bogey or worse. The smart play involves accepting the three-shot approach and focusing on precision over power. ## DIFFERENT SKILL LEVELS **Low-handicap players** can be more aggressive with their tee shots and consider going for the green in two under ideal conditions, but should still respect the small target. Focus on hitting quality approach shots from your preferred distances. **High-handicap players** should embrace the three-shot strategy completely, using fairway woods or hybrids to advance the ball safely and setting up comfortable approach distances. The key is avoiding big numbers by staying in play and not forcing shots beyond your capabilities - remember, Dubsdread earned its nickname as a warning to golfers who attempt shots beyond their skill level. The 11th hole rewards golfers who understand that sometimes the best strategy is the conservative one, especially when facing one of Dubsdread's most challenging tests.
Watch for
- 8 mapped bunkers guard landing zones and/or the green.
- Tree-lined areas (17 mapped woodland zones) punish offline tee shots.
Hole 11 Green Complex
Mapped green boundary
Green size: 5,265 sq ft
How did Hole 11 play?
How did this hole play today?
Frequently asked questions
Yardage reference: Championship tees · 607 yards.
Can this par 5 be reached in two?
↓
At 607 yards, A true three-shot hole for most players. Position your layup to leave a comfortable wedge distance.
How difficult is hole 11?
↓
This hole is a moderate challenge for most golfers. Key challenges include: long par 5, heavily bunkered.
How big is the green on hole 11?
↓
The green is medium-sized with moderate targets. Pay attention to pin placement when selecting your approach club.
What's a good score on hole 11?
↓
This hole is a true three-shot hole where birdie requires execution. This longer par 5 demands patience. Two good shots set up the scoring opportunity.