Hole 5 at Cog Hill Golf & CC (Dubsdread)
- Par
- 5
- Yardage
- 498 yds
- Stroke index
- 1
- Hazards
- 8 bunkers
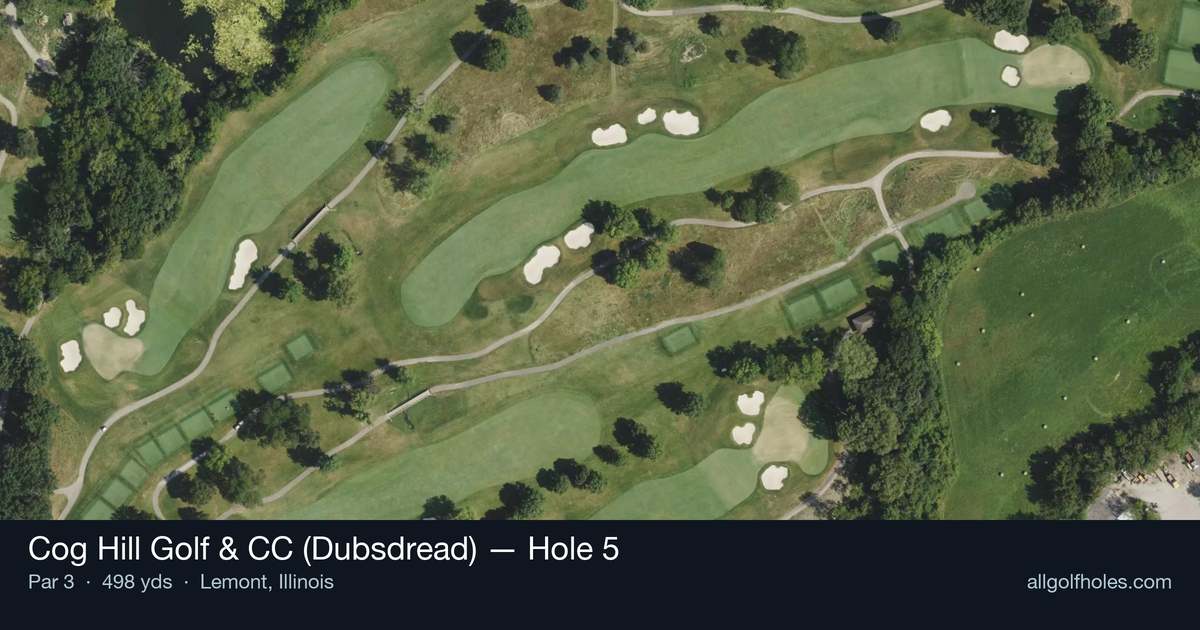
Aerial source not provided
Green size: 33 yds deep × 26 yds wide
Scorecard yardage is for Championship tees. The aerial shows its labeled reference position; distance rings measure to the green.
Championship tees · Par 5 · 498 yards
The plan for No. 5
The fifth hole at Cog Hill Golf & CC (Dubsdread) stands as an anomaly in modern golf design - a 498-yard par 3 that challenges every convention of the short game. This mammoth one-shotter, ranking as the #1 handicap hole, demands nothing short of a perfect long iron or hybrid from the championship tees. The straight layout offers no reprieve, requiring golfers to carry their tee shot the full distance to a small, unforgiving green complex. With minimal hazards to distract, the hole's difficulty lies purely in its demanding length and the precision required to find and hold the putting surface. This beast of a par 3 exemplifies why Dubsdread earned its fearsome nickname, testing even tour professionals who competed here during BMW Championship years with a shot that separates champions from pretenders.
Off the tee
For most golfers, the tee shot strategy should focus on advancing the ball as far as possible while maintaining control and setting up the best angle for your approach. Choose your longest reliable club - whether that's driver, 3-wood, or hybrid - and aim for the center of the target line. The straight layout provides a clear visual, but don't let the distance intimidate you into swinging harder than your natural tempo allows. Focus on solid contact and distance control rather than trying to reach the green in one shot.
Approach & recovery
Your approach shot becomes the scoring opportunity on this hole. With the green being small, precision trumps power on your second shot. Study the pin position carefully and select a club that allows you to attack the flag with confidence. Mid-iron to short-iron approaches give you the best chance to control trajectory and spin. The small green size means missing the putting surface can lead to difficult recovery shots, so err on the side of the center of the green when pin positions are tucked.
On the green
The putting surface at this hole rewards patience and careful green reading. With the green's compact size, most putts will have subtle breaks that can be easily misread. Take time to study the slopes from multiple angles, as the small target means every putt matters significantly to your score. Focus on speed control first, as leaving yourself manageable second putts is crucial for salvaging par or limiting damage. ## RISK VS REWARD The primary risk/reward decision comes with club selection off the tee. Aggressive players might attempt to get closer to the green with driver, but the reward of a shorter approach must be weighed against the risk of finding trouble with an errant tee shot. The more conservative play of ensuring you're in the fairway with a manageable approach distance often proves the smarter strategy, especially given the hole's difficulty rating. ## DIFFERENT SKILL LEVELS **High-handicap players** should embrace this hole as a par 4 in their minds. Play for bogey by hitting two solid shots that advance the ball toward the green, then focus on getting up and down. Don't feel pressured to reach the green in regulation - course management is key. **Low-handicap players** have the option to be more aggressive, potentially reaching the green with a well-struck driver and mid-iron approach. However, even skilled players should respect this hole's difficulty and prioritize avoiding big numbers over chasing birdies. **Scratch players and professionals** can attack this hole more directly, but should still factor in wind conditions and pin positions when determining strategy. The hole's history on the PGA Tour shows that even tour professionals often play this conservatively, focusing on avoiding the disasters that can derail a round on Dubsdread's unforgiving layout.
Watch for
- 8 mapped bunkers guard landing zones and/or the green.
- Tree-lined areas (22 mapped woodland zones) punish offline tee shots.
Hole 5 Green Complex
Mapped green boundary
Green size: 4,945 sq ft
How did Hole 5 play?
How did this hole play today?
Frequently asked questions
Yardage reference: Championship tees · 498 yards.
How big is the green on hole 5?
↓
The green is medium-sized with moderate targets. The green is wider than it is deep, rewarding shots that find the correct tier. Pay attention to pin placement when selecting your approach club.