Hole 4 at Cog Hill Golf & CC (Dubsdread)
- Par
- 4
- Yardage
- 462 yds
- Stroke index
- 5
- Hazards
- 5 bunkers
Aerial source not provided
Green size: 36 yds deep × 31 yds wide
Scorecard yardage is for Championship tees. The aerial shows its labeled reference position; distance rings measure to the green.
Championship tees · Par 4 · 462 yards
The plan for No. 4
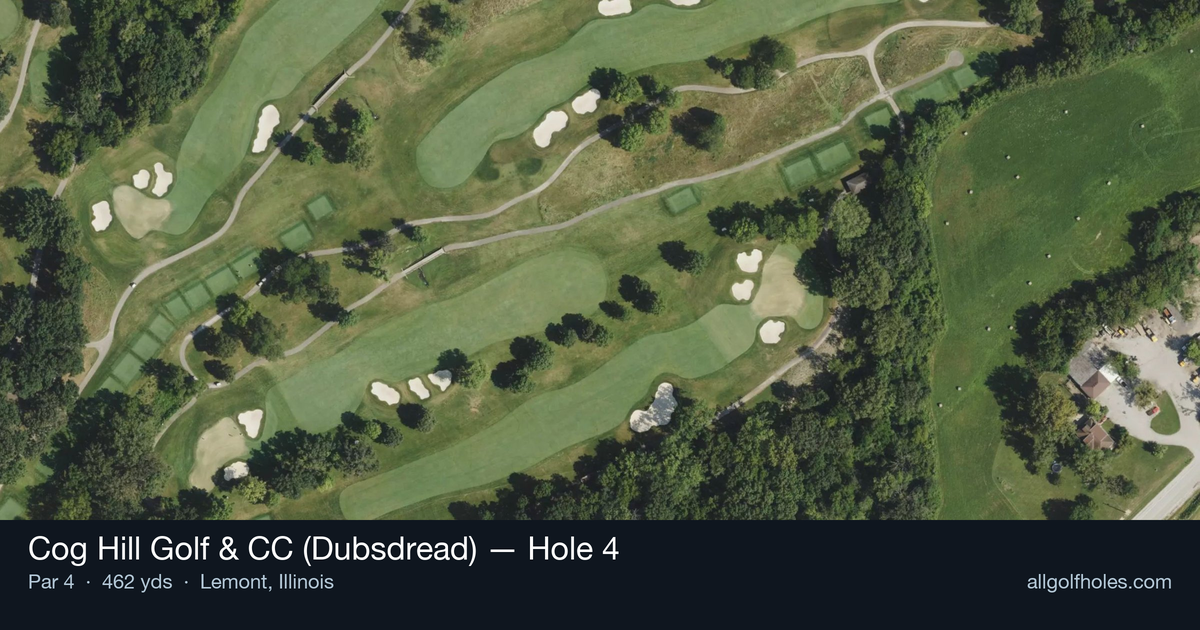
The fourth hole at Cog Hill Golf & CC (Dubsdread) epitomizes the championship pedigree that earned this course its fearsome nickname. This demanding par 4 stretches 462 yards down a straight fairway that appears deceptively simple but requires precision from tee to green. The tee shot demands accuracy to find the optimal position for the lengthy approach shot to a small, well-guarded green complex. Dick Wilson's design philosophy shines through here, where strategic positioning off the tee becomes crucial for attacking the compact putting surface. With its handicap rating of 5, this hole exemplifies why "Dubsdread" has challenged PGA Tour professionals and ambitious amateurs since 1964, demanding both power and finesse to secure par on one of Illinois' most respected championship tests.
Off the tee
The tee shot strategy centers on finding the optimal position for your approach while respecting the hole's substantial length. Driver is typically the right choice for most golfers to give yourself the best chance at reaching the small green in regulation. Focus on the center of the fairway as your target line, as the straight layout rewards accuracy over aggressive angles. The key is committing to a smooth, controlled swing rather than trying to overpower the hole. Given Dubsdread's reputation for punishing wayward shots, even without obvious hazards visible, the rough and surrounding areas likely present significant recovery challenges. Position your tee shot in the fairway's heart to set up the most manageable approach angle.
Approach & recovery
Your approach shot to this small green demands precision and smart club selection. With the green's compact size, accuracy trumps distance considerations. The lack of major hazards doesn't make this shot easier – it likely means the green complex itself and surrounding areas provide the primary defense. Plan your approach based on pin position and wind conditions. A small green means there's little room for error, so take enough club to ensure you reach your target while maintaining control. Mid-iron to long-iron will typically be required from a good drive position, depending on conditions and your distance from the tee shot.
On the green
The small green size makes putting strategy crucial for scoring well on this hole. Expect subtle breaks and challenging pin positions that test your green-reading skills. Focus on lag putting to the correct quadrant of the green rather than being overly aggressive with longer putts. Two-putting from anywhere on this green should be considered a victory, especially with difficult pin positions. The compact surface means speed control becomes even more critical – a putt that's slightly off-line can quickly run off the putting surface on a small target like this. ## RISK VS REWARD This hole presents a classic risk/reward scenario typical of championship golf courses. The primary risk comes from the temptation to be overly aggressive with either the tee shot or approach. The reward for disciplined, strategic play is a legitimate birdie opportunity, while aggressive play that misses the mark can lead to big numbers. The straight layout might tempt players to take risks they shouldn't, but Dubsdread's reputation suggests that conservative, precise play yields better scoring opportunities than gambling for extra distance or attacking difficult pins. ## DIFFERENT SKILL LEVELS **High-Handicap Players:** Focus on two solid shots rather than trying to overpower the hole. Consider a 3-wood or hybrid off the tee if driver accuracy is inconsistent. Aim for the center of the green regardless of pin position, and prioritize keeping the ball in play above all else. **Low-Handicap Players:** You can be more aggressive with driver off the tee and attack specific pin positions, but respect the small green size. Consider the risk/reward of going at tucked pins versus playing to the fat part of the green. Your superior distance control allows for more precise approach shots, but don't let confidence override smart course management. The 4th hole at Dubsdread rewards patience, precision, and strategic thinking – qualities that separate good rounds from great ones on this legendary championship layout.
Watch for
- 5 mapped bunkers guard landing zones and/or the green.
- Tree-lined areas (16 mapped woodland zones) punish offline tee shots.
Hole 4 Green Complex
Mapped green boundary
Green size: 5,143 sq ft
How did Hole 4 play?
How did this hole play today?
Frequently asked questions
Yardage reference: Championship tees · 462 yards.
What's the best strategy off the tee?
↓
For this 462-yard par 4, most players will hit driver to set up a comfortable approach.
How difficult is hole 4?
↓
This hole is a moderate challenge for most golfers. Key challenges include: long par 4, heavily bunkered.
How big is the green on hole 4?
↓
The green is medium-sized with moderate targets. Pay attention to pin placement when selecting your approach club.
What's a good score on hole 4?
↓
This hole is one of the tougher holes where par feels like birdie. A challenging par 4. Accept that bogey happens and avoid big numbers.