Hole 1 at Cog Hill Golf & CC (Dubsdread)
- Par
- 4
- Yardage
- 458 yds
- Stroke index
- 9
- Hazards
- 6 bunkers
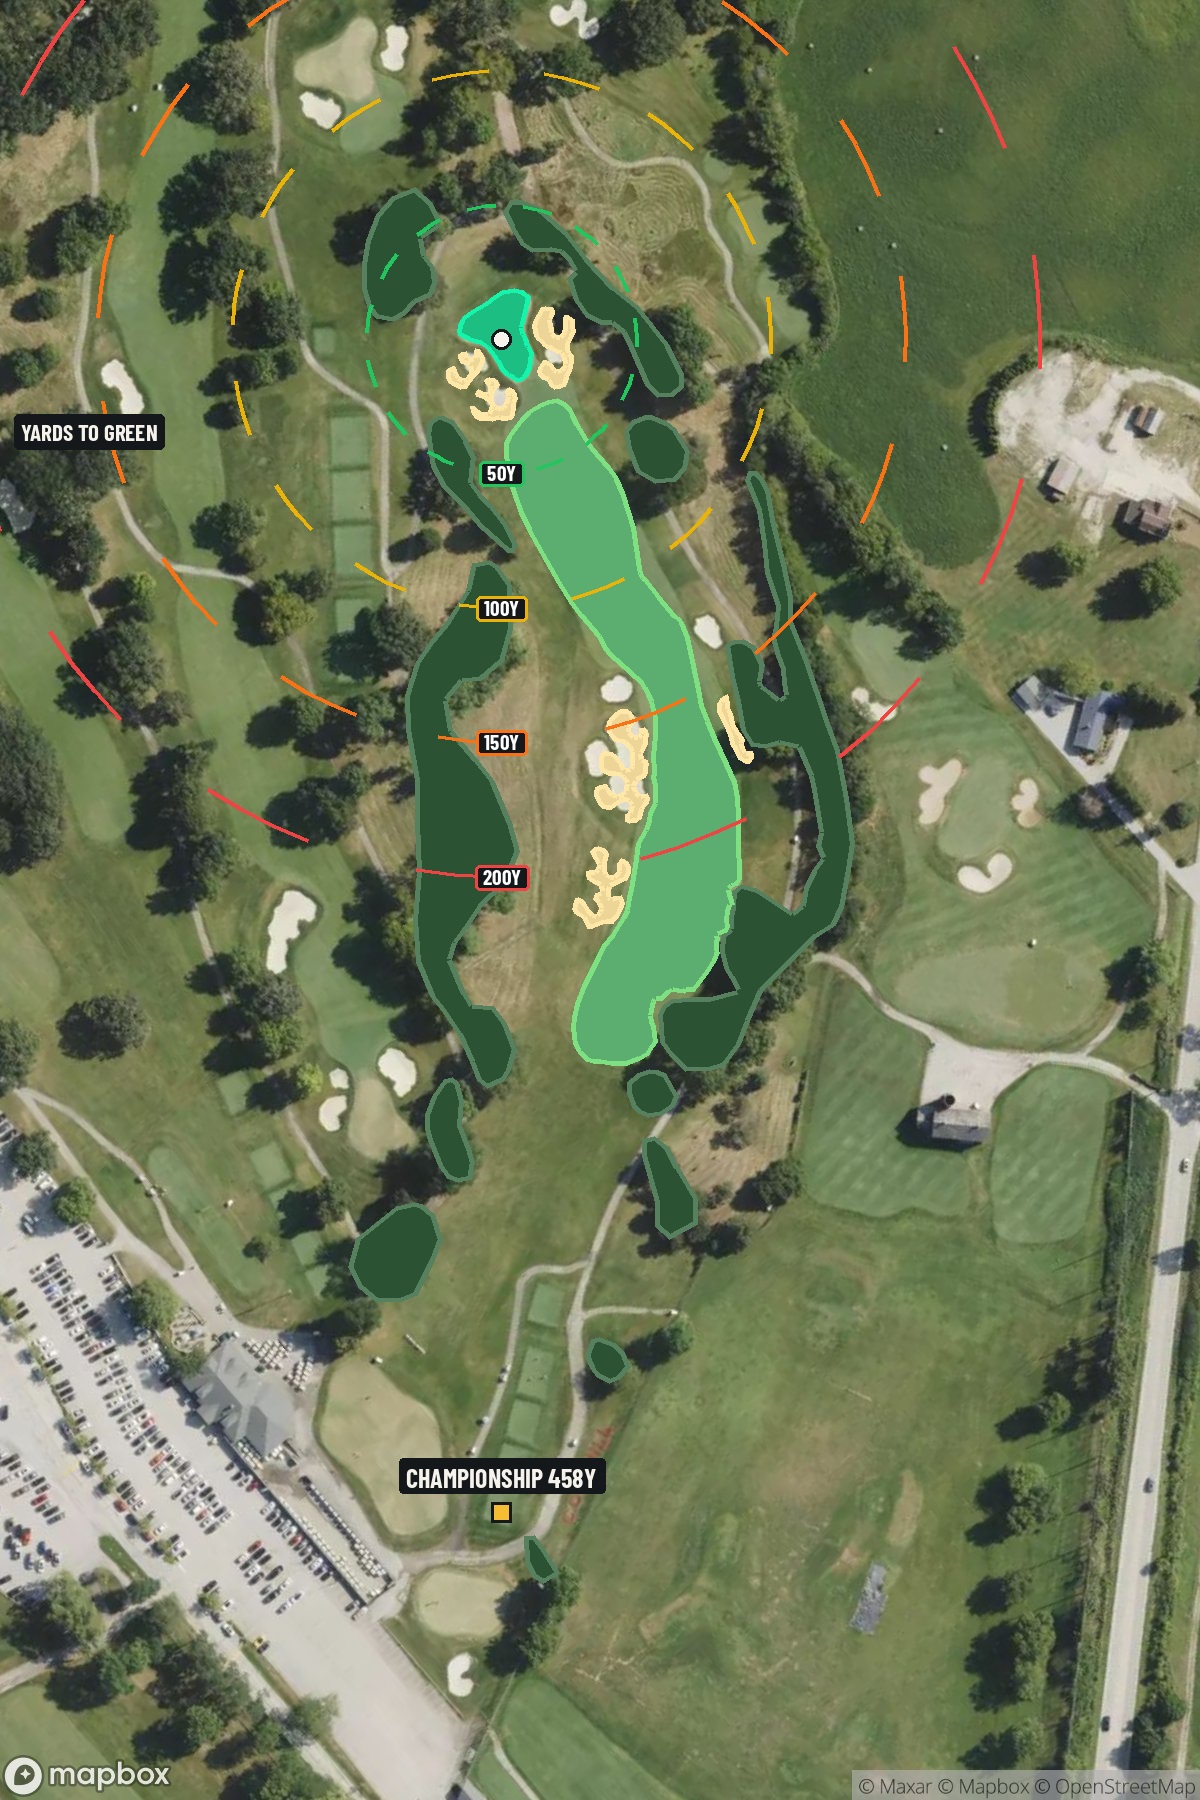 Hole 1 map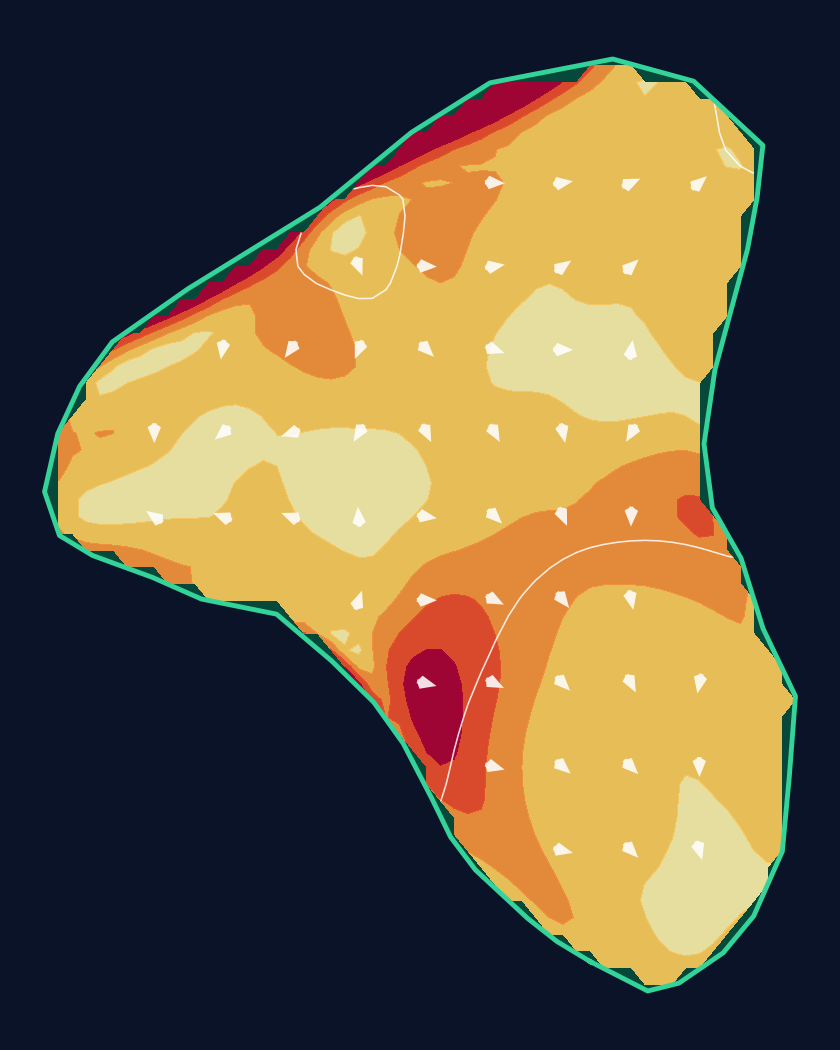
28 yd wide × 35 yd deep · 2.1 ft total elevation range
Light = gentler slope · Red = steeper slope
White lines: 1 foot of elevation. Arrows: downhill. General terrain, not a pin read.
Approach from bottom
Contour source
USGS 1 Meter 16 x42y462 IL_4_County_QL1_LiDAR_2016_B16 · collection 2017
Map source & reference
Mapbox Satellite composite · capture date not provided. Green at the top; the labeled map reference is below.
Scorecard yardage is for Championship tees. The aerial shows its labeled reference position; distance rings measure to the green.
Championship tees · Par 4 · 458 yards
The plan for No. 1
The opening hole at Cog Hill Golf & CC (Dubsdread) sets an immediate tone for what lies ahead on this legendary championship layout. This straight par 4 stretches 458 yards and demands both precision and power from the first tee shot. The generous fairway provides a welcoming target, but the approach shot reveals the hole's true character with a compact green that requires careful club selection and accurate iron play. Despite the absence of major hazards, the small putting surface punishes wayward approaches and immediately introduces golfers to Dubsdread's reputation for demanding precise shot-making. It's a classic opening statement from a course that has challenged PGA Tour professionals for decades, offering a fair but firm handshake before the real test begins.
Off the tee
Your primary objective is finding the fairway center, as the straight layout rewards accurate drives over pure distance. The landing zone sits comfortably in the 250-280 yard range for most golfers, making driver the preferred club for longer hitters who can maintain control. However, don't let the absence of major hazards fool you - rough at Dubsdread is notoriously penal, and missing the fairway will complicate your approach significantly. Target the center-left portion of the fairway to open up the best angle to the small green. Conservative players should consider a 3-wood or hybrid if driver accuracy has been inconsistent, as position trumps distance on this hole. The key is avoiding the thick rough that can turn a manageable approach into a difficult recovery shot.
Approach & recovery
With the green's small size being the primary defense, your approach shot demands precision over power. From a good drive, you'll typically face a mid-iron to long-iron depending on conditions and pin position. The compact target means club selection must account for wind conditions and green firmness. Focus on hitting the center of the green rather than attacking pins, especially early in the round when you're still finding your rhythm. The green's small dimensions make it unforgiving to approach shots that come up short or long, so take enough club to ensure solid contact and proper distance control.
On the green
The putting surface, while small, typically features subtle breaks that can be deceiving. Pay close attention to the overall slope and grain direction, as these factors become magnified on a compact green. Lag putting becomes essential here - focus on getting your first putt close rather than being overly aggressive with longer attempts. Pin positions in different quadrants can significantly affect the green's playability, so adjust your approach strategy accordingly. When the pin is tucked, aim for the fat part of the green and rely on your putting to make up the difference. ## RISK VS REWARD This hole offers a straightforward risk/reward proposition: aggressive drives that find the fairway set up easier approaches to the small green, while conservative tee shots may leave longer, more challenging approach shots. The reward for finding the fairway is substantial, as it allows for more aggressive iron play into the green. The primary risk lies in missing the fairway and facing a difficult approach from thick rough to a small target. Given that this is the opening hole, conservative strategy often pays dividends by avoiding early-round mistakes that can affect confidence throughout the round. ## DIFFERENT SKILL LEVELS **High-Handicap Players:** Focus entirely on fairway accuracy with your most reliable tee shot club, even if it's a 3-wood or hybrid. Aim for the center of the green on your approach, accepting longer putts rather than risking short-sided positions. Course management is crucial here - par is an excellent score to start your Dubsdread experience. **Low-Handicap Players:** Driver should be the play if you can maintain accuracy, as the shorter approach shot to the small green provides better birdie opportunities. Consider attacking pins only when they're in favorable positions, and don't hesitate to be aggressive with your putting on this smaller surface where you can better read the breaks. The opening hole at Dubsdread immediately establishes the course's reputation for demanding precision. Respect the challenge, execute your game plan, and use this hole to build confidence for the more demanding tests that lie ahead on this storied championship layout.
Watch for
- 6 mapped bunkers guard landing zones and/or the green.
- Tree-lined areas (12 mapped woodland zones) punish offline tee shots.
Hole 1 Green Complex & Slope
USGS 3DEP terrain analysis
Green size: 4,763 sq ft
How did Hole 1 play?
How did this hole play today?
Frequently asked questions
Yardage reference: Championship tees · 458 yards.
What's the best strategy off the tee?
↓
For this 458-yard par 4, most players will hit driver to set up a comfortable approach.
How difficult is hole 1?
↓
This hole is a moderate challenge for most golfers. Key challenges include: long par 4, heavily bunkered.
How big is the green on hole 1?
↓
The green is medium-sized with moderate targets. Pay attention to pin placement when selecting your approach club.
What's a good score on hole 1?
↓
This hole is one of the tougher holes where par feels like birdie. A challenging par 4. Accept that bogey happens and avoid big numbers.