Hole 7 at Cog Hill Golf & CC (Dubsdread)
- Par
- 4
- Yardage
- 396 yds
- Stroke index
- 1
- Hazards
- 6 bunkers · Water
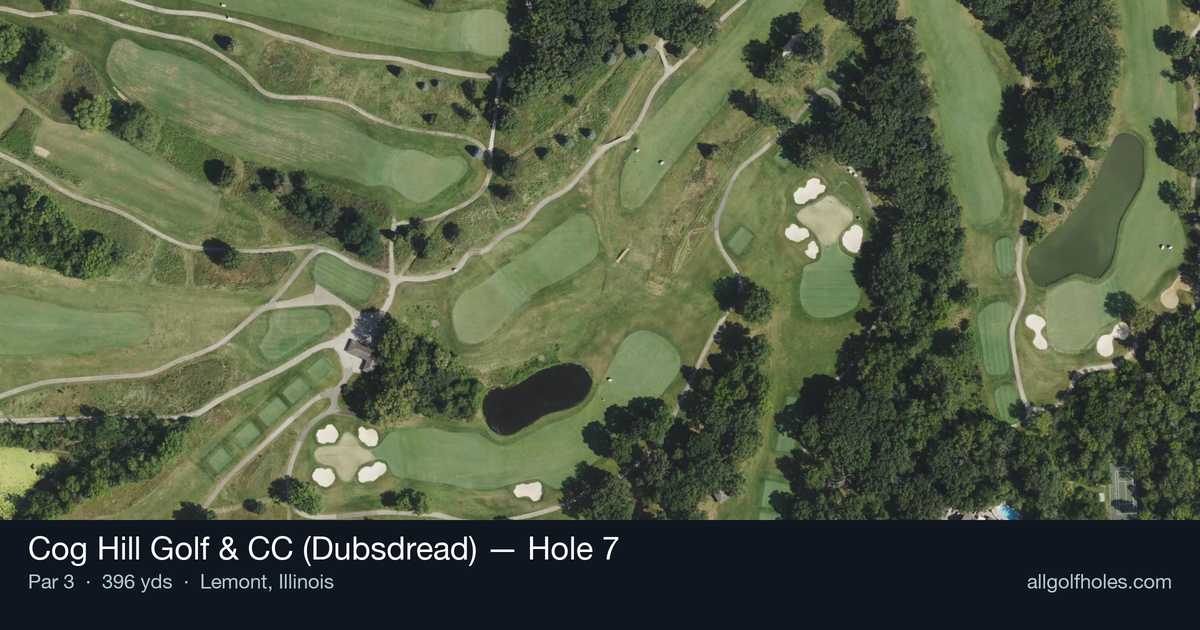
Aerial source not provided
Green size: 29 yds deep × 28 yds wide
Scorecard yardage is for Championship tees. The aerial shows its labeled reference position; distance rings measure to the green.
Championship tees · Par 4 · 396 yards
The plan for No. 7
The seventh hole at Cog Hill Golf & CC (Dubsdread) stands as the course's most demanding par 3, stretching an imposing 396 yards and earning its designation as the number one handicap hole. This monster one-shotter epitomizes why Dubsdread has earned its fearsome reputation among Chicago-area golfers. The tee shot requires nothing short of a perfectly struck long iron or fairway wood to reach the small, well-protected green complex. With minimal room for error on the putting surface, precision becomes paramount over power. The hole's length alone eliminates any margin for mishits, demanding golfers commit fully to their club selection and swing. This intimidating par 3 serves as a true test of ball-striking ability, separating skilled players from weekend warriors on Dick Wilson's masterfully designed championship layout.
Off the tee
**Club Selection and Strategy:** Most golfers will need their longest club in the bag - likely a driver or 3-wood depending on conditions and individual distance capabilities. The key is committing fully to an aggressive swing while maintaining balance and tempo. In windy Chicago-area conditions, club selection becomes even more critical. **Target Line:** Aim for the center of the green and trust your swing. With such a small target from this distance, trying to get cute with pin hunting is a recipe for disaster. The straight layout allows you to pick your line and commit to it without worrying about doglegs or hidden trouble. **Mental Approach:** Accept that this hole will likely cost you a stroke relative to par. Focus on solid contact and getting the ball somewhere on or near the green rather than trying to be a hero.
Approach & recovery
Since this is a par 3, your tee shot IS your approach shot. The small green size means there's little room for error, making course management crucial. If you're between clubs, always take the longer option - coming up short on a 396-yard par 3 is far more damaging than going slightly long. **Wind Considerations:** Illinois weather can be unpredictable. Into the wind, you may need to club up significantly or consider a lower, penetrating ball flight. Downwind, be careful not to fly the green entirely.
On the green
The small green creates challenging putting scenarios even when you do find the surface. Expect subtle breaks and fast conditions typical of Dubsdread's championship-caliber setup. Two-putting from anywhere on this green should be considered a victory. **Pin Position Strategy:** Regardless of pin position, aim for the center of the green. The combination of distance and green size makes precision pin hunting nearly impossible for most golfers. ## RISK VS REWARD This hole offers little in terms of risk/reward options - it's simply about executing under pressure. The reward comes from making par on what many consider an unfair hole, while the risk is posting a big number that can derail an entire round. The real strategic decision comes in club selection and commitment level. Playing conservatively might leave you short, while being overly aggressive can lead to trouble beyond the green. ## DIFFERENT SKILL LEVELS **High Handicappers (15+ handicap):** Accept that bogey or double bogey is a reasonable score here. Focus on solid contact with your longest club and aim for the largest part of the green. Consider this hole a bonus if you make par, and don't let a big number here affect the rest of your round. **Mid Handicappers (8-15 handicap):** This hole will test your long iron or fairway wood accuracy. Take one more club than you think you need and commit to an aggressive swing. Bogey is still a solid score, but par is definitely achievable with good execution. **Low Handicappers (Under 8 handicap):** This is where Dubsdread earns its fearsome reputation. You should be targeting par while respecting the hole's difficulty. Focus on tempo and balance in your swing, and trust your distance control. This hole often determines tournament outcomes and handicap differentials. The 7th hole at Dubsdread embodies everything that makes this course legendary among public golf venues - it's fair but incredibly demanding, rewarding only the best-executed shots while punishing anything less than complete commitment.
Watch for
- Water hazard influence the hole; use mapped edges for the selected tee.
- 6 mapped bunkers guard landing zones and/or the green.
- Tree-lined areas (9 mapped woodland zones) punish offline tee shots.
Hole 7 Green Complex
Mapped green boundary
Green size: 4,356 sq ft
How did Hole 7 play?
How did this hole play today?
Frequently asked questions
Yardage reference: Championship tees · 396 yards.
How big is the green on hole 7?
↓
The green is small and requires precision. Expect challenging pin positions with limited room for error.