Hole 3 at Cog Hill Golf & CC (Dubsdread)
- Par
- 4
- Yardage
- 443 yds
- Stroke index
- 7
- Hazards
- 4 bunkers
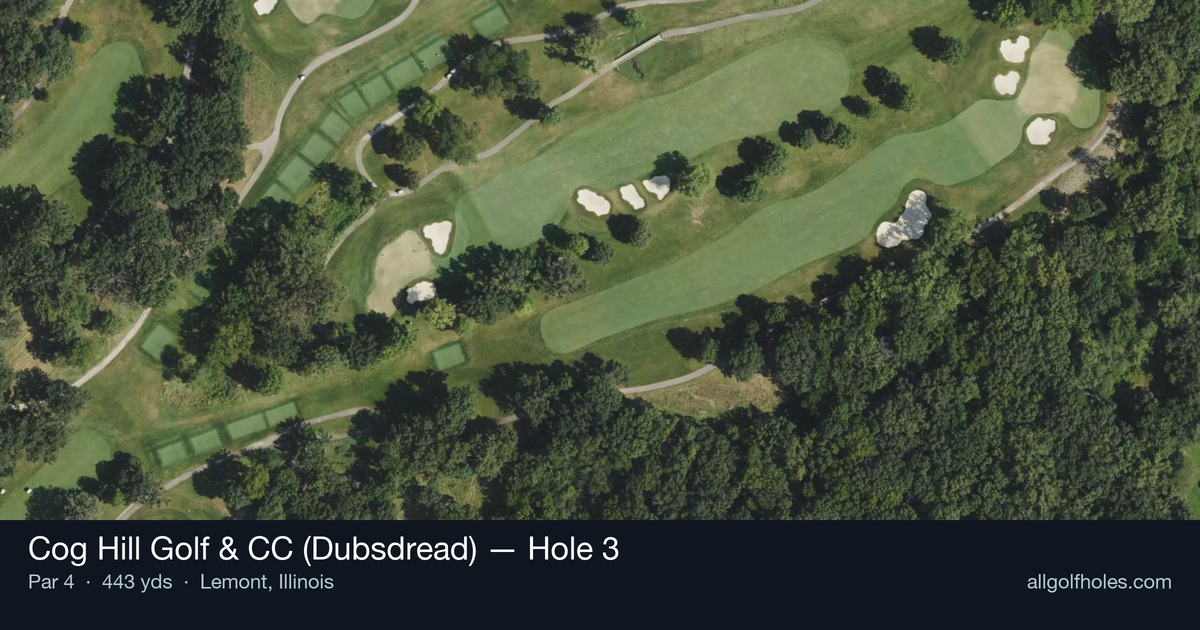
Aerial source not provided
Green size: 26 yds deep × 36 yds wide
Scorecard yardage is for Championship tees. The aerial shows its labeled reference position; distance rings measure to the green.
Championship tees · Par 4 · 443 yards
The plan for No. 3
The third hole at Cog Hill Golf & CC (Dubsdread) exemplifies the Dick Wilson and Joe Lee design philosophy that created this legendary championship test. This straight par 4 stretches 443 yards through the rolling Illinois terrain, demanding both power and precision from the opening tee shot. The fairway presents a generous target, but the real challenge emerges on the approach to the small, well-defended green complex. With its compact putting surface requiring pinpoint accuracy, this hole embodies the course's reputation for testing even tour professionals. The absence of major water hazards doesn't diminish the strategic demands - club selection and course management prove critical for scoring opportunities on this deceptively challenging hole that perfectly captures Dubsdread's unforgiving character.
Off the tee
The key to this hole starts with an aggressive but controlled tee shot. With 443 yards to work with, longer hitters should consider driver to maximize distance and leave a shorter iron into the small green. Position your tee shot down the center or slightly favoring your preferred approach angle. The straight layout allows for an aggressive line, but accuracy remains paramount - wayward drives will make the approach shot significantly more difficult. Focus on a smooth, controlled swing that prioritizes finding the fairway while still achieving good distance.
Approach & recovery
The approach shot is where this hole shows its teeth. The small green demands pinpoint accuracy, making club selection and target line crucial. Depending on your tee shot, you'll likely face a mid-iron to long-iron approach. Aim for the center of the green regardless of pin position - the small target makes aggressive pin-hunting a risky proposition. Take one extra club if needed to ensure you clear any front-edge trouble and give yourself the best chance at a two-putt par. The key is committing fully to your yardage and swing, as tentative approaches to small greens rarely end well.
On the green
With a small green, putting strategy becomes about lag putting and avoiding three-putts. The compact surface means most putts will be relatively straight, but speed control becomes critical. Focus on getting your first putt close rather than being overly aggressive with birdie attempts. Pay attention to the overall slope and grain of the green, as subtle breaks can be magnified on shorter putts. Position yourself below the hole when possible, as uphill putts are always easier to control on small greens. ## RISK VS REWARD This hole offers a classic risk/reward scenario with tee shot aggression. The reward for a bold, long drive is a shorter iron into the green, significantly improving your chances of hitting and holding the small target. However, the risk of missing the fairway and facing a longer, more difficult approach from rough or trouble must be weighed carefully. The straight layout encourages aggressive play, but the small green punishes approaches that aren't precise. ## DIFFERENT SKILL LEVELS **Low Handicappers:** Should play aggressively off the tee with driver, aiming to leave a mid-iron approach. Focus on hitting the center of the green and making birdie putts from there. This is a hole where superior ball-striking can create scoring opportunities. **High Handicappers:** Consider a more conservative approach with 3-wood or hybrid off the tee to ensure finding the fairway. Accept that you'll have a longer approach shot, but prioritize accuracy over distance. Aim for the center of the green and focus on two-putting for a solid par. Remember, this is a difficult hole even for accomplished players - par is an excellent score. The strategic design elements that made Dubsdread famous for testing tour professionals are evident here. Success requires the kind of precision and course management that separates good rounds from great ones.
Watch for
- 4 mapped bunkers guard landing zones and/or the green.
- Tree-lined areas (13 mapped woodland zones) punish offline tee shots.
Hole 3 Green Complex
Mapped green boundary
Green size: 5,458 sq ft
How did Hole 3 play?
How did this hole play today?
Frequently asked questions
Yardage reference: Championship tees · 443 yards.
Why is hole 3 called 'Doral'?
↓
Hole 3 at Cog Hill's Dubsdread course is called "Doral" as a tribute to the famous Doral-Blue Course, which was also designed by Dick Wilson, one of the architects who partnered with Joe Jemsek to create Cog Hill's challenging fourth course. The naming reflects the connection between the two Dick Wilson-designed courses and honors the architectural legacy of one of golf's most renowned course designers.
What's the best strategy off the tee?
↓
For this 443-yard par 4, most players will hit driver to set up a comfortable approach.
How difficult is hole 3?
↓
This hole is a moderate challenge for most golfers. Key challenges include: heavily bunkered.
How big is the green on hole 3?
↓
The green is medium-sized with moderate targets. Pay attention to pin placement when selecting your approach club.
What's a good score on hole 3?
↓
This hole is a demanding hole where bogey is not unusual. This longer par 4 will test most golfers. Focus on position over distance.