Hole 6 at Pasatiempo Golf Club
- Par
- 5
- Yardage
- 567 yds
- Stroke index
- 16
- Hazards
- 5 bunkers
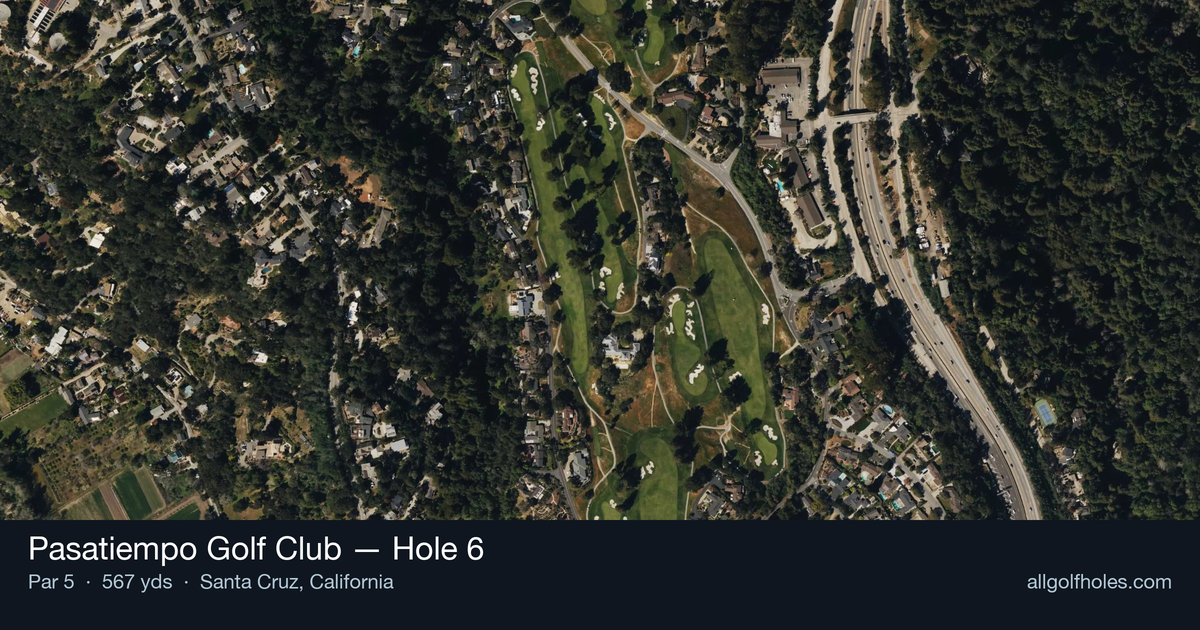
Aerial source not provided
Green size: 46 yds deep × 26 yds wide
Scorecard yardage is for Championship tees. The aerial shows its labeled reference position; distance rings measure to the green.
Championship tees · Par 5 · 567 yards
The plan for No. 6
The sixth hole at Pasatiempo Golf Club presents a deceptively challenging par 5 that embodies Alister MacKenzie's strategic design philosophy. At 567 yards, this straight layout demands precision over power, with out-of-bounds stakes lurking along the perimeter to punish wayward shots. The generous fairway invites an aggressive tee shot, but the real test begins with the approach to the compact green complex. Smart players will favor positioning themselves left of center throughout the hole, as the elevated green's firm surface readily rejects under-clubbed approaches into the surrounding rough. Despite its modest handicap ranking of 16, this hole rewards course management and punishes overconfidence, making it a classic example of MacKenzie's belief that every shot should present both risk and reward opportunities.
Off the tee
Focus on finding the fairway with your most reliable club rather than maximum distance. A well-struck 3-wood or hybrid can be the perfect choice here, keeping you in play while setting up an ideal angle for your second shot. Avoid the temptation to grip-and-rip with driver if accuracy is a concern - position trumps distance on this hole. Keep the ball in the short grass and away from any trouble areas to maintain control of the hole.
Approach & recovery
Your second shot strategy depends heavily on your tee shot success. For most players, this becomes a positioning shot rather than an aggressive green-seeking attempt. Lay up to your favorite wedge distance, ideally around 100-120 yards from the pin. This conservative approach ensures you'll have a full swing with a scoring club for your third shot. Longer hitters might consider going for the green in two, but the small target makes this a high-risk proposition.
On the green
The compact green size means precision is paramount on your approach shot. Take enough club to ensure you reach the putting surface, as short shots can leave difficult up-and-downs. Once on the green, focus on lag putting to the correct tier or section, as even small greens can have subtle breaks that affect longer putts. Two-putting from anywhere on this green should be considered a victory. ## RISK VS REWARD The primary risk/reward decision comes on the second shot - whether to lay up strategically or attempt to reach the green. Given the small target and potential trouble areas, the smart money is usually on the conservative play. The reward of a potential eagle must be weighed against the risk of finding trouble and making bogey or worse. ## DIFFERENT SKILL LEVELS **Higher Handicappers:** Play this as a true three-shot par 5. Use your most accurate clubs off the tee and for the layup shot. Focus on avoiding big numbers by staying in bounds and finding the fairway. A well-executed three-shot strategy can easily yield par or better. **Lower Handicappers:** While you have the distance to potentially reach in two, consider the percentages. The small green and potential hazards make laying up to a comfortable wedge distance often the smarter play. Save the aggressive shots for holes where the risk/reward ratio is more favorable. This hole exemplifies strategic golf course design - rewarding thoughtful play over raw power and teaching valuable lessons in course management that will serve you well throughout your round at this classic Alister MacKenzie layout.
Hole 6 Green Complex
Mapped green boundary
Green size: 4,982 sq ft
How did Hole 6 play?
How did this hole play today?
Frequently asked questions
Yardage reference: Championship tees · 567 yards.
Can this par 5 be reached in two?
↓
At 567 yards, A true three-shot hole for most players. Position your layup to leave a comfortable wedge distance.
How difficult is hole 6?
↓
This hole is a moderate challenge for most golfers. Key challenges include: long par 5, heavily bunkered.
How big is the green on hole 6?
↓
The green is medium-sized with moderate targets. The green is deeper than wide, so club selection is crucial. Pay attention to pin placement when selecting your approach club.
What's a good score on hole 6?
↓
This hole is a true three-shot hole where birdie requires execution. This longer par 5 demands patience. Two good shots set up the scoring opportunity.