Hole 5 at Pasatiempo Golf Club
- Par
- 3
- Yardage
- 190 yds
- Stroke index
- 6
- Hazards
- 5 bunkers
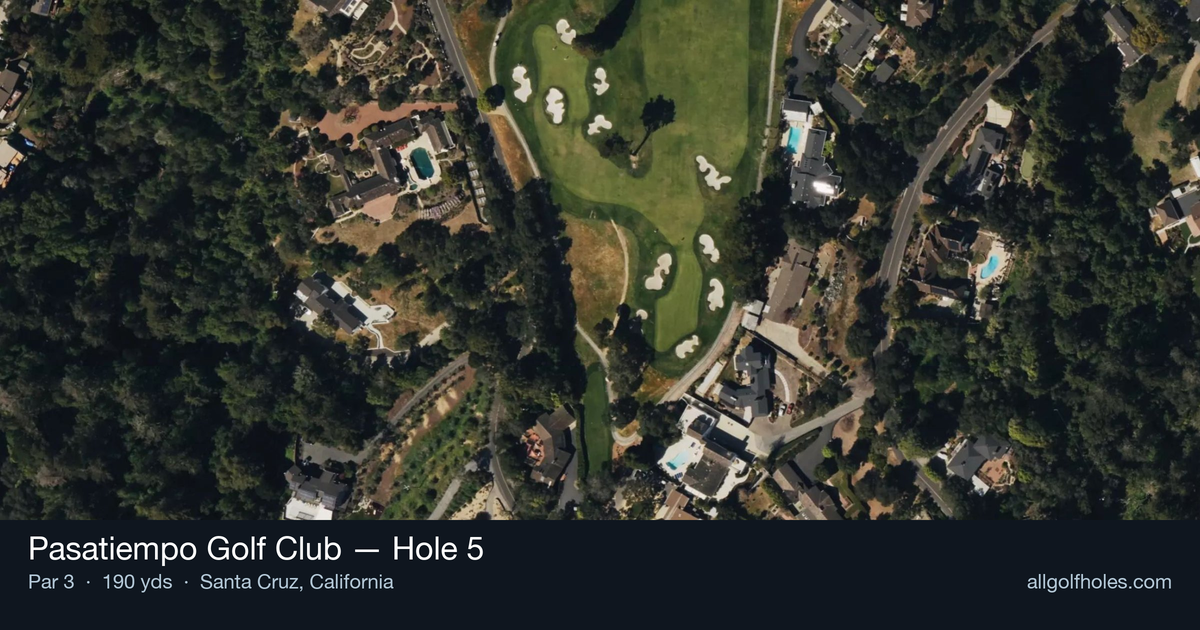
Aerial source not provided
Green size: 38 yds deep × 25 yds wide
Scorecard yardage is for Championship tees. The aerial shows its labeled reference position; distance rings measure to the green.
Championship tees · Par 3 · 190 yards
The plan for No. 5
The fifth hole at Pasatiempo Golf Club showcases Dr. Alister MacKenzie's masterful design philosophy in a deceptively challenging par 3. This 190-yard test demands precision over the breathtaking Santa Cruz landscape, where the elevated tee provides stunning views but also exposes every shot to coastal winds. The small green complex requires careful club selection, as MacKenzie's subtle contouring punishes wayward approaches with difficult recovery shots. What appears straightforward from the tee reveals its true character upon closer inspection - the compact target and surrounding slopes demand both accuracy and proper distance control. This hole exemplifies why Pasatiempo Golf Club hole 5 remains a favorite among golfers who appreciate strategic architecture, where a well-struck mid-iron can yield birdie opportunities while slightly off-target shots quickly turn par into a challenging proposition.
Off the tee
Club selection is paramount on this straightforward par 3. Most players will need a mid to long iron depending on conditions and pin position. Focus on the center of the green rather than chasing pins, as the small green size leaves little margin for error. Take one extra club if you're between selections - being long is typically better than coming up short on MacKenzie designs. Pay attention to wind conditions, which can significantly affect club choice on this exposed tee shot.
Approach & recovery
Since this is a par 3, your tee shot is your approach. The key strategic consideration is understanding that the small green demands accuracy over distance. Aim for the fat part of the green and let your putting take care of the rest. MacKenzie's greens are known for their subtle slopes and strategic contours, so even from the center of the green, you'll have reasonable birdie opportunities while avoiding the trouble that comes with missed greens.
On the green
MacKenzie's green complexes are renowned for their strategic putting surfaces, and this small green likely features subtle breaks that can fool the eye. Take time to read the overall slope and grain direction. With the green's compact size, most putts will be relatively short, making lag putting less critical than accurate speed control. Focus on getting your first putt close rather than being overly aggressive, as three-putts from this small surface can be particularly frustrating. ## RISK VS REWARD The primary risk/reward decision involves pin hunting versus playing to the center. When the pin is tucked near edges or in challenging positions, the small green size amplifies the penalty for missing your target. The reward for aggressive play is limited - even center-green leaves reasonable birdie chances. Conservative strategy typically yields better scoring averages on holes like this, where pars accumulate into good rounds. ## DIFFERENT SKILL LEVELS **High-Handicap Players:** Focus entirely on finding the green with a conservative club selection. Aim for the center regardless of pin position, and take one extra club to ensure you reach the putting surface. A bogey from the green is far better than a double bogey from short of the target. **Low-Handicap Players:** You can be more aggressive with pin positions, but respect the small green size. Consider the hole's position in your round - early in the round, play conservatively to build confidence; later in competitive situations, you might take on more challenging pins. Your superior ball-striking allows for more precise target selection, but don't let that override smart course management. The 5th hole at Pasatiempo exemplifies why MacKenzie's designs have stood the test of time - strategic complexity wrapped in apparent simplicity, where the best score often comes from the most conservative approach.
Hole 5 Green Complex
Mapped green boundary
Green size: 4,162 sq ft
How did Hole 5 play?
How did this hole play today?
Frequently asked questions
Yardage reference: Championship tees · 190 yards.
What club should I use on this par 3?
↓
At 190 yards, most golfers will need a long iron or hybrid (5-iron to 6-iron) to reach this green. Adjust for elevation, wind, and pin position.
How difficult is hole 5?
↓
This hole is a moderate challenge for most golfers. Key challenges include: heavily bunkered, small green.
What hazards should I watch out for on hole 5?
↓
Key hazards include: 5 greenside bunkers. Plan your shots to avoid these trouble spots.
How big is the green on hole 5?
↓
The green is small and requires precision. The green is deeper than wide, so club selection is crucial. Expect challenging pin positions with limited room for error.