Hole 17 at Pasatiempo Golf Club
- Par
- 4
- Yardage
- 371 yds
- Stroke index
- 9
- Hazards
- 1 bunker
Aerial source not provided
Green size: 52 yds deep × 22 yds wide
Scorecard yardage is for Championship tees. The aerial shows its labeled reference position; distance rings measure to the green.
Championship tees · Par 4 · 371 yards
The plan for No. 17
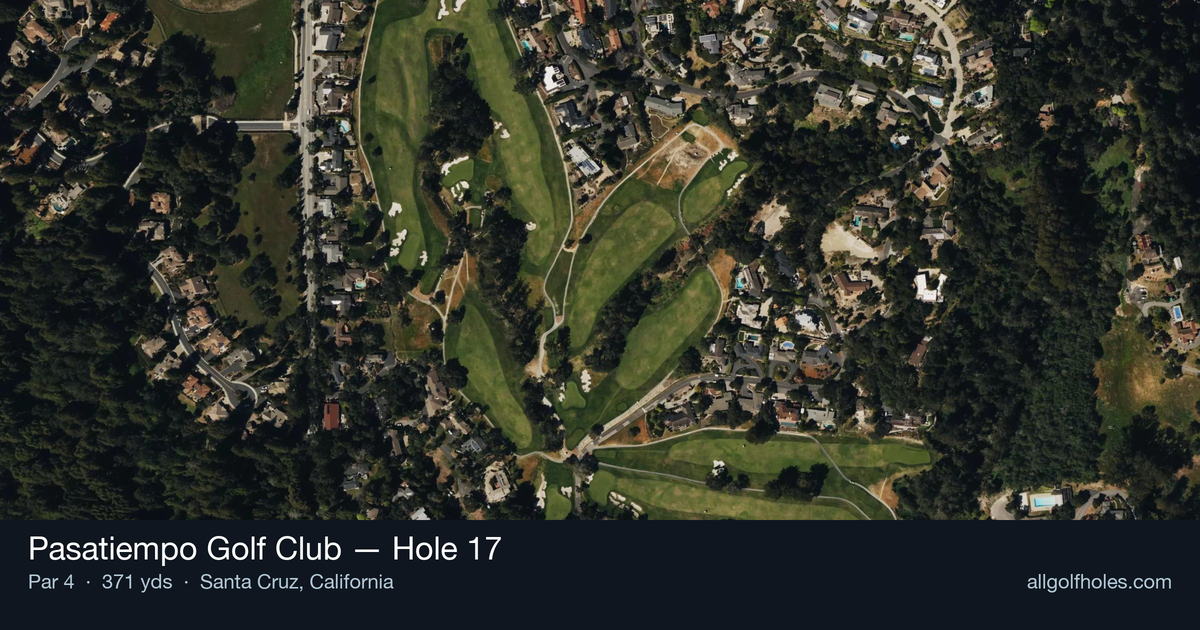
The penultimate hole at Pasatiempo Golf Club hole 17 exemplifies Dr. Alister MacKenzie's masterful design philosophy, presenting a deceptively straightforward par 4 that demands precision over power. This 371-yard gem unfolds as a classic risk-reward opportunity, where the generous fairway invites aggressive tee shots but rewards strategic thinking. The straight layout allows golfers to see their target clearly, yet the approach shot to the small green complex requires careful club selection and accurate distance control. MacKenzie's restored original design elements shine through in the subtle undulations and natural contours that frame this hole. With no significant hazards to navigate, success hinges purely on execution and course management, making it a true test of fundamental golf skills as players prepare for the challenging finishing hole ahead.
Off the tee
The tee shot strategy revolves around positioning rather than distance. With no significant hazards threatening the landing area, your primary focus should be finding the center of the fairway to ensure the best possible lie for your approach. Driver is certainly an option for longer hitters looking to leave a short iron into the green, but a controlled 3-wood or hybrid can be equally effective, especially in windy conditions common to this coastal location. The key is avoiding the rough, which can complicate club selection and spin control on your approach to the small green. Aim for the center of the fairway and prioritize accuracy over maximum distance – leaving yourself 120-140 yards with a perfect lie is far superior to being 90 yards out in the rough.
Approach & recovery
The approach shot is where this hole reveals its true character. The small green demands precise distance control and proper trajectory to hold the putting surface. From the optimal tee shot position, you'll typically face a mid-iron to short-iron approach, depending on conditions and pin position. Club selection should err on the side of taking enough club to ensure you reach the green, as coming up short can leave difficult recovery shots. The compact green size means there's little margin for error in any direction, so commit fully to your yardage and swing with confidence. Pay attention to wind direction, as the exposed nature of this hole can significantly affect ball flight.
On the green
MacKenzie's restored greens at Pasatiempo are known for their subtle contours and true roll. While specific break patterns will depend on pin position, the small size of this green means most putts will be relatively straight with gentle slopes. The key is reading the overall tilt of the green and trusting your line. Speed control becomes critical on the smaller putting surface – aggressive putts that miss the hole can easily roll off the green. Focus on getting your first putt close to the hole rather than trying to make everything, as two-putts from most positions should be very manageable. ## RISK VS REWARD This hole offers a classic risk/reward scenario in club selection off the tee. Aggressive players might choose driver to leave the shortest possible approach, but the reward may not justify the risk of finding rough or an awkward lie. The conservative play of 3-wood or long iron, leaving a slightly longer but more controlled approach, often proves more effective for scoring. The real reward comes from playing within your capabilities and avoiding the big number. With proper course management, this hole should yield pars consistently, with birdie opportunities arising from solid execution rather than aggressive tactics. ## DIFFERENT SKILL LEVELS **High-Handicap Players:** Focus on fairway accuracy above all else. Consider hitting your most reliable fairway club off the tee, even if it leaves a longer approach. A 7 or 8-iron from the fairway is much more manageable than a wedge from the rough. Aim for the center of the green regardless of pin position, and be satisfied with two-putting for par. **Low-Handicap Players:** This hole rewards precise distance control and strategic thinking. Consider the pin position when selecting your tee club – a back pin might favor leaving a higher-lofted approach club, while a front pin could allow for a more aggressive tee shot. Use your course management skills to identify the optimal angle into the green based on the day's conditions. The 17th at Pasatiempo exemplifies how MacKenzie's genius lies not in overwhelming difficulty, but in rewarding thoughtful play while punishing careless execution. Respect the hole's strategic demands, and it will reward you with scoring opportunities in the closing stretch of your round.
Hole 17 Green Complex
Mapped green boundary
Green size: 5,809 sq ft
How did Hole 17 play?
How did this hole play today?
Frequently asked questions
Yardage reference: Championship tees · 371 yards.
What's the best strategy off the tee?
↓
For this 371-yard par 4, most players will hit 3-wood or driver to set up a comfortable approach.
How difficult is hole 17?
↓
This hole is a good scoring opportunity for most golfers.
How big is the green on hole 17?
↓
The green is medium-sized with moderate targets. The green is wider than it is deep, rewarding shots that find the correct tier. Pay attention to pin placement when selecting your approach club.
What's a good score on hole 17?
↓
This hole is a medium-length test where par is a solid result. A straightforward par 4 where course management pays off.