Hole 16 at Pasatiempo Golf Club
- Par
- 4
- Yardage
- 387 yds
- Stroke index
- 1
- Hazards
- 2 bunkers
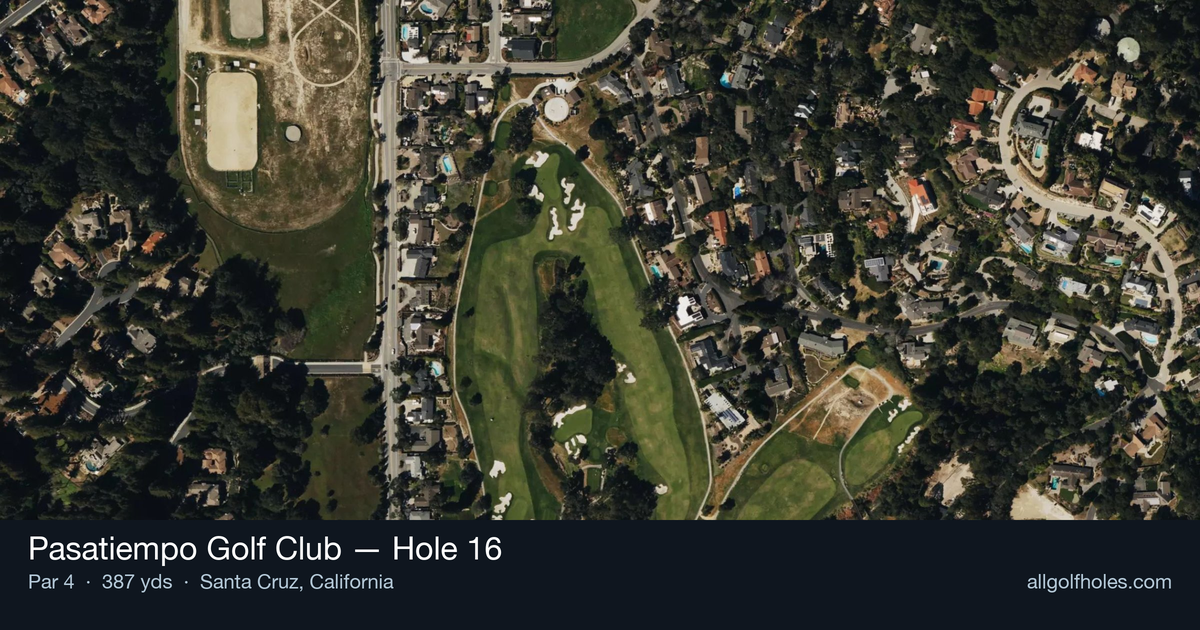
Aerial source not provided
Green size: 47 yds deep × 34 yds wide
Scorecard yardage is for Championship tees. The aerial shows its labeled reference position; distance rings measure to the green.
Championship tees · Par 4 · 387 yards
The plan for No. 16
The signature Pasatiempo Golf Club hole 16 stands as Dr. Alister MacKenzie's masterpiece, earning its reputation as the #1 handicap hole on this legendary Santa Cruz layout. This deceptively challenging 387-yard par 4 demands precision from tee to green, with the tee shot requiring careful placement to set up the approach to MacKenzie's most famous creation. The hole's defining feature is its iconic four-tiered green complex, featuring enormous steps that create distinct pinnable areas within a dramatic back-to-front slope. This terraced green, with its approximately 10-foot elevation change, transforms what appears to be a straightforward approach shot into a test of distance control and green-reading skills. The stepped putting surface rewards precise approach shots while severely punishing anything short or long, making this hole a true examination of strategic golf that has captivated players for nearly a century.
Off the tee
The tee shot strategy centers on finding the optimal position in the landing zone while avoiding any trouble that may guard the fairway edges. With the hole playing at 387 yards, most golfers will need a solid drive to leave a manageable approach distance. Target the center-left portion of the fairway to provide the best angle into the green. Driver is typically the right choice for longer hitters, while shorter players might consider a 3-wood or hybrid for accuracy. The key is avoiding any lateral hazards and ensuring you have a clear sight line to the green for your approach.
Approach & recovery
The approach shot to the famous four-tiered green is where this hole truly shows its teeth. The green features dramatic elevation changes with approximately 10 feet of back-to-front slope across four distinct levels. Club selection is critical - take one extra club to ensure you carry any fronting hazards and reach the correct tier. Study the pin position carefully, as hitting to the wrong level can leave you with an extremely difficult putt. The green slopes significantly from back to front, so favor being below the hole whenever possible. Mid-iron to long-iron will typically be required depending on your tee shot position and the day's conditions.
On the green
Pasatiempo's 16th green is truly iconic for good reason - the four enormous steps create distinct pinnable areas that require precise distance control on approach shots. Once on the green, reading the breaks becomes crucial as putts can gather serious speed on the downhill sections. If you're above the hole, focus on speed control rather than line, as gravity will do most of the work. Uphill putts require firm striking, while downhill putts demand a feather touch. The key is avoiding three-putts by being conservative with your first putt and ensuring you don't leave yourself on the wrong tier. ## RISK VS REWARD The primary risk/reward decision comes with approach shot aggression versus safety. Attacking pins on the upper tiers offers scoring opportunities but risks leaving difficult downhill putts or worse. The safer play involves targeting the center of the green or the tier below the pin, accepting a longer putt in exchange for better speed control. Given the green's reputation for punishing overly aggressive play, the reward rarely justifies the risk unless you're in a match-play situation requiring birdies. ## DIFFERENT SKILL LEVELS **High-Handicap Players:** Focus on reaching the green in regulation rather than attacking specific pin positions. Play conservatively off the tee with your most reliable club, then aim for the center or front portion of the green with your approach. Two-putting from anywhere on this green is a victory, so prioritize avoiding the steep downhill putts from the back tiers. **Low-Handicap Players:** You have more options for aggressive play, but respect the green's difficulty. Consider pin position and your approach angle when selecting targets. From ideal tee shot positions, you can attack pins on the lower tiers, but always have an escape plan. Your superior putting skills allow for more aggressive approach shots, but even scratch players should think twice about going at back pins. The 16th hole at Pasatiempo remains a testament to strategic golf course design, where local knowledge and careful planning triumph over raw power. Embrace the challenge while respecting the hole's legendary difficulty.
Hole 16 Green Complex
Mapped green boundary
Green size: 7,326 sq ft
How did Hole 16 play?
How did this hole play today?
Frequently asked questions
Yardage reference: Championship tees · 387 yards.
What's the best strategy off the tee?
↓
For this 387-yard par 4, most players will hit driver to set up a comfortable approach.
How difficult is hole 16?
↓
This hole is a good scoring opportunity for most golfers. Key challenges include: large green requiring good lag putting.
What hazards should I watch out for on hole 16?
↓
Key hazards include: 2 greenside bunkers. Plan your shots to avoid these trouble spots.
How big is the green on hole 16?
↓
The green is fairly large with multiple pin positions. The green is deeper than wide, so club selection is crucial. Lag putting becomes important on longer putts.
What's a good score on hole 16?
↓
This hole is a medium-length test where par is a solid result. A straightforward par 4 where course management pays off.