Hole 17 at Grayhawk Golf Club (Raptor course)
- Par
- 4
- Yardage
- 464 yds
- Stroke index
- 7
- Hazards
- 2 bunkers
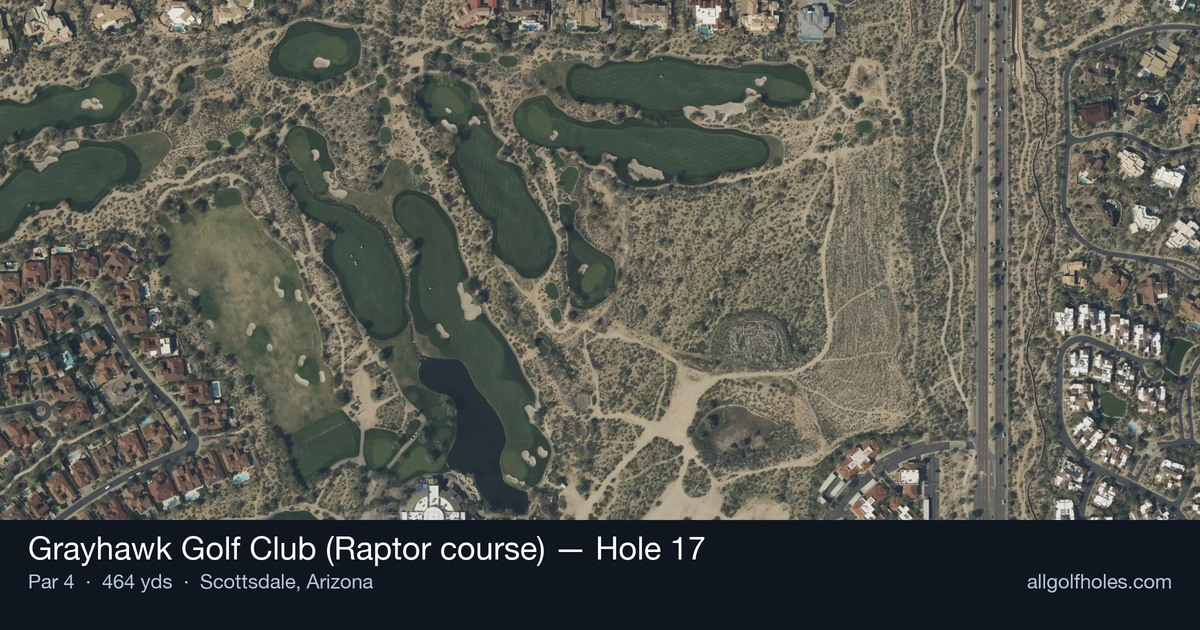
Aerial source not provided
Green size: 39 yds deep × 31 yds wide
Scorecard yardage is for Championship tees. The aerial shows its labeled reference position; distance rings measure to the green.
Championship tees · Par 4 · 464 yards
The plan for No. 17
The 17th hole at Grayhawk Golf Club's Raptor course presents a deceptive challenge that embodies Tom Fazio's masterful design philosophy. This 464-yard par 4 features a generous fairway that initially appears welcoming, but strategic bunkers positioned down the right side create a compelling risk-reward scenario. The conservative play calls for a long iron or fairway wood that stays short of the right bunker, leaving a longer but safer approach to the small, crowned green. More aggressive players can challenge the carry over the strategically placed sand, gaining a significant advantage for the approach shot. Deep greenside bunkers guard the elevated putting surface, demanding precision on the second shot. This penultimate hole perfectly captures the Raptor's "come-and-get-it" style, where clear visual challenges test both course management skills and execution under pressure.
Off the tee
The key strategic element is the right fairway bunker positioned at a challenging carry distance. Conservative players should employ a long iron or fairway wood, laying up short of this bunker to ensure a safe landing area. This strategy leaves a longer approach but eliminates the risk of finding sand. Aggressive players with sufficient distance can attempt to carry the bunker, gaining valuable yardage and a better approach angle. The target line should favor the left side of the fairway when playing conservatively, or challenge the right side bunker when going for maximum distance. Club selection depends on wind conditions and personal carry distances - prioritize accuracy over pure distance.
Approach & recovery
From the conservative tee shot position, expect a mid-iron to long-iron approach depending on conditions and pin placement. The small green size demands precise club selection and committed swings. Study the pin position carefully - front pins may allow for more aggressive approaches, while back pins require extra club to ensure adequate carry. Avoid coming up short, as Tom Fazio's design typically features deep greenside bunkers guarding crowned greens. Aim for the center of the green when in doubt, as the small target leaves little margin for error on approach shots.
On the green
The small, crowned green typical of Raptor course design creates subtle but significant breaks. Putts will generally break away from the center crown, so read the green carefully from multiple angles. Above-the-hole positions present particularly challenging downhill putts on the crowned surface. Focus on speed control rather than aggressive line-taking, as the small green means three-putts can quickly derail scoring. When facing longer putts, prioritize getting your first putt to the low side of the hole. ## RISK VS REWARD The primary risk-reward decision occurs on the tee shot. Carrying the right bunker opens up better approach angles and shorter distances, but failure results in a difficult bunker shot or worse. The reward includes easier approach club selection and better scoring opportunities. Conservative play virtually guarantees a reasonable approach shot but may require precise iron play to score well. Weather conditions significantly impact this decision - headwinds make the carry more challenging while tailwinds encourage aggressive play. ## DIFFERENT SKILL LEVELS **High-handicap players** should embrace the conservative strategy without hesitation. Use a long iron or fairway wood off the tee, accept the longer approach shot, and focus on hitting the center of the green. Avoid the temptation to challenge bunkers - bogey is an acceptable score on this demanding hole. **Low-handicap players** can evaluate the risk-reward based on their carry distances and current form. Strong ball-strikers may choose to challenge the right bunker when conditions favor aggressive play, but should have a clear bailout plan. Even skilled players should consider conservative play when struggling with accuracy or facing challenging conditions. The 17th hole rewards thoughtful course management while punishing overaggressive play, making it a true test of strategic thinking late in the round.
Watch for
- Course conditioning and mapped hazards may affect line selection; confirm from the aerial.
Hole 17 Green Complex
Mapped green boundary
Green size: 5,208 sq ft
How did Hole 17 play?
How did this hole play today?
Frequently asked questions
Yardage reference: Championship tees · 464 yards.
What's the best strategy off the tee?
↓
For this 464-yard par 4, most players will hit driver to set up a comfortable approach.
How difficult is hole 17?
↓
This hole is a moderate challenge for most golfers. Key challenges include: long par 4.
How big is the green on hole 17?
↓
The green is medium-sized with moderate targets. Pay attention to pin placement when selecting your approach club.
What's a good score on hole 17?
↓
This hole is one of the tougher holes where par feels like birdie. A challenging par 4. Accept that bogey happens and avoid big numbers.