Hole 13 at Grayhawk Golf Club (Raptor course)
- Par
- 3
- Yardage
- 230 yds
- Stroke index
- 15
- Hazards
- 1 bunker
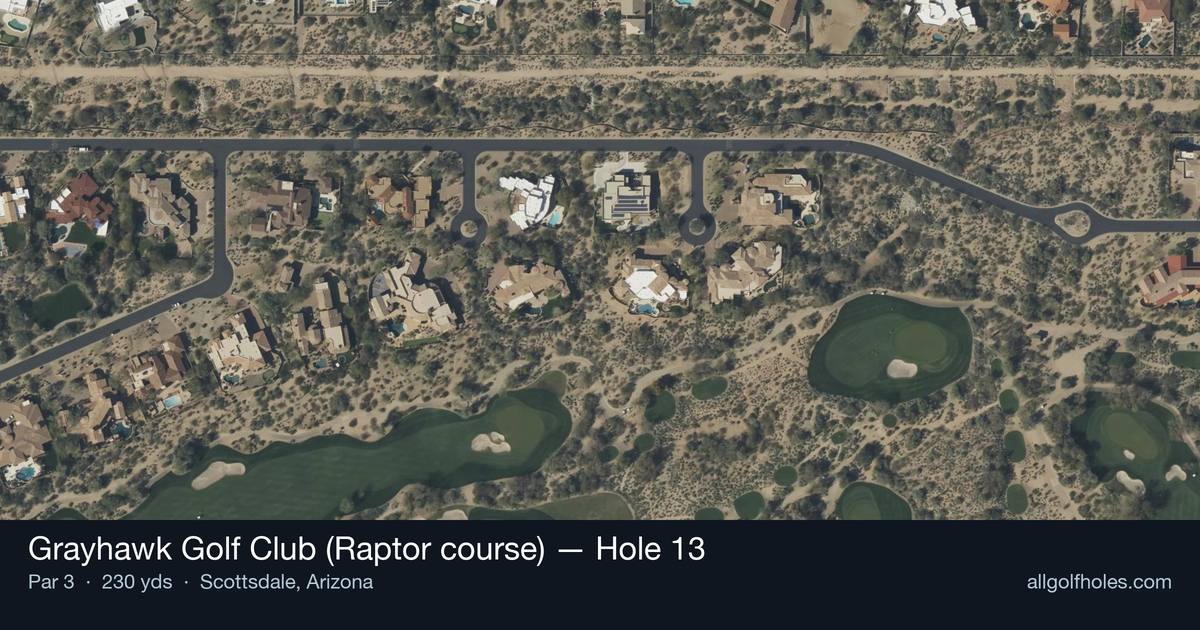
Aerial source not provided
Green size: 33 yds deep × 27 yds wide
Scorecard yardage is for Championship tees. The aerial shows its labeled reference position; distance rings measure to the green.
Championship tees · Par 3 · 230 yards
The plan for No. 13
The 13th hole at Grayhawk Golf Club's Raptor course presents a deceptively challenging par 3 that tests precision over power. At 230 yards, this Tom Fazio design demands a confident tee shot to a small, well-protected green nestled in the Sonoran Desert landscape. The hole's straight layout might appear straightforward, but the compact target and desert surroundings leave little room for error. Club selection becomes critical as golfers must account for elevation changes and desert winds that can wreak havoc on ball flight. This mid-length par 3 exemplifies Fazio's philosophy of risk-reward golf, where a well-struck shot is rewarded but wayward attempts face the unforgiving desert terrain that has challenged professionals during WGC Match Play events.
Off the tee
From the tee, commit fully to your club selection based on pin position and wind conditions. The desert environment can create swirling winds that significantly affect ball flight, making it essential to factor in both distance and trajectory. Aim for the center of the green when in doubt, as the small target leaves little margin for error. Take one extra club if you're between selections - being long is often preferable to coming up short on a par-3 of this length. The elevated tee provides excellent visibility to assess conditions, but don't let the scenic Sonoran Desert backdrop distract from your pre-shot routine. Focus on a smooth, controlled swing rather than trying to muscle the ball to the pin.
Approach & recovery
Since this is a par-3, your tee shot IS your approach shot. The key is selecting the right trajectory for the pin position. When the pin is tucked behind trouble or on a shelf, play to the fat part of the green and rely on your putting. The small green means you'll face longer putts, but two-putting from the center is far better than scrambling from off the green. Pay special attention to the desert conditions - firm, fast greens are common, so consider landing short and letting the ball release when conditions permit. Conversely, when the greens are soft, you can be more aggressive with your target line.
On the green
The small green size means most putts will have significant break due to the undulations needed for proper drainage. Study the slopes carefully during your approach to the tee, as the elevated perspective provides valuable information about the green's contours. Desert greens often feature subtle but decisive breaks that can fool the eye at ground level. Focus on speed control above all else - getting your first putt close is crucial when facing potentially long second putts on this compact surface. The firm conditions typical of desert courses mean putts can easily run well past the hole if struck too firmly. ## RISK VS REWARD This hole rewards conservative, smart play over aggressive pin-hunting. The primary risk/reward decision involves club selection and target choice. While going directly at pins might seem tempting, the small green size and desert surroundings make center-green the percentage play for most golfers. The reward for finding the green in regulation is a legitimate birdie opportunity, while missing the target often leads to difficult recovery shots. ## DIFFERENT SKILL LEVELS **High-Handicap Players:** Focus entirely on finding the green, regardless of pin position. Use a club that you're confident will carry the required distance, even if it means being long. Aim for the center of the green and accept that two-putting for par is an excellent result on this challenging hole. **Low-Handicap Players:** You can be more aggressive with pin positions, especially when they're accessible. However, even skilled players should respect the small target and desert conditions. Consider the match situation in tournament play - sometimes par is the right score to take and move on. **Course Management Tip:** Given Grayhawk's reputation as a venue for professional events, approach this hole with the same strategic mindset the pros employ - patience, precision, and smart target selection over heroic attempts. This hole exemplifies why the Raptor course has earned its reputation as a thinking player's course, rewarding those who combine sound strategy with solid execution.
Watch for
- Course conditioning and mapped hazards may affect line selection; confirm from the aerial.
Hole 13 Green Complex
Mapped green boundary
Green size: 4,930 sq ft
How did Hole 13 play?
How did this hole play today?
Frequently asked questions
Yardage reference: Championship tees · 230 yards.
What club should I use on this par 3?
↓
At 230 yards, most golfers will need a fairway wood or hybrid to reach this green. Adjust for elevation, wind, and pin position.
How difficult is hole 13?
↓
This hole is a moderate challenge for most golfers. Key challenges include: long par 3.
What hazards should I watch out for on hole 13?
↓
Key hazards include: 1 greenside bunker. Plan your shots to avoid these trouble spots.
How big is the green on hole 13?
↓
The green is medium-sized with moderate targets. Pay attention to pin placement when selecting your approach club.
What's a good score on hole 13?
↓
This hole is a challenging par where bogey is acceptable. This longer par 3 will test your long iron or hybrid game. Par is a good score.