Hole 3 of 18 · Brewster, Washington
Hole 3 at Gamble Sands Golf and Inn
- Par
- 5
- Yards
- 632
- Handicap
- 1
- Bunkers
- 4
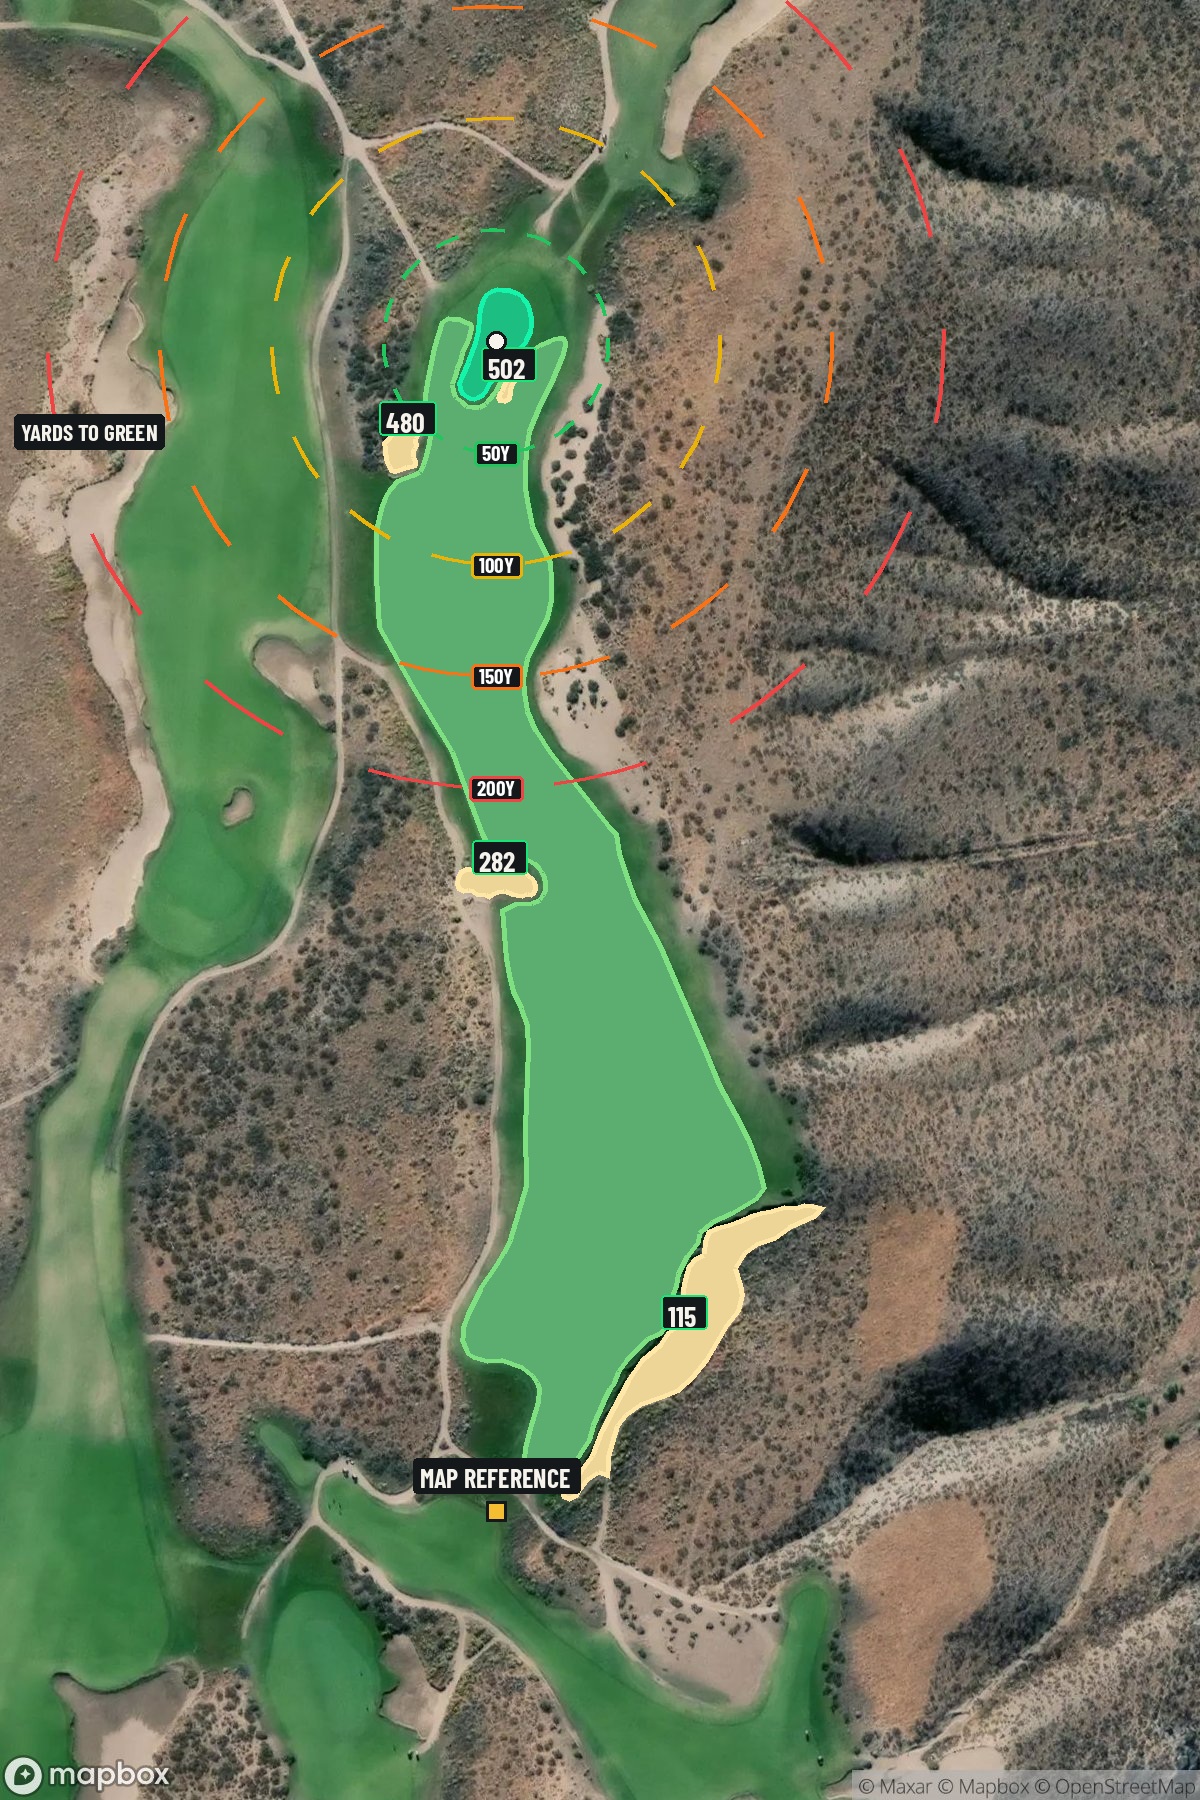
Map distances from Map reference tee
The map's printed distances are measured from the Map reference tee to the green; they do not move when you change tees. Your Championship yardage is in the tiles above.
Green size: 51 yds deep × 34 yds wide
Mapbox Satellite composite · capture date not provided. Green at the top.
Where this map comes from
- Satellite photo
- Date not published
- Mapbox satellite
The plan for No. 3
These notes were written before the current map. Where their distances differ, trust the map.
The play: The longest and most demanding test at Gamble Sands Golf and Inn, this 632-yard par 5 serves as the course's signature hole and number one handicap challenge. Set against the dramatic backdrop of central Washington's high desert landscape, the hole stretches across rolling terrain with sweeping views of the surrounding mountains. The generous fairway invites an aggressive tee shot, but the sheer length demands strategic positioning for the lengthy approach shots that follow. With no significant hazards to navigate, success depends purely on execution and course management across this marathon hole. The small green complex requires precision on the final approach, rewarding those who can maintain accuracy after two demanding shots. This quintessential risk-reward par 5 exemplifies the bold, strategic golf that makes Gamble Sands a premier Pacific Northwest destination.
Shot by shot
The green on No. 3
Mapped boundary- Wide × deepyards
- 34×51
- Areasq ft
- 9,054
Gear for Hole 3
4bunkers
Bring a sand wedge you trust
 Titleist Vokey SM10 Tour Chrome$180 MSRPCheck priceCompare all picks →
632yd par 5
A fairway wood sets up the third
 PING G440 Max Fairway Wood$300 MSRPCheck priceCompare all picks →
We may earn a commission when you buy through these links.
How did Hole 3 play?
How did this hole play today?
Frequently asked questions
Yardage reference: Championship tees · 632 yards.
Can this par 5 be reached in two?
↓
At 632 yards, A true three-shot hole for most players. Position your layup to leave a comfortable wedge distance.
How difficult is hole 3?
↓
This hole is a moderate challenge for most golfers. Key challenges include: long par 5, heavily bunkered, large green requiring good lag putting.
How big is the green on hole 3?
↓
The green is large and can play quite long. Three-putt territory if you don't manage your approach distance well.
Which side of the fairway is safer on hole 3?
↓
Aim for the left side of the fairway when possible. Missing right brings more trouble into play.
What's a good score on hole 3?
↓
This hole is a true three-shot hole where birdie requires execution. This longer par 5 demands patience. Two good shots set up the scoring opportunity.