Hole 11 at Edgewood Tahoe G.C.
- Par
- 4
- Yardage
- 407 yds
- Stroke index
- 12
- Hazards
- 1 bunker · Water
Aerial source not provided
Green size: 37 yds deep × 25 yds wide
Scorecard yardage is for Pro tees. The aerial shows its labeled reference position; distance rings measure to the green.
Pro tees · Par 4 · 407 yards
The plan for No. 11
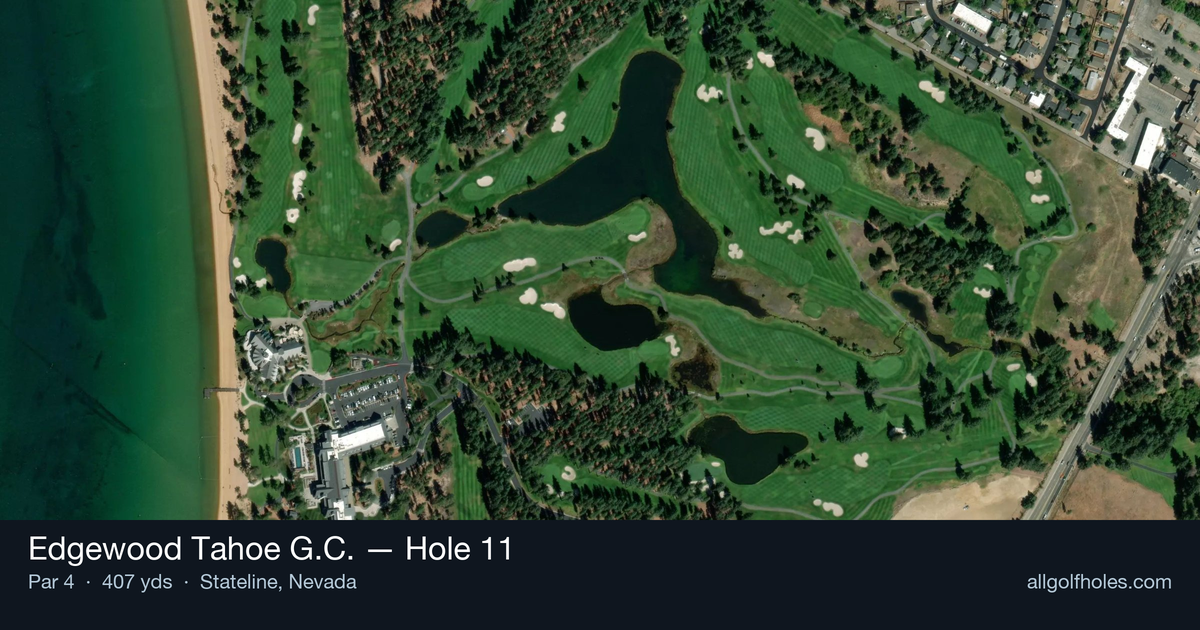
The 11th hole at Edgewood Tahoe G.C. presents a deceptively challenging par 4 that plays over a pond to a green nestled among towering pines. This 407-yard test demands both precision and nerve, as the approach shot must carry water to reach the small, well-protected putting surface. The straight layout allows for an aggressive tee shot, but players must carefully consider their angle of attack for the critical second shot. With the green tucked into the trees and water guarding the front, club selection becomes paramount on the approach. The hole exemplifies Edgewood's blend of natural beauty and strategic design, where the stunning Sierra Nevada backdrop can distract from the tactical demands. Successfully navigating this water-protected green complex requires both course management skills and precise iron play, making it a memorable challenge in the heart of Lake Tahoe's most scenic golf experience.
Off the tee
Your tee shot strategy should focus on finding the ideal distance and angle for your approach. A well-struck driver or 3-wood will leave you with a mid-iron to the green, but club selection depends heavily on your comfort level with the water carry. Consider laying back with a hybrid or long iron if you're more confident with a shorter club in your hands for the approach. The target line should favor the center-right portion of the fairway, giving you the best angle to attack the pin while avoiding any trees that might interfere with your approach trajectory.
Approach & recovery
The approach shot is where this hole's true character emerges. With the green playing over a pond and tucked into the trees, precision trumps power every time. Take one extra club and commit to a smooth, confident swing rather than forcing a shot. Aim for the center of the green initially, as Edgewood's multi-tiered green complexes require precise iron shots to have legitimate birdie opportunities. The water short and the trees behind demand that you find the correct distance - coming up short is costly, while going long leaves a difficult recovery.
On the green
Edgewood's green complexes are known for their multiple tiers and challenging putts, especially when you find yourself above the hole. The small green size means precision on your approach pays dividends here. Study the slopes carefully, as putts can be quite slippery from elevated positions. Focus on getting your first putt close rather than being overly aggressive, as three-putts can quickly turn a good scoring hole into a bogey or worse. ## RISK VS REWARD This hole offers excellent birdie potential for players willing to be aggressive with their approach shots. The risk/reward calculation centers on your confidence with mid-irons over water. Aggressive players who can carry the pond comfortably should attack pins, while more conservative golfers should focus on finding the green and two-putting for par. The penalty for missing short is severe, making club selection and commitment crucial to your strategy. ## DIFFERENT SKILL LEVELS **Low-Handicap Players:** Attack this hole aggressively with driver off the tee, leaving a comfortable mid-iron approach. Trust your distance control and aim for specific quadrants of the green based on pin position. This represents a legitimate birdie opportunity when played with confidence. **High-Handicap Players:** Consider a more conservative approach with a fairway wood or hybrid off the tee, ensuring you have a club you're comfortable hitting over water for your approach. Focus on finding the center of the green and making a solid par. The key is avoiding the big number that water can create - take an extra club on approach and swing smoothly rather than trying to muscle a shot you're not comfortable with. The 11th hole exemplifies Edgewood Tahoe's blend of natural beauty and strategic golf, where smart course management and confident execution lead to scoring opportunities in one of golf's most scenic settings.
Watch for
- Course conditioning and mapped hazards may affect line selection; confirm from the aerial.
Hole 11 Green Complex
Mapped green boundary
Green size: 4,403 sq ft
How did Hole 11 play?
How did this hole play today?
Frequently asked questions
Yardage reference: Pro tees · 407 yards.
What's the best strategy off the tee?
↓
For this 407-yard par 4, most players will hit driver to set up a comfortable approach.
How difficult is hole 11?
↓
This hole is one of the tougher holes on the course for most golfers. Key challenges include: water in play, small green.
What hazards should I watch out for on hole 11?
↓
Key hazards include: 1 greenside bunker; water at 166.4 yards. Plan your shots to avoid these trouble spots.
How big is the green on hole 11?
↓
The green is small and requires precision. The green is wider than it is deep, rewarding shots that find the correct tier. Expect challenging pin positions with limited room for error.