Hole 7 at Edgewood Tahoe G.C.
- Par
- 3
- Yardage
- 169 yds
- Stroke index
- 17
- Hazards
- 4 bunkers
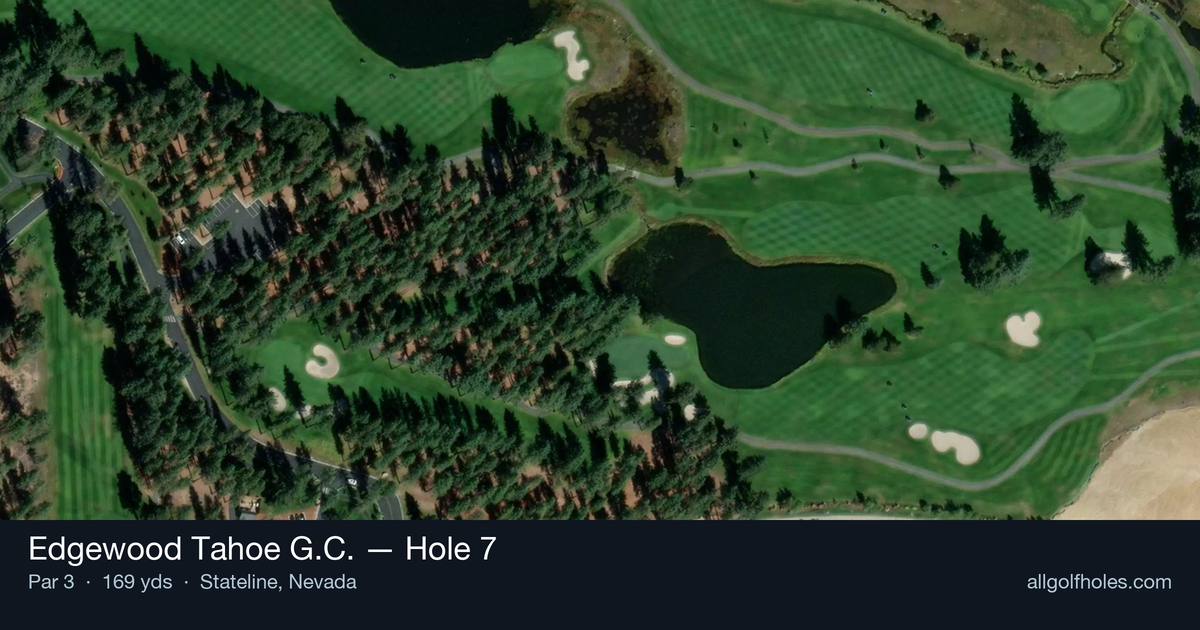
Aerial source not provided
Green size: 46 yds deep × 30 yds wide
Scorecard yardage is for Pro tees. The aerial shows its labeled reference position; distance rings measure to the green.
Pro tees · Par 3 · 169 yards
The plan for No. 7
Hole 7 at Edgewood Tahoe G.C. presents a deceptively straightforward par 3 that demands precision over power. At 169 yards, this mid-iron challenge features a compact green that punishes wayward tee shots despite the absence of major hazards. The hole's handicap rating of 17 might suggest simplicity, but the small target and Lake Tahoe's unpredictable mountain winds create a test that has humbled many accomplished players. The straight-line approach requires careful club selection and committed execution, as the unforgiving green complex leaves little margin for error. What makes this hole memorable is its pure golf challenge – no tricks or dramatic features, just the fundamental demand for accurate iron play that defines championship golf at this legendary Tahoe venue.
Off the tee
Your tee shot strategy should prioritize the center of the green above all else. With a small target, aim for the heart of the green rather than chasing pins, especially when they're tucked near edges. Club selection typically ranges from a 7-iron to 5-iron depending on conditions, but remember that Tahoe's elevation can add 10-15 yards to your carry distance. Take one less club than you'd normally hit at sea level and make a confident, smooth swing. The key is committing to your yardage and trusting your distance control rather than trying to manufacture a perfect shot.
Approach & recovery
Since this is a par 3, your tee shot IS your approach shot. Focus on a controlled, three-quarter swing that prioritizes accuracy over distance. The small green means there's little room for error, so avoid the temptation to attack pins aggressively. Instead, play to the fat part of the green and let your putting do the work. Pay attention to wind conditions, which can be tricky in the mountain setting, and don't be afraid to take an extra club if there's any doubt about your distance.
On the green
The small green size means most putts will be relatively short, but don't underestimate the importance of lag putting. With limited green surface area, three-putts can easily happen if you're not careful with speed control. Read the green carefully from multiple angles, as subtle breaks can be deceiving on smaller surfaces. Focus on getting your first putt within a three-foot circle of the hole, and always err on the side of leaving putts short rather than racing them past the hole on a small target. ## RISK VS REWARD This hole offers limited risk/reward scenarios due to its straightforward design and lack of significant hazards. The main decision point is whether to be aggressive with pin positions or play conservatively to the center. Given the small green, the conservative approach typically yields better scoring results. The reward for precision is a legitimate birdie opportunity, while the risk of missing the green entirely can lead to difficult up-and-down situations. ## DIFFERENT SKILL LEVELS **High-handicap players** should focus exclusively on finding the green, regardless of pin position. Take enough club to ensure you reach the putting surface, and aim for the center of the green every time. A bogey from the center of the green is far better than a double bogey from short of the green. **Low-handicap players** can be more aggressive with their target selection, especially when pins are in accessible positions. However, even skilled players should respect the small green size and avoid forcing shots to difficult pins. Use your superior distance control to attack middle pins while playing conservatively to edge positions. The beauty of Edgewood Tahoe's 7th hole lies in its simplicity – it's a pure test of iron play accuracy that rewards smart course management and punishes overaggression. Make par your worst score, and let birdies come naturally through solid execution.
Watch for
- Course conditioning and mapped hazards may affect line selection; confirm from the aerial.
Hole 7 Green Complex
Mapped green boundary
Green size: 6,150 sq ft
How did Hole 7 play?
How did this hole play today?
Frequently asked questions
Yardage reference: Pro tees · 169 yards.
What club should I use on this par 3?
↓
At 169 yards, most golfers will need a mid-iron (7-iron to 8-iron) to reach this green. Adjust for elevation, wind, and pin position.
How difficult is hole 7?
↓
This hole is a good scoring opportunity for most golfers. Key challenges include: heavily bunkered.
What hazards should I watch out for on hole 7?
↓
Key hazards include: 4 greenside bunkers. Plan your shots to avoid these trouble spots.
How big is the green on hole 7?
↓
The green is fairly large with multiple pin positions. Lag putting becomes important on longer putts.
What's a good score on hole 7?
↓
This hole is a solid par with birdie chances for precise approach shots. Making par is a good result here. Focus on hitting the green and avoiding three-putts.