Hole 12 at Edgewood Tahoe G.C.
- Par
- 3
- Yardage
- 205 yds
- Stroke index
- 10
- Hazards
- 2 bunkers · Water
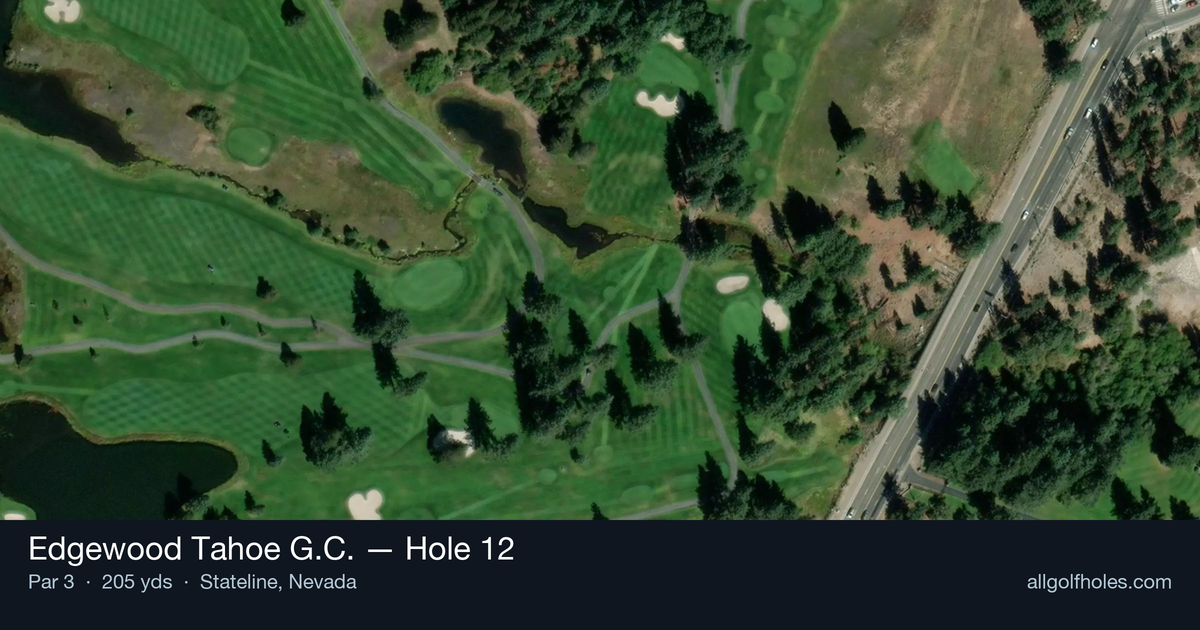
Aerial source not provided
Green size: 20 yds deep × 35 yds wide
Scorecard yardage is for Pro tees. The aerial shows its labeled reference position; distance rings measure to the green.
Pro tees · Par 3 · 205 yards
The plan for No. 12
The 12th hole at Edgewood Tahoe G.C. presents a formidable 205-yard par 3 that demands both precision and power against the stunning Sierra Nevada backdrop. This challenging tee shot requires a long carry over bunkers to reach the small, elevated green nestled among towering pines. The hole's straightforward layout belies its difficulty, as the compact target leaves little margin for error on approach shots. Club selection becomes critical at this altitude, where the thin mountain air can dramatically affect ball flight. With Lake Tahoe's pristine waters shimmering in the distance, golfers must block out the spectacular scenery and focus on executing a pure strike to find the putting surface. The 12th epitomizes Edgewood's blend of natural beauty and strategic golf design.
Off the tee
Club selection is paramount on this 205-yard one-shotter. Depending on conditions and pin position, you'll likely need anything from a long iron to a hybrid or fairway wood. The key strategic element is the bunker carry mentioned in course descriptions - commit fully to clearing this hazard rather than trying to play short and safe. Target the center of the green initially, then adjust based on pin position. The Lake Tahoe elevation (approximately 6,200 feet) will add distance to your shots, so club down accordingly. Wind off the lake can be a significant factor, so pay attention to conditions before making your final club selection.
Approach & recovery
Since this is a par 3, your tee shot IS your approach. Focus on a smooth, controlled swing rather than trying to overpower the shot. The small green size demands accuracy, and the course's characteristic left-to-right ball flight tendencies should factor into your aim point. Given Edgewood's reputation for complex green surfaces, landing your ball below the hole whenever possible will provide the best scoring opportunities. The tiered nature of many greens here means an approach shot that finishes above the pin can leave you with an extremely challenging downhill putt.
On the green
Edgewood Tahoe's greens are known for their multiple tiers and can create treacherous putting surfaces when you're above the hole. Study the green carefully during your approach to identify the tier where the pin is located. Speed control becomes critical on these slippery surfaces. If you find yourself above the hole, focus on a controlled stroke that gets the ball rolling at the right pace rather than worrying too much about perfect line. Conversely, uphill putts can be more aggressive since the slope will help control speed. ## RISK VS REWARD The primary risk/reward decision centers on pin position relative to the bunkers and green tiers. When the pin is tucked behind bunkers or on a challenging tier, the smart play is to aim for the center of the green and accept a longer putt rather than risk finding sand or leaving yourself above the hole. More aggressive players might attack certain pin positions, but the small green size limits the margin for error. The scoring opportunity comes from avoiding three-putts rather than making birdie. ## DIFFERENT SKILL LEVELS **High-Handicap Players:** Focus entirely on clearing the bunkers and finding the putting surface. Club up to ensure you carry the trouble, and aim for the largest part of the green regardless of pin position. A bogey from the center of the green is far better than a double or triple from the bunkers. **Low-Handicap Players:** Can be more aggressive with pin hunting, especially when the flag is in a favorable position on the green's tiers. Use course management skills to identify when to attack versus when to play conservatively. Your superior distance control allows you to work different areas of the green based on pin position. **Mid-Handicap Players:** Strike a balance by playing to the fat part of the green but adjusting slightly for pin position when it's not in a particularly challenging spot. Focus on solid contact and commitment to your club selection rather than trying to manufacture shots you're not comfortable executing. The 12th hole rewards patience and precision - qualities that serve players well throughout their round at this championship venue that has hosted major USGA events.
Watch for
- Course conditioning and mapped hazards may affect line selection; confirm from the aerial.
Hole 12 Green Complex
Mapped green boundary
Green size: 3,814 sq ft
How did Hole 12 play?
How did this hole play today?
Frequently asked questions
Yardage reference: Pro tees · 205 yards.
What club should I use on this par 3?
↓
At 205 yards, most golfers will need a long iron or hybrid (5-iron to 6-iron) to reach this green. Adjust for elevation, wind, and pin position.
What hazards should I watch out for on hole 12?
↓
Key hazards include: 2 greenside bunkers; water at 123.4 yards. Plan your shots to avoid these trouble spots.
How big is the green on hole 12?
↓
The green is small and requires precision. The green is wider than it is deep, rewarding shots that find the correct tier. Expect challenging pin positions with limited room for error.