Hole 17 at Edgewood Tahoe G.C.
- Par
- 3
- Yardage
- 207 yds
- Stroke index
- 18
- Hazards
- 4 bunkers · Water
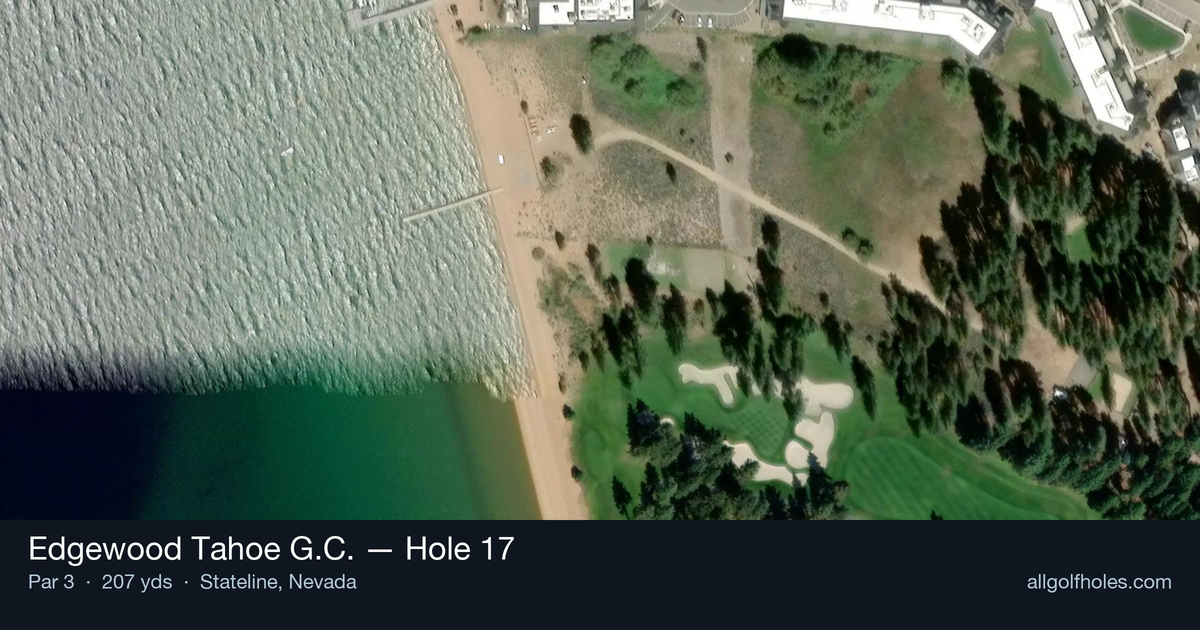
Aerial source not provided
Green size: 37 yds deep × 33 yds wide
Scorecard yardage is for Pro tees. The aerial shows its labeled reference position; distance rings measure to the green.
Pro tees · Par 3 · 207 yards
The plan for No. 17
The signature Edgewood Tahoe G.C. hole 17 stands as one of the most recognizable par 3s in American golf, immortalized through decades of televised celebrity tournaments against Lake Tahoe's stunning backdrop. This 207-yard test demands precision over Lake Tahoe's pristine waters, where swirling winds off the lake can dramatically affect club selection and ball flight. The elevated tee shot must carry entirely over water to reach a small, well-protected green that offers little margin for error. With the Sierra Nevada mountains framing this iconic hole, golfers face both visual intimidation and strategic complexity. The combination of distance, water carry, and unpredictable lake breezes makes this celebrity tournament favorite a memorable challenge that separates confident ball-strikers from tentative players, creating countless dramatic moments in golf's most scenic setting.
Off the tee
Club selection is critical on this televised hole where celebrities and pros have made both eagles and big numbers. The 207-yard distance typically calls for a mid to long iron, but Lake Tahoe's elevation (over 6,200 feet) means the ball flies farther in the thin air. Factor in a club less than normal, then adjust for wind conditions that can be gusty and swirling off the lake. Target the center of the small green rather than chasing pins, especially when they're tucked near edges. The straight layout means you can commit fully to your target line without worrying about doglegs or hidden trouble. Take an extra moment on the tee to feel the wind direction and intensity - many players underestimate how much the lake breeze affects ball flight here.
Approach & recovery
Since this is a par 3, your tee shot IS your approach shot, making precision paramount. The small green leaves little margin for error, so focus on solid contact and proper trajectory rather than trying to stick it close to challenging pin positions. A controlled fade or draw can help you work with the wind rather than fighting it. Pay attention to the pin position during your pre-shot routine. When the flag is in a difficult spot, aim for the fat part of the green and rely on your putting rather than risking a miss that could lead to a difficult up-and-down. Remember, this hole has seen everything from hole-in-ones to big numbers during tournament play.
On the green
The small green means every putt matters significantly for your score. While specific break patterns aren't detailed, most mountain course greens have subtle slopes that can be deceptive. Take time to read your putt carefully, as the scenic surroundings can be distracting. Focus on speed control, as short putts can easily slip by on what might be faster greens due to the mountain climate and maintenance standards of this premium facility. The pressure of playing such a famous hole can affect your putting stroke, so stick to your normal routine and trust your read. ## RISK VS REWARD The primary risk/reward decision comes in club selection and target choice. The reward of going at a tucked pin with the perfect club can yield birdie or better (as evidenced by the hole-in-ones recorded here), but the risk of missing the small green entirely can lead to difficult recovery shots. The smart play is usually the conservative approach - take enough club to comfortably reach the green, aim for the center, and let your putting determine your score. This strategy becomes even more important when winds are gusty, as mentioned by players who've experienced the challenging conditions here. ## DIFFERENT SKILL LEVELS **High-Handicap Players:** Focus entirely on finding the green with a comfortable swing. Don't be tempted by the beauty or fame of the hole to try shots beyond your ability. Take one extra club to ensure you reach the putting surface, and aim for the biggest part of the green regardless of pin position. **Low-Handicap Players:** You can be more aggressive with pin hunting, especially in calm conditions. Use your course management skills to identify when to attack and when to play safe. The hole's reputation and tournament history mean you should embrace the challenge while respecting the precision required. **All Players:** Remember that this hole has humbled pros and celebrities alike during televised events. The key is committing to your club selection and target, then executing with confidence. Don't let the hole's fame or the stunning scenery distract from solid fundamentals and smart golf strategy.
Watch for
- Course conditioning and mapped hazards may affect line selection; confirm from the aerial.
Hole 17 Green Complex
Mapped green boundary
Green size: 6,699 sq ft
How did Hole 17 play?
How did this hole play today?
Frequently asked questions
Yardage reference: Pro tees · 207 yards.
What club should I use on this par 3?
↓
At 207 yards, most golfers will need a long iron or hybrid (5-iron to 6-iron) to reach this green. Adjust for elevation, wind, and pin position.
How big is the green on hole 17?
↓
The green is fairly large with multiple pin positions. Lag putting becomes important on longer putts.