Hole 6 at Edgewood Tahoe G.C.
- Par
- 4
- Yardage
- 442 yds
- Stroke index
- 5
- Hazards
- 9 bunkers · Water
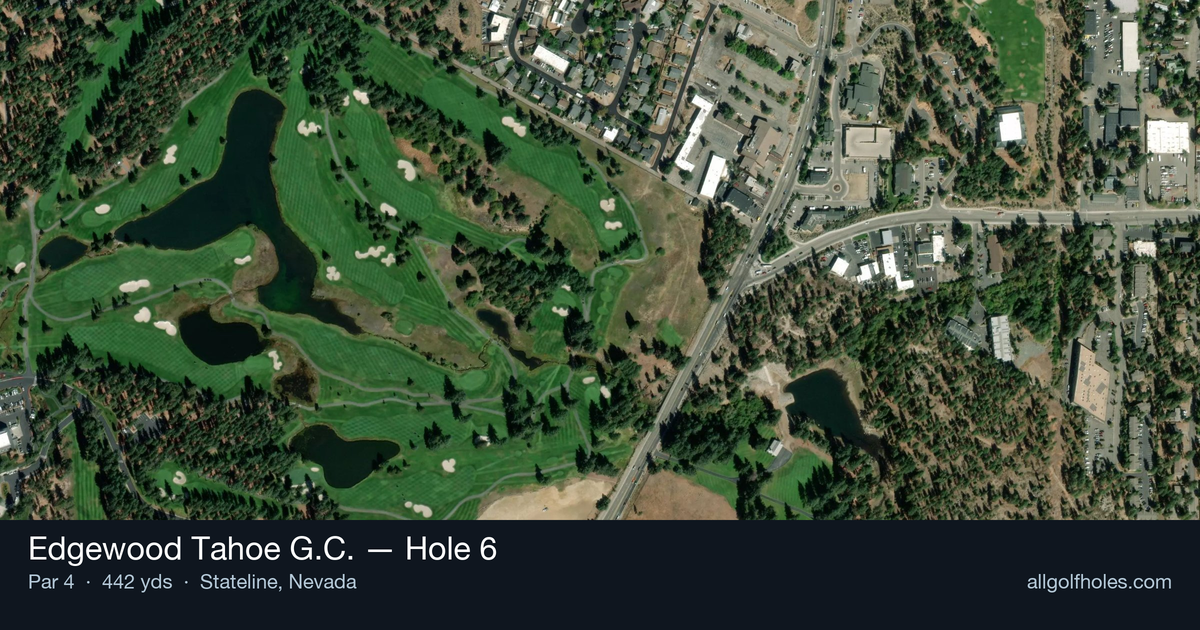
Aerial source not provided
Green size: 48 yds deep × 22 yds wide
Scorecard yardage is for Pro tees. The aerial shows its labeled reference position; distance rings measure to the green.
Pro tees · Par 4 · 442 yards
The plan for No. 6
The sixth hole at Edgewood Tahoe G.C. presents a demanding 442-yard par 4 that tests precision over power in the pristine Sierra Nevada setting. This straight-away challenge requires a confident tee shot to establish proper position for the crucial approach shot to a compact green complex. Playing at over 6,200 feet elevation, the thin mountain air adds distance but demands recalibrated club selection. The small green places a premium on accuracy, rewarding golfers who favor control over aggressive play. With minimal hazards to navigate, success hinges on course management and understanding how Tahoe's alpine conditions affect ball flight. This hole exemplifies Edgewood's philosophy of providing championship-caliber challenges within nature's most spectacular amphitheater, where strategic thinking trumps brute force.
Off the tee
Your tee shot strategy should prioritize finding the center of the fairway while taking advantage of the extra distance you'll get at this altitude. A well-struck driver or strong 3-wood will typically leave you with a mid-iron approach, but club selection depends on wind conditions and pin position. The straight layout means you can be aggressive with your target line down the middle of the fairway. Given Edgewood's reputation for favoring golfers with a left-to-right ball flight, those who naturally fade the ball will find this hole particularly appealing. Focus on a smooth, controlled swing rather than trying to overpower the shot - the thin air will provide the extra distance naturally.
Approach & recovery
The approach shot is where this hole's true challenge reveals itself. With a small green as your target, precision trumps power every time. Depending on your tee shot position, you'll likely face a mid-iron to long-iron approach. The key is committing to your club selection and swinging with confidence. At this altitude, the ball will fly higher and farther, so consider taking one less club than you might normally hit. Pay close attention to wind direction, as mountain conditions can be tricky. Aim for the center of the green regardless of pin position - the small target makes going flag-hunting a risky proposition for most golfers.
On the green
The small green demands accurate putting and good speed control. While specific break patterns aren't detailed, mountain greens typically feature subtle slopes that can be deceptive. Take time to read the green from multiple angles, paying particular attention to the overall slope and grain direction. With limited green surface area, distance control becomes crucial - leaving yourself above the hole can create challenging downhill putts. Focus on getting your first putt close rather than trying to make everything, as two-putting from anywhere on this green represents solid scoring. ## RISK VS REWARD This hole offers a straightforward risk/reward proposition: the more aggressive you are off the tee, the shorter your approach shot becomes, but accuracy remains paramount throughout. The absence of major hazards might tempt you to swing harder, but the small green punishes wayward approach shots severely. The smart play is controlled aggression - take advantage of the altitude to hit it far, but maintain the precision needed for the approach. Missing the green here likely means a difficult up-and-down, making par a challenge rather than an expectation. ## DIFFERENT SKILL LEVELS **High-Handicap Players:** Focus on keeping the ball in play off the tee, even if it means hitting 3-wood or hybrid for better accuracy. Your approach strategy should prioritize hitting the green anywhere rather than attacking pins. Consider the center of the green your target regardless of flag position, and be satisfied with two-putting for par. **Low-Handicap Players:** You can be more aggressive with driver off the tee, using the extra distance to leave shorter irons into the green. This allows for more precise distance control and better chances at birdie. Consider pin position more heavily in your approach strategy, but respect the small target. This is a legitimate birdie opportunity for skilled players who execute properly, but the small green makes bogey equally possible with poor approach shots. The 6th hole at Edgewood Tahoe rewards smart course management and precise execution while punishing overly aggressive play that lacks accuracy. Success here comes from understanding how the mountain conditions affect your ball flight and respecting the challenge that the small green presents.
Watch for
- Course conditioning and mapped hazards may affect line selection; confirm from the aerial.
Hole 6 Green Complex
Mapped green boundary
Green size: 5,483 sq ft
How did Hole 6 play?
How did this hole play today?
Frequently asked questions
Yardage reference: Pro tees · 442 yards.
What's the best strategy off the tee?
↓
For this 442-yard par 4, most players will hit driver to set up a comfortable approach.
How difficult is hole 6?
↓
This hole is one of the tougher holes on the course for most golfers. Key challenges include: water in play, heavily bunkered.
How big is the green on hole 6?
↓
The green is medium-sized with moderate targets. The green is wider than it is deep, rewarding shots that find the correct tier. Pay attention to pin placement when selecting your approach club.
What's a good score on hole 6?
↓
This hole is a demanding hole where bogey is not unusual. This longer par 4 will test most golfers. Focus on position over distance.