Hole 10 at Edgewood Tahoe G.C.
- Par
- 4
- Yardage
- 441 yds
- Stroke index
- 6
- Hazards
- 3 bunkers · Water
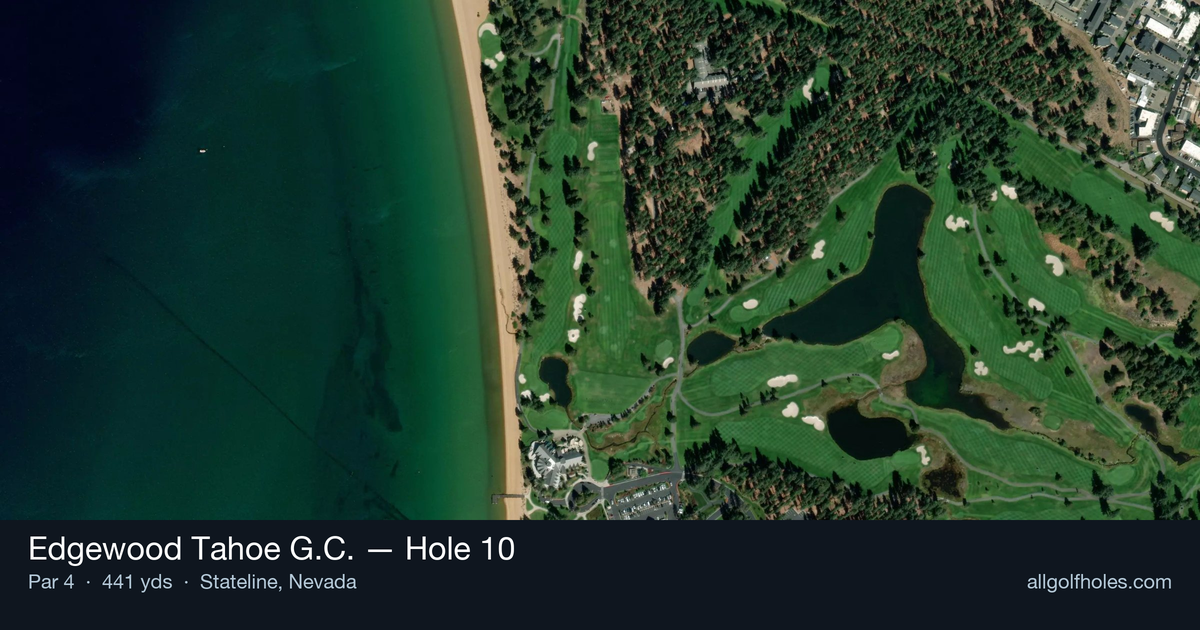
Aerial source not provided
Green size: 41 yds deep × 24 yds wide
Scorecard yardage is for Pro tees. The aerial shows its labeled reference position; distance rings measure to the green.
Pro tees · Par 4 · 441 yards
The plan for No. 10
The 10th hole at Edgewood Tahoe G.C. presents a deceptively challenging par 4 that demands both distance and precision across its 441 yards. This straight hole opens the back nine with a generous fairway off the tee, allowing players to unleash their driver while setting up the hole's defining feature. The approach shot requires navigating a pond that guards the front of the small green complex, creating a dramatic risk-reward scenario. Players must commit fully to their iron selection, as coming up short means finding water while going long leaves a difficult recovery. With Lake Tahoe's stunning backdrop and the pressure of clearing water, this hole exemplifies the championship-caliber golf that has hosted major USGA events at this prestigious Nevada resort course.
Off the tee
Your tee shot strategy should focus on finding the optimal position for attacking the green while avoiding trouble. With the straight layout, target the center-left portion of the fairway to provide the best angle for your approach shot. A driver may be tempting given the 441-yard length, but consider your comfort level with the approach distance that remains. Many players benefit from a controlled 3-wood or hybrid off the tee, leaving themselves with a confident mid-iron rather than a tentative long iron over water. The key is positioning yourself in the fairway with a distance that matches your most reliable approach club.
Approach & recovery
The approach shot defines this hole, as you must carry your ball over the pond to reach the small green. Club selection becomes paramount - always take enough club to comfortably clear the water, even if it means hitting to the back of the green. Study the pin position carefully: front pins demand extra precision and courage, while back pins allow for more aggressive play. Aim for the center of the green regardless of pin position until you're completely comfortable with the carry distance. The small green size means there's little room for error, so commit fully to your club selection and swing with confidence.
On the green
With a small green, putting becomes about precision rather than power. Focus on speed control, as the compact surface means even slight misjudgments can leave challenging comeback putts. Read the green carefully from multiple angles during your approach - the elevated view often reveals subtle breaks not visible from ground level. Given the water short of the green, most putts will break away from that hazard, so factor in the natural drainage when reading your line. ## RISK VS REWARD The primary risk/reward decision comes with approach club selection. Playing it safe with extra club might leave you with a longer putt but guarantees avoiding the water. More aggressive players might attack front pins with precise iron play, but the penalty for coming up short is severe. The reward for successful aggressive play is a closer birdie opportunity on the small green, but the risk of penalty strokes makes conservative play often the smarter choice, especially in competitive situations. ## DIFFERENT SKILL LEVELS **High-handicap players** should prioritize keeping the ball dry above all else. Consider laying up short of the pond if your approach distance exceeds your comfort zone, then play a simple wedge to the green. There's no shame in making a strategic bogey rather than risking a big number. **Low-handicap players** can be more aggressive with their target line and pin hunting, but should still respect the water hazard. Focus on committing to your club selection and trusting your swing. The small green rewards precision, so even skilled players benefit from aiming for the center of the green rather than chasing every pin position. The 10th hole at Edgewood Tahoe exemplifies strategic golf architecture, where the penalty for poor execution is significant, but smart course management and confident execution can yield excellent scoring opportunities.
Watch for
- Course conditioning and mapped hazards may affect line selection; confirm from the aerial.
Hole 10 Green Complex
Mapped green boundary
Green size: 5,476 sq ft
How did Hole 10 play?
How did this hole play today?
Frequently asked questions
Yardage reference: Pro tees · 441 yards.
What's the best strategy off the tee?
↓
For this 441-yard par 4, most players will hit driver to set up a comfortable approach.
How difficult is hole 10?
↓
This hole is a moderate challenge for most golfers. Key challenges include: water in play.
How big is the green on hole 10?
↓
The green is medium-sized with moderate targets. The green is wider than it is deep, rewarding shots that find the correct tier. Pay attention to pin placement when selecting your approach club.
What's a good score on hole 10?
↓
This hole is a demanding hole where bogey is not unusual. This longer par 4 will test most golfers. Focus on position over distance.