Hole 2 at Edgewood Tahoe G.C.
- Par
- 4
- Yardage
- 417 yds
- Stroke index
- 15
- Hazards
- Water
Aerial source not provided
Green size: 34 yds deep × 30 yds wide
Scorecard yardage is for Pro tees. The aerial shows its labeled reference position; distance rings measure to the green.
Pro tees · Par 4 · 417 yards
The plan for No. 2
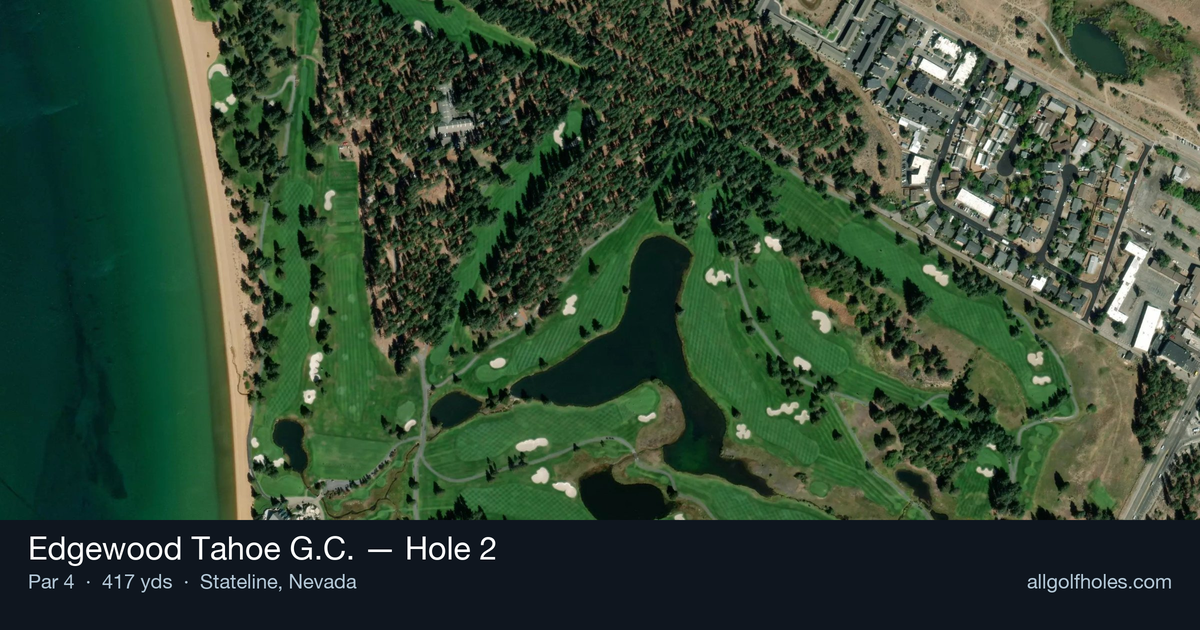
Edgewood Tahoe G.C. hole 2 presents one of the course's signature challenges with a babbling brook meandering down the entire left side from tee to green. This beautiful 417-yard par 4 demands precision over power, as the water hazard creates immediate consequences for wayward tee shots. The straight layout might appear forgiving, but strategic positioning becomes crucial with a long fairway bunker lurking to catch aggressive drives. The approach shot to the small green requires careful club selection, as the brook continues its journey alongside the putting surface. This early test at the renowned Lake Tahoe venue, which has hosted major championships including the 1980 U.S. Public Links Championship, sets the tone for the round with its blend of natural beauty and strategic golf design.
Off the tee
The key to success starts with smart club selection off the tee. Rather than automatically reaching for driver, consider the position of that long fairway bunker and plan your target line accordingly. A well-struck 3-wood or hybrid can position you perfectly in the fairway while avoiding trouble. Favor the right side of the fairway to stay clear of the brook, but don't overcook it as the bunker likely guards that area. The ideal tee shot lands in the sweet spot that provides a clear approach to the small green while maintaining distance from both hazards.
Approach & recovery
With the brook continuing along the left side through the green, approach shots demand precision over power. The small green size amplifies the importance of accurate club selection and committed swings. Approach from the right side of the fairway when possible, as this angle keeps you furthest from the water hazard. Take one extra club to ensure you clear any front-side trouble and reach the putting surface safely. Missing short or left can lead to penalty strokes, making aggressive pin-hunting a risky proposition.
On the green
The small green at this elevation and in mountain conditions can play faster than expected. Focus on lag putting to avoid three-putts, especially with the psychological pressure of the nearby water hazard. Pin positions near the left edge create additional stress, so don't be afraid to putt to the fat part of the green and take your two-putt par. Read putts carefully as mountain greens can have subtle breaks that aren't immediately obvious. ## RISK VS REWARD This hole offers limited reward opportunities but significant risk potential. The primary risk/reward decision comes on the tee shot - do you take enough club to carry the fairway bunker for a shorter approach, or play conservatively short of trouble? Given the small green and water hazard, the conservative approach typically yields better scoring. The hole's handicap rating of 15 suggests it's more about avoiding mistakes than creating birdies. ## DIFFERENT SKILL LEVELS **High-Handicap Players:** Play this hole defensively from start to finish. Consider hitting 3-wood or hybrid off the tee to ensure fairway position. On the approach, take plenty of club and aim for the center of the green, ignoring pin positions. Your goal is bogey or better while avoiding the big number that water can create. **Low-Handicap Players:** You can be more aggressive with driver if you're confident in your accuracy, but respect the strategic elements. Use the fairway bunker as a reference point for your ideal landing area. On approach shots, you can attack certain pin positions, but always err away from the water hazard. This hole rewards patience and precision over raw distance. The 2nd hole at Edgewood Tahoe exemplifies championship-caliber design, having hosted major USGA events. Success here comes from embracing the scenic beauty while respecting the strategic challenges that make this hole memorable for all the right reasons.
Watch for
- Course conditioning and mapped hazards may affect line selection; confirm from the aerial.
Hole 2 Green Complex
Mapped green boundary
Green size: 5,377 sq ft
How did Hole 2 play?
How did this hole play today?
Frequently asked questions
Yardage reference: Pro tees · 417 yards.
What's the best strategy off the tee?
↓
For this 417-yard par 4, most players will hit driver to set up a comfortable approach.
How difficult is hole 2?
↓
This hole is a moderate challenge for most golfers. Key challenges include: water in play.
What hazards should I watch out for on hole 2?
↓
Key hazards include: water at 120.3 yards. Plan your shots to avoid these trouble spots.
How big is the green on hole 2?
↓
The green is medium-sized with moderate targets. The green is wider than it is deep, rewarding shots that find the correct tier. Pay attention to pin placement when selecting your approach club.