Hole 4 at Edgewood Tahoe G.C.
- Par
- 5
- Yardage
- 572 yds
- Stroke index
- 9
- Hazards
- 3 bunkers · Water
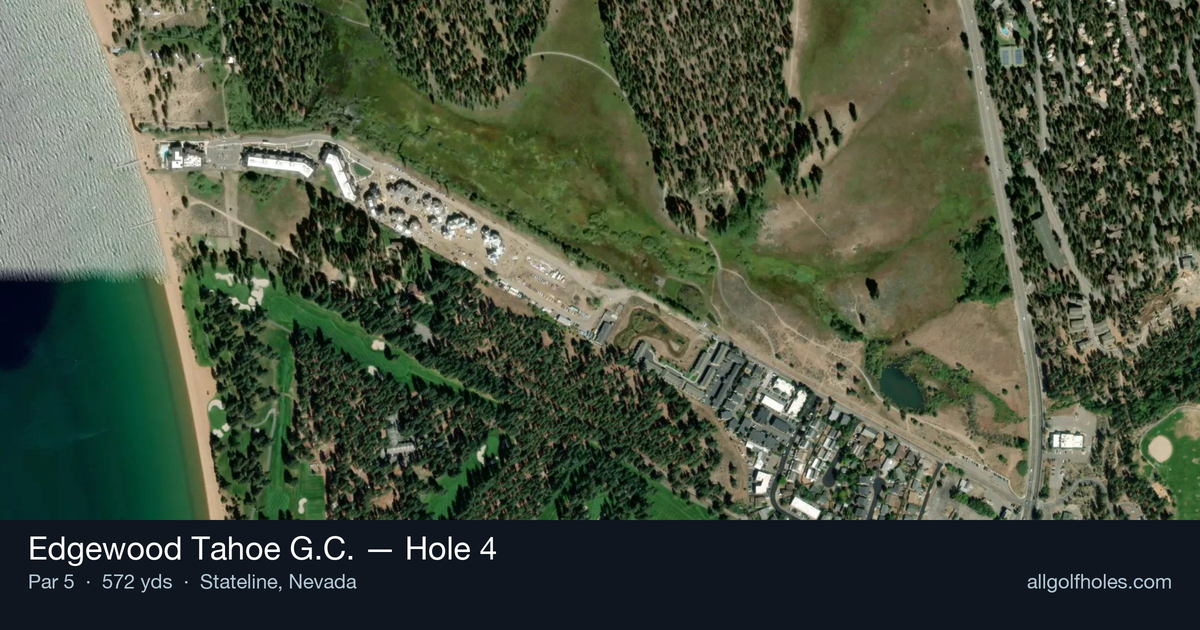
Aerial source not provided
Green size: 36 yds deep × 31 yds wide
Scorecard yardage is for Pro tees. The aerial shows its labeled reference position; distance rings measure to the green.
Pro tees · Par 5 · 572 yards
The plan for No. 4
The fourth hole at Edgewood Tahoe G.C. presents a strategic par 5 that rewards both power and precision across its 572 yards. This straight-away layout offers multiple route options, with the tee shot demanding careful navigation to set up scoring opportunities. The generous fairway invites aggressive drives, but smart positioning becomes crucial for the approach shots that follow. What makes this hole particularly compelling is how it balances risk and reward - longer hitters can consider going for the green in two, while others must plot their way methodically toward the small, well-protected putting surface. The absence of major hazards doesn't diminish the challenge; instead, it places premium emphasis on course management and execution. This hole epitomizes Edgewood's philosophy of strategic golf in one of America's most stunning mountain settings.
Off the tee
Driver is the clear choice here, as distance is your friend on this hazard-free par 5. Aim down the center of the fairway and let it rip - the straight layout means you don't need to worry about finding angles or avoiding trouble. Focus on making solid contact and maximizing carry distance. The generous fairway width allows for aggressive swings, making this an ideal hole to take advantage of favorable wind conditions. Position yourself as far down the fairway as possible to set up the most advantageous second shot.
Approach & recovery
Your approach strategy depends entirely on your tee shot distance and skill level. Longer hitters who can reach the green in two should carefully assess pin position and green firmness before committing to the aggressive play. The small green demands precision - a slightly off-target shot could leave a difficult up-and-down. For those laying up, position your second shot in the 80-100 yard range for an optimal wedge distance into the green. Choose a comfortable yardage that matches your most reliable scoring club, and avoid getting caught between distances.
On the green
The small green size makes distance control crucial on your final approach. Pin position will dictate strategy more than usual due to the limited real estate. When the pin is tucked, aim for the center of the green and take your birdie putt from there. The compact putting surface means most putts will be relatively straight, but pay attention to any subtle slopes that could affect speed control. Two-putt pars should be your worst-case scenario when you've positioned yourself properly. ## RISK VS REWARD This hole offers a classic risk/reward decision for players who can potentially reach in two. The absence of hazards reduces the penalty for missing, but the small green increases the precision required. Going for the green makes sense when you have a mid-iron or shorter in hand, but attempting it with a long iron or hybrid significantly reduces your chances of success. The conservative play of laying up to your favorite wedge distance often produces better scoring results than forcing a marginal second shot. ## DIFFERENT SKILL LEVELS **Low Handicappers:** Aggressive tee shots followed by calculated decisions on going for the green. When laying up, be precise with yardages to ensure optimal wedge distances. Target specific areas of the green based on pin position rather than just aiming at the center. **High Handicappers:** Focus on two solid shots to reach comfortable wedge range, then attack the pin with your most reliable short iron. Don't be tempted to go for the green in two unless you have a very short iron in hand. The small target makes three-shot strategy the percentage play for consistent scoring. This hole rewards smart course management combined with aggressive execution - take advantage of the scoring opportunity while respecting the precision required around the green.
Watch for
- Course conditioning and mapped hazards may affect line selection; confirm from the aerial.
Hole 4 Green Complex
Mapped green boundary
Green size: 5,368 sq ft
How did Hole 4 play?
How did this hole play today?
Frequently asked questions
Yardage reference: Pro tees · 572 yards.
Can this par 5 be reached in two?
↓
At 572 yards, A true three-shot hole for most players. Position your layup to leave a comfortable wedge distance.
How difficult is hole 4?
↓
This hole is a moderate challenge for most golfers. Key challenges include: long par 5, water in play.
How big is the green on hole 4?
↓
The green is medium-sized with moderate targets. The green is wider than it is deep, rewarding shots that find the correct tier. Pay attention to pin placement when selecting your approach club.
What's a good score on hole 4?
↓
This hole is a true three-shot hole where birdie requires execution. This longer par 5 demands patience. Two good shots set up the scoring opportunity.