Hole 3 at Edgewood Tahoe G.C.
- Par
- 5
- Yardage
- 599 yds
- Stroke index
- 1
- Hazards
- 6 bunkers · Water
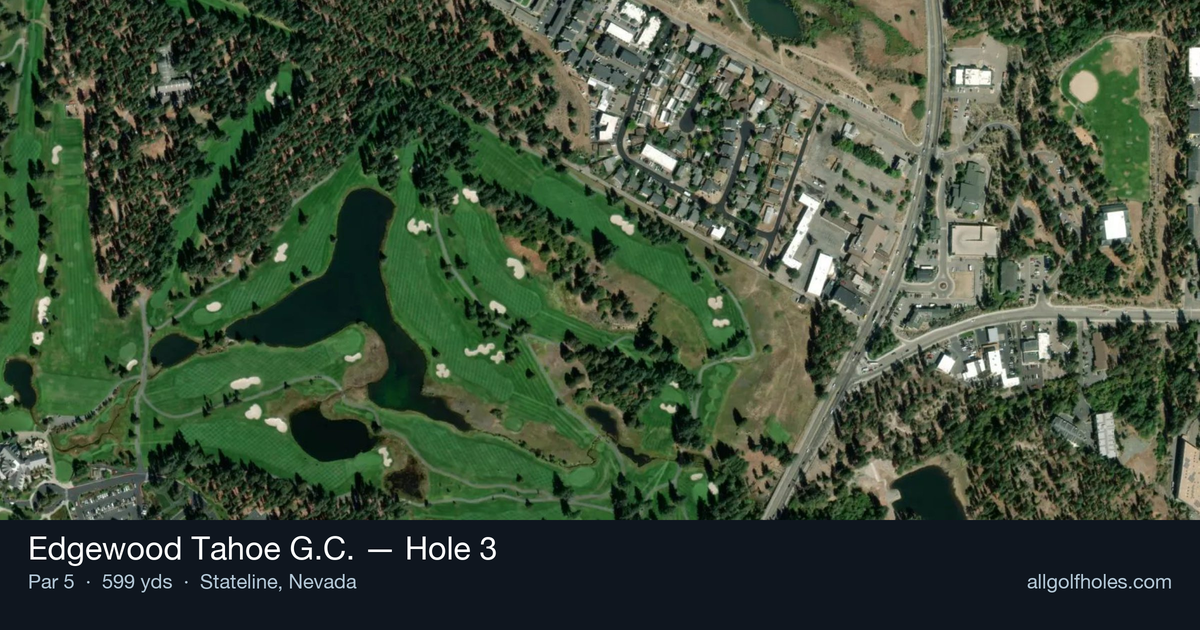
Aerial source not provided
Green size: 22 yds deep × 39 yds wide
Scorecard yardage is for Pro tees. The aerial shows its labeled reference position; distance rings measure to the green.
Pro tees · Par 5 · 599 yards
The plan for No. 3
The number one handicap hole at Edgewood Tahoe G.C., this 599-yard par 5 demands both power and precision from the championship tees. The straight layout may appear deceptively simple, but strategic positioning is crucial on this demanding three-shot hole. Players must navigate carefully around potential trouble areas while setting up favorable angles for their approach shots. The small green complex requires accurate iron play, making distance control paramount on the final approach. With Lake Tahoe's stunning Sierra Nevada backdrop providing a breathtaking canvas, this hole combines natural beauty with serious golf challenge. The demanding length and tight green target make this par 5 a true test of skill, earning its status as the course's most difficult hole and setting an early tone for the round ahead.
Off the tee
Your tee shot strategy should prioritize finding the fairway center, giving yourself the best angle for your second shot. With the hole's straight design, aim down the middle and select a club that ensures you stay in play - whether that's driver, 3-wood, or even a long iron depending on your comfort level. The key is avoiding any trouble that could derail your scoring opportunity early. Focus on a smooth, controlled swing that finds the short grass and sets up your layup strategy.
Approach & recovery
Given the hole's length and small green, most golfers will be playing this as a legitimate three-shot hole. Your second shot becomes crucial for course management - position yourself in the ideal distance range for your favorite approach club, typically leaving yourself with a comfortable wedge or short iron. Avoid the temptation to get overly aggressive trying to reach in two, as the small green makes this a low-percentage play for most golfers. Instead, find the fairway again and leave yourself a full swing into the green.
On the green
The small green demands precision on your approach shot and careful attention to speed control when putting. With limited real estate, there's little room for error, so focus on hitting the center of the green rather than chasing pins. Once on the putting surface, take extra time to read the slopes - small greens often have subtle breaks that can be deceiving. Lag putting becomes essential, as leaving yourself long comeback putts on a small green can quickly turn a birdie opportunity into a bogey. ## RISK VS REWARD This hole offers a classic risk/reward decision on the second shot. While the small green makes going for it in two shots a challenging proposition for most players, longer hitters may be tempted when conditions are favorable. However, the smart play is typically laying up to your preferred distance, ensuring you have a comfortable approach shot with a club you can control. The reward of potentially making eagle must be weighed against the risk of missing the small target and facing a difficult up-and-down. ## DIFFERENT SKILL LEVELS **High-handicap players** should embrace the three-shot strategy without hesitation. Focus on keeping the ball in play with conservative club selections off the tee and on the layup shot. Aim for the center of the green with your approach, accepting par as an excellent score on the #1 handicap hole. **Low-handicap players** have more options but should still respect the small green. Consider going for it in two only when you're hitting the ball particularly well and have a mid-iron or shorter approach. Even skilled players often benefit from the three-shot approach, as it provides multiple birdie opportunities while minimizing the risk of big numbers. The key to conquering this demanding par 5 is patience and precision - qualities that will serve you well throughout your round at Edgewood Tahoe.
Watch for
- Course conditioning and mapped hazards may affect line selection; confirm from the aerial.
Hole 3 Green Complex
Mapped green boundary
Green size: 4,622 sq ft
How did Hole 3 play?
How did this hole play today?
Frequently asked questions
Yardage reference: Pro tees · 599 yards.
Can this par 5 be reached in two?
↓
At 599 yards, A true three-shot hole for most players. Position your layup to leave a comfortable wedge distance.
How difficult is hole 3?
↓
This hole is one of the tougher holes on the course for most golfers. Key challenges include: long par 5, water in play, heavily bunkered.
How big is the green on hole 3?
↓
The green is medium-sized with moderate targets. Pay attention to pin placement when selecting your approach club.
Which side of the fairway is safer on hole 3?
↓
Aim for the left side of the fairway when possible. Missing right (water) brings more trouble into play.
What's a good score on hole 3?
↓
This hole is a true three-shot hole where birdie requires execution. This longer par 5 demands patience. Two good shots set up the scoring opportunity.