Hole 2 at Hazeltine National Golf Club
- Par
- 4
- Yardage
- 431 yds
- Stroke index
- 0
- Hazards
- 5 bunkers · Water
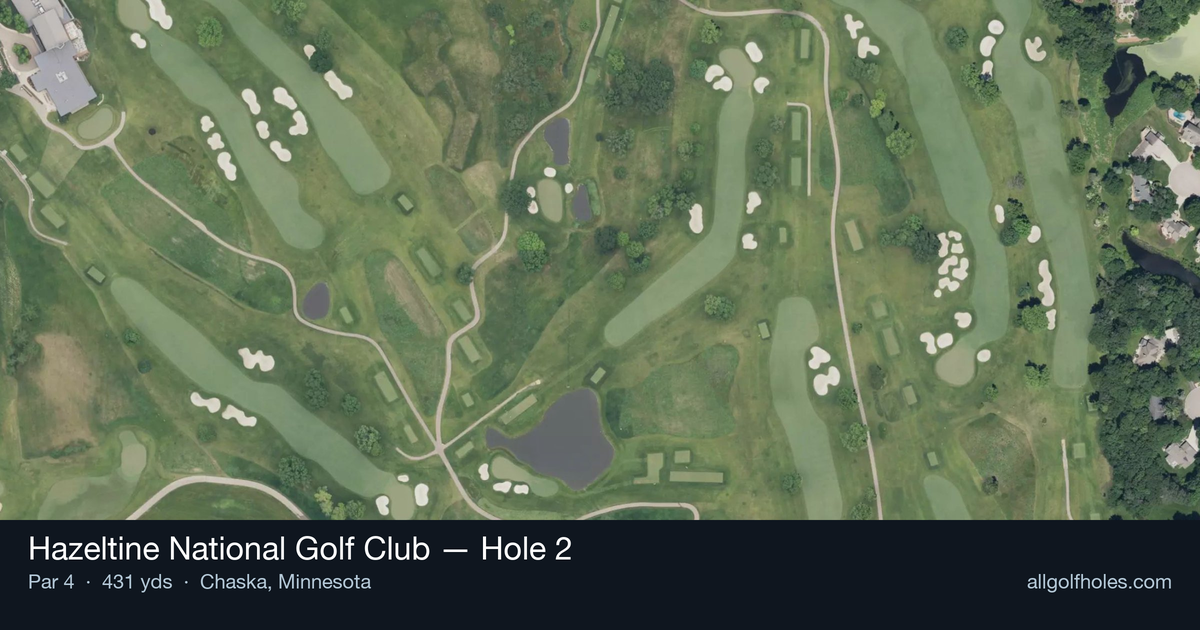
Aerial source not provided
Green size: 25 yds deep × 33 yds wide
Scorecard yardage is for Championship tees. The aerial shows its labeled reference position; distance rings measure to the green.
Championship tees · Par 4 · 431 yards
The plan for No. 2
Hole 2 at Hazeltine National Golf Club presents an early test of precision and course management on this championship layout. This strategic par 4 demands thoughtful club selection and accurate placement to navigate its challenges effectively. The hole exemplifies Hazeltine's reputation for rewarding smart, strategic play over pure distance.
Off the tee
Your tee shot strategy revolves around positioning for the best possible approach angle while maximizing distance. With 431 yards to navigate, most golfers will need their driver to have any realistic chance of reaching the green in regulation. Focus on the center of the fairway as your target line, as the straight layout rewards accuracy over aggressive angles. The key is committing to a smooth, controlled swing that prioritizes finding the short grass. Even a perfectly struck drive will likely leave you with a substantial approach shot, so resist the temptation to overswing in pursuit of extra distance. A drive that travels about 250-270 yards and finds the fairway puts you in an ideal position to attack the pin.
Approach & recovery
The approach shot represents the hole's primary scoring opportunity and greatest challenge. With a small green as your target, precision becomes paramount over power. Depending on your tee shot distance, you'll likely face anything from a mid-iron to a hybrid for your second shot. Study the pin position carefully before selecting your club, as the small green offers little margin for error. Aim for the center of the green when the pin is tucked, and only attack aggressive pin positions when you're confident in your distance control. The compact putting surface means that even well-struck shots can run through the green if you've misjudged the yardage.
On the green
The small green demands respect with your putter, as three-putts can quickly turn a good hole into a disappointing one. Focus on lag putting to ensure you're never facing a comeback putt longer than four feet. The green's size means that most putts will have relatively subtle breaks, but don't underestimate the importance of reading the grain and slope carefully. Position yourself below the hole whenever possible, as uphill putts on this green tend to be more forgiving than their downhill counterparts. Take your time with green reading, as the compact surface can create deceptive slopes that aren't immediately apparent.
Watch for
- Water along the hole
- Fairway bunker crossing the landing zone
- Greenside bunker (greenside)
Hole 2 Green Complex
Mapped green boundary
Green size: 5,291 sq ft
How did Hole 2 play?
How did this hole play today?
Frequently asked questions
Yardage reference: Championship tees · 431 yards.
What's the best strategy off the tee?
↓
For this 431-yard par 4, most players will hit driver to set up a comfortable approach.
How difficult is hole 2?
↓
This hole is one of the tougher holes on the course for most golfers. Key challenges include: water in play, heavily bunkered.
How big is the green on hole 2?
↓
The green is medium-sized with moderate targets. Pay attention to pin placement when selecting your approach club.
Which side of the fairway is safer on hole 2?
↓
Aim for the left side of the fairway when possible. Missing right (water) brings more trouble into play.
What's a good score on hole 2?
↓
This hole is a demanding hole where bogey is not unusual. This longer par 4 will test most golfers. Focus on position over distance.